TRENDnet TV-IP672WI User's Guide - Page 8
admin, Camera Name, Change Password, PPPoE, Fixed IP - default ip
 |
View all TRENDnet TV-IP672WI manuals
Add to My Manuals
Save this manual to your list of manuals |
Page 8 highlights
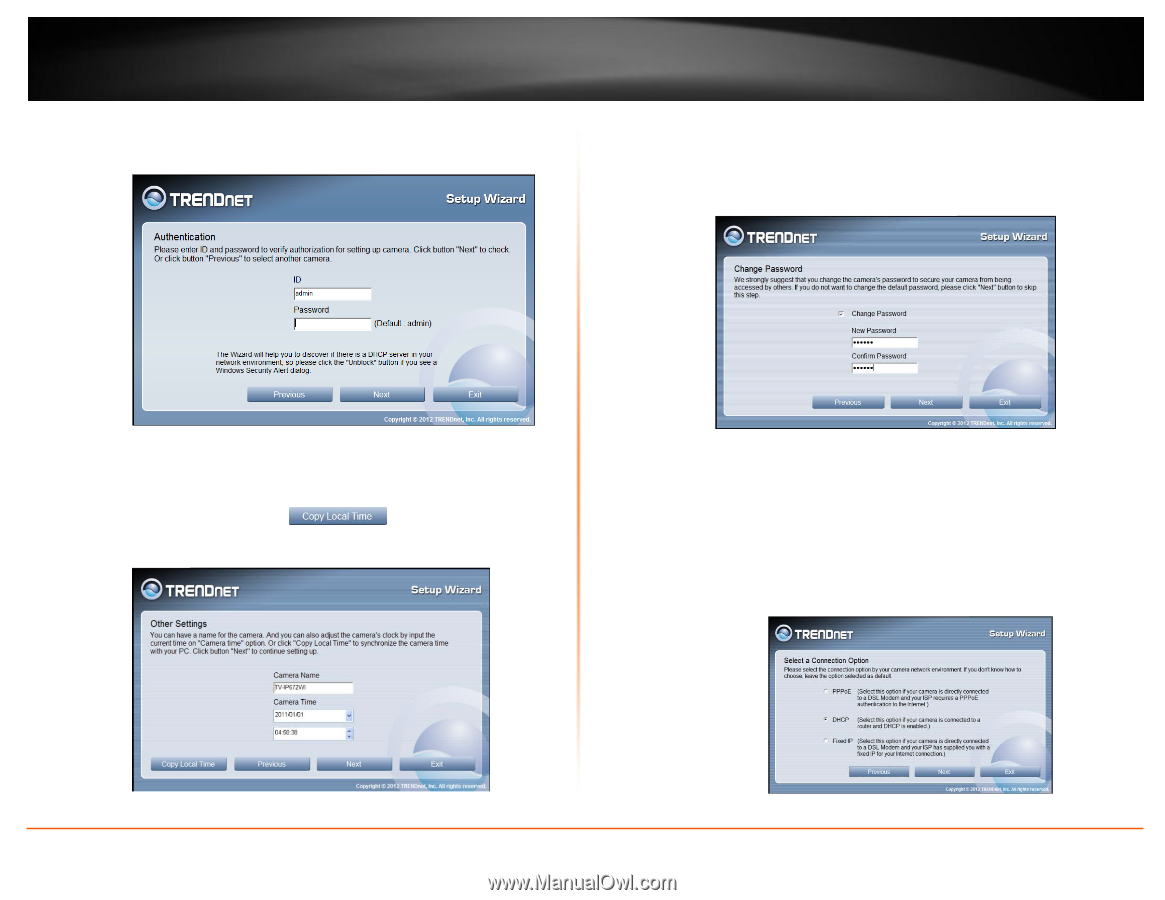
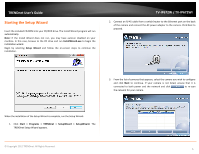
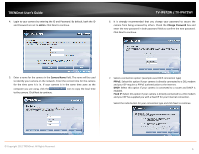
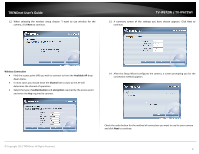
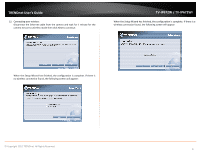
TRENDnet User's Guide 4. Login to your camera by entering the ID and Password. By default, both the ID and Password are set to admin. Click Next to continue. TV-IP672W / TV-IP672WI 6. It is strongly recommended that you change your password to secure the camera from being accessed by others. Check the Change Password box and enter the new password in both password fields to confirm the new password. Click Next to continue. 5. Enter a name for the camera in the Camera Name field. The name will be used to identify your camera on the network. Enter the correct time for the camera for the time zone it is in. If your camera is in the same time zone as the computer you are using, click the to the camera. Click Next to continue. icon to copy the local time 7. Select a connection option: (example uses DHCP connection type) PPPoE: Select this option if your camera is directly connected to a DSL modem and your ISP requires a PPPoE authentication to the Internet. DHCP: Select this option if your camera is connected to a router and DHCP is enabled. Fixed IP: Select this option if your camera is directly connected to a DSL modem and your ISP has supplied you with a fixed IP for your Internet connection. Select the radio button for your connection type and click Next to continue. © Copyright 2012 TRENDnet. All Rights Reserved. 6
-
 1
1 -
2
-
 3
3 -
 4
4 -
 5
5 -
 6
6 -
 7
7 -
 8
8 -
 9
9 -
 10
10 -
 11
11 -
 12
12 -
 13
13 -
14
-
15
-
16
-
17
-
18
-
19
-
20
-
21
-
22
-
23
-
24
-
25
-
26
-
27
-
28
-
29
-
30
-
31
-
32
-
33
-
34
-
35
-
36
-
37
-
38
-
39
-
40
-
41
-
42
-
43
 |
 |