TRENDnet TV-IP672WI User's Guide - Page 6
© Copyright 2012 TRENDnet. All Rights Reserved.
 |
View all TRENDnet TV-IP672WI manuals
Add to My Manuals
Save this manual to your list of manuals |
Page 6 highlights
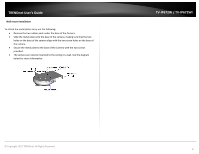
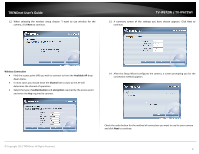
TRENDnet User's Guide Wall mount installation To attach the metal plates carry out the following: Remove the two rubber pads under the base of the Camera. Slide the metal plate onto the base of the camera, making sure that the two holes on the base of the camera align with the two screw holes on the base of the camera. Secure the metal plate to the base of the Camera with the two screws provided. The camera can now be mounted to the ceiling or a wall. See the diagram below for more information. TV-IP672W / TV-IP672WI © Copyright 2012 TRENDnet. All Rights Reserved. 4
-
 1
1 -
 2
2 -
 3
3 -
 4
4 -
 5
5 -
 6
6 -
 7
7 -
 8
8 -
 9
9 -
 10
10 -
 11
11 -
 12
12 -
13
-
14
-
15
-
16
-
17
-
18
-
19
-
20
-
21
-
22
-
23
-
24
-
25
-
26
-
27
-
28
-
29
-
30
-
31
-
32
-
33
-
34
-
35
-
36
-
37
-
38
-
39
-
40
-
41
-
42
-
43
 |
 |

© Copyright 2012 TRENDnet. All Rights Reserved.
TRENDnet User’s Guide
TV-IP672W / TV-IP672WI
4
Wall mount installation
To attach the metal plates carry out the following:
Remove the two rubber pads under the base of the Camera.
Slide the metal plate onto the base of the camera, making sure that the two
holes on the base of the camera align with the two screw holes on the base of
the camera.
Secure the metal plate to the base of the Camera with the two screws
provided.
The camera can now be mounted to the ceiling or a wall. See the diagram
below for more information.