TRENDnet TV-IP672WI User's Guide - Page 15
DDNS settings, DDNS Server, Server Address, Host Name, User Name, Password, Timeout, Enable, Camera
 |
View all TRENDnet TV-IP672WI manuals
Add to My Manuals
Save this manual to your list of manuals |
Page 15 highlights
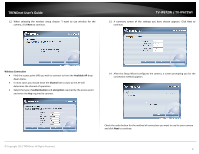
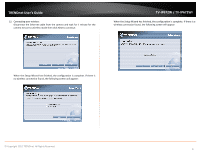
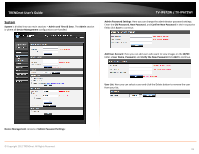
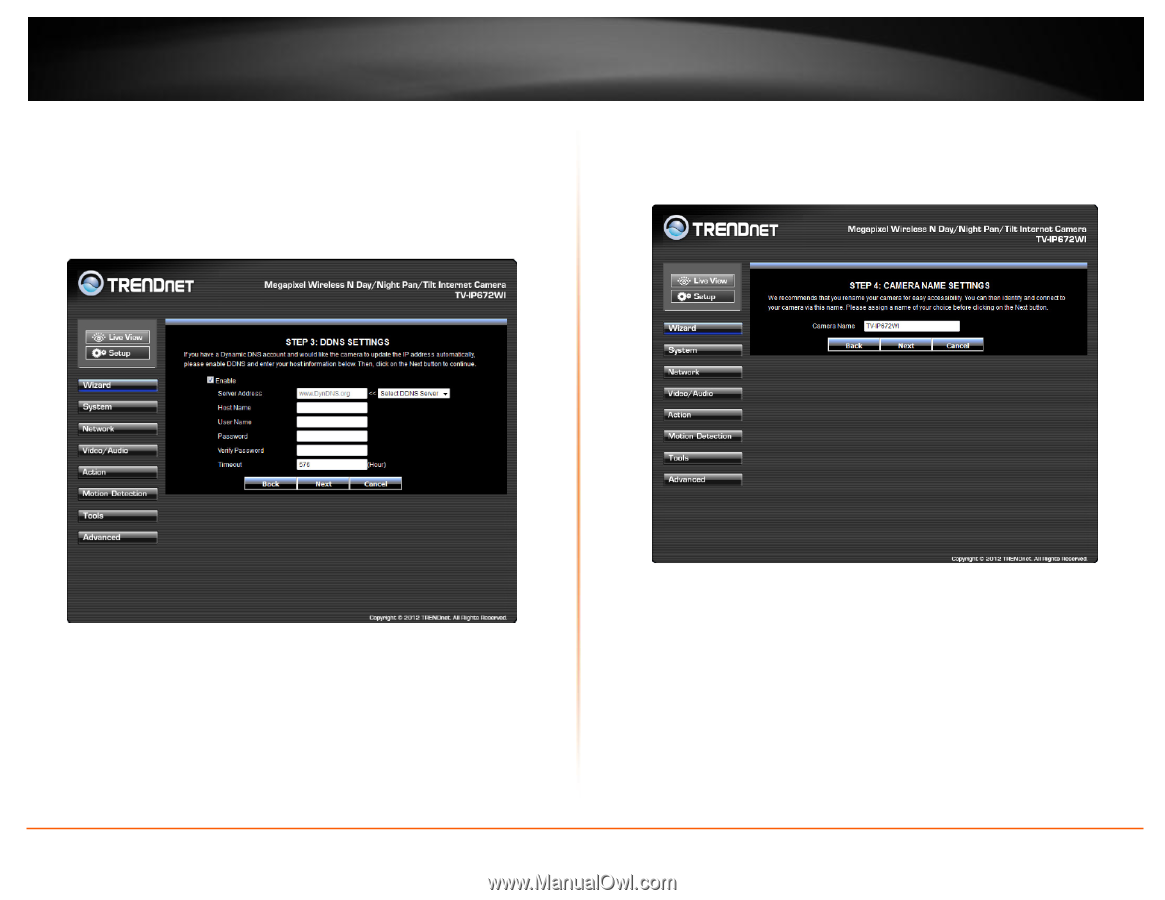
TRENDnet User's Guide Step 3: DDNS Settings This screen provides DDNS settings. Click the Enable checkbox to setup DDNS. Once you have clicked Enable, select your DDNS Server and enter your Server Address. Enter a Host Name, User Name, and Password. Verify the password by entering your details again and then enter the Timeout settings in hours. Click Next to continue. If you do not want to use the DDNS settings uncheck the Enable checkbox and click Next. TV-IP672W / TV-IP672WI Step 4: Camera Name Settings This screen provides Camera Name settings. In the Camera Name field type the name you wish to assign to the camera and click Next to continue. © Copyright 2012 TRENDnet. All Rights Reserved. 13
-
 1
1 -
2
-
3
-
4
-
5
-
6
-
7
-
8
-
9
-
 10
10 -
 11
11 -
 12
12 -
 13
13 -
 14
14 -
 15
15 -
 16
16 -
 17
17 -
 18
18 -
 19
19 -
 20
20 -
21
-
22
-
23
-
24
-
25
-
26
-
27
-
28
-
29
-
30
-
31
-
32
-
33
-
34
-
35
-
36
-
37
-
38
-
39
-
40
-
41
-
42
-
43
 |
 |
© Copyright 2012 TRENDnet. All Rights Reserved.
TRENDnet User’s Guide
TV-IP672W / TV-IP672WI
13
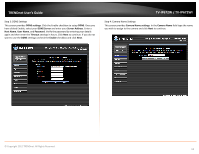
Step 3: DDNS Settings
This screen provides
DDNS settings
. Click the Enable checkbox to setup
DDNS
. Once you
have clicked Enable, select your
DDNS Server
and enter your
Server Address
. Enter a
Host Name
,
User Name
, and
Password
. Verify the password by entering your details
again and then enter the
Timeout
settings in hours. Click
Next
to continue. If you do not
want to use the
DDNS
settings uncheck the
Enable
checkbox and click
Next
.
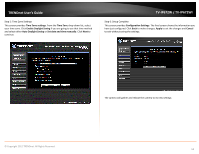
Step 4: Camera Name Settings
This screen provides
Camera Name settings
. In the
Camera Name
field type the name
you wish to assign to the camera and click
Next
to continue.