TRENDnet TV-IP672WI User's Guide - Page 32
How to setup/access the camera remotely - default password
 |
View all TRENDnet TV-IP672WI manuals
Add to My Manuals
Save this manual to your list of manuals |
Page 32 highlights
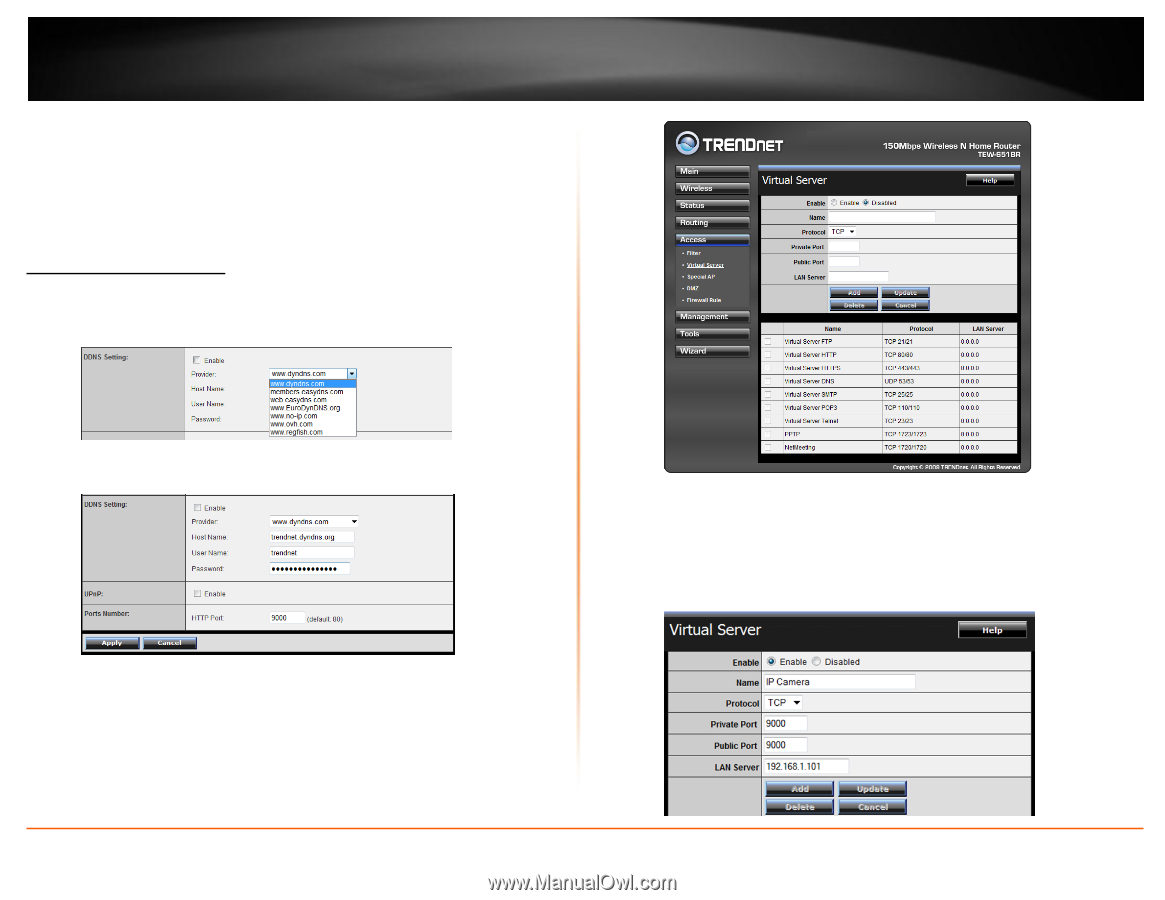
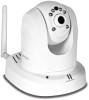
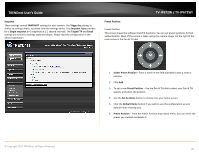
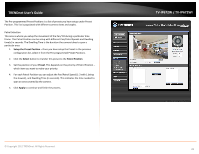
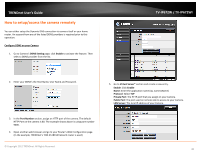
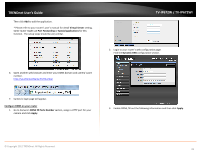
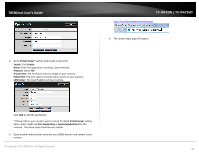
TRENDnet User's Guide How to setup/access the camera remotely You can either setup the Dynamic DNS connection via camera itself or your home router. An account from any of the listed DDNS providers is required prior to this operation. Configure DDNS on your Camera 1. Go to Camera's DDNS Setting page; click Enable to activate the feature. Then select a DDNS provider from the list. TV-IP672W / TV-IP672WI 2. Enter your DDNS's the Host Name, User Name and Password. 3. In the Port Number section, assign an HTTP port of the camera. The default HTTP Port on the camera is 80. The example shows above is using port number 9000. 4. Open another web browser and go to your Router's Web Configuration page. (In the example, TRENDnet's TEW-651BR Wireless N router is used) © Copyright 2012 TRENDnet. All Rights Reserved. 5. Go to Virtual Server* section and create a new entry. Enable: Click Enable Name: Enter the application name (eg. CameraName) Protocol: Select TCP Private Port: The HTTP port that you assign on your Camera. Public Port: The port used on remote side to access to your Camera. LAN Server: The local IP address of your Camera. 30
-
 1
1 -
2
-
3
-
4
-
5
-
6
-
7
-
8
-
9
-
10
-
11
-
12
-
13
-
14
-
15
-
16
-
17
-
18
-
19
-
20
-
21
-
22
-
23
-
24
-
25
-
26
-
 27
27 -
 28
28 -
 29
29 -
 30
30 -
 31
31 -
 32
32 -
 33
33 -
 34
34 -
 35
35 -
 36
36 -
 37
37 -
38
-
39
-
40
-
41
-
42
-
43
 |
 |