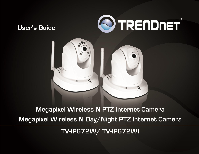
TRENDnet TV-IP672WI User's Guide - Page 4
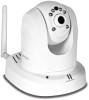
TV-IP672W / TV-IP672WI - focus
 |
View all TRENDnet TV-IP672WI manuals
Add to My Manuals
Save this manual to your list of manuals |
Page 4 highlights
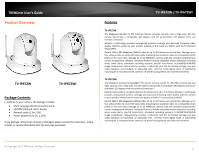
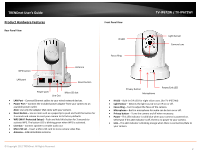
TRENDnet User's Guide Product Hardware Features Rear Panel View Front Panel View IR LED TV-IP672W / TV-IP672WI Light Sensor Camera Lens Focus Ring WPS button LAN port Antenna Reset button Power port Micro SD slot Line Out LAN Port - Connect Ethernet cables to your wired network devices. Power Port - Connect the included power adapter from your camera to an available power outlet. Note: Use only the adapter that came with your camera. Reset Button - Use an item such as a paperclip to push and hold this button for 3 seconds and release to reset your camera to its factory defaults. WPS (Wi-Fi Protected Setup) - Push and hold this button for 3 seconds to activate WPS. The button LED is blinking green when WPS is activated. Line Out - Connect speaker to enable audio out Micro SD Lot - Insert a Micro-SD card to store camera video files. Antenna - 2dBi detachable antenna Privacy button Microphone Power/Link LED IR LED - Built-in 6 IR LED for night vision uses. (for TV-IP672WI) Light Sensor - Detects the light source to turn IR on or off. Focus Ring - Turn to adjust the focus of the camera. Microphone - Built-in microphone for audio can be turn on or off. Privacy button - Turns the camera on/off when necessary. Power - This LED indicator is solid blue when your camera is powered on. Otherwise if this LED indicator is off, there is no power to your camera. Link - This LED indicator is blinking orange when there is connection/data to your camera. © Copyright 2012 TRENDnet. All Rights Reserved. 2
-
 1
1 -
 2
2 -
 3
3 -
 4
4 -
 5
5 -
 6
6 -
 7
7 -
 8
8 -
 9
9 -
 10
10 -
11
-
12
-
13
-
14
-
15
-
16
-
17
-
18
-
19
-
20
-
21
-
22
-
23
-
24
-
25
-
26
-
27
-
28
-
29
-
30
-
31
-
32
-
33
-
34
-
35
-
36
-
37
-
38
-
39
-
40
-
41
-
42
-
43
 |
 |
