Toshiba Satellite P35 Satellite P30/P35 User's Guide (PDF) - Page 65
Setting up your printer, Connecting a local printer - drivers
 |
View all Toshiba Satellite P35 manuals
Add to My Manuals
Save this manual to your list of manuals |
Page 65 highlights
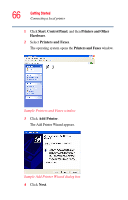
Getting Started Connecting a local printer 65 NOTE You must supply the proper printer cable. If one did not come with your printer, you may purchase one from an electronics or computer store. These instructions assume you have a USB printer, consult the document that came with your printer to verify the connection type. To connect the printer: 1 If the computer is on, turn it off. 2 Connect the printer cable to the printer and then connect the other end to one of the computer's USB ports. 3 Plug the printer's power cable into a live electrical outlet. 4 See your printer documentation for additional configuration steps or see "Setting up a printer," below. For more information on getting your printer to print, see "Printing your work" on page 85. Setting up your printer Setting up a printer involves selecting a printer driver. This special program acts as a translator that turns your document into a form the printer can understand. If you are using any non-Windows® programs, set up a printer driver for each of those programs. Refer to your program's documentation for more information. TECHNICAL NOTE: If you have the manufacturer's disc that came with your printer, you can use it to install the printer on your computer. The manufacturer's disc may include additional drivers and fonts. To set up a printer with the Add Printer Wizard:
-
 1
1 -
2
-
3
-
4
-
5
-
6
-
7
-
8
-
9
-
10
-
11
-
12
-
13
-
14
-
15
-
16
-
17
-
18
-
19
-
20
-
21
-
22
-
23
-
24
-
25
-
26
-
27
-
28
-
29
-
30
-
31
-
32
-
33
-
34
-
35
-
36
-
37
-
38
-
39
-
40
-
41
-
42
-
43
-
44
-
45
-
46
-
47
-
48
-
49
-
50
-
51
-
52
-
53
-
54
-
55
-
56
-
57
-
58
-
59
-
 60
60 -
 61
61 -
 62
62 -
 63
63 -
 64
64 -
 65
65 -
 66
66 -
 67
67 -
 68
68 -
 69
69 -
 70
70 -
71
-
72
-
73
-
74
-
75
-
76
-
77
-
78
-
79
-
80
-
81
-
82
-
83
-
84
-
85
-
86
-
87
-
88
-
89
-
90
-
91
-
92
-
93
-
94
-
95
-
96
-
97
-
98
-
99
-
100
-
101
-
102
-
103
-
104
-
105
-
106
-
107
-
108
-
109
-
110
-
111
-
112
-
113
-
114
-
115
-
116
-
117
-
118
-
119
-
120
-
121
-
122
-
123
-
124
-
125
-
126
-
127
-
128
-
129
-
130
-
131
-
132
-
133
-
134
-
135
-
136
-
137
-
138
-
139
-
140
-
141
-
142
-
143
-
144
-
145
-
146
-
147
-
148
-
149
-
150
-
151
-
152
-
153
-
154
-
155
-
156
-
157
-
158
-
159
-
160
-
161
-
162
-
163
-
164
-
165
-
166
-
167
-
168
-
169
-
170
-
171
-
172
-
173
-
174
-
175
-
176
-
177
-
178
-
179
-
180
-
181
-
182
-
183
-
184
-
185
-
186
-
187
-
188
-
189
-
190
-
191
-
192
-
193
-
194
-
195
-
196
-
197
-
198
-
199
-
200
-
201
-
202
-
203
-
204
-
205
-
206
-
207
-
208
-
209
-
210
-
211
-
212
-
213
-
214
-
215
-
216
-
217
-
218
-
219
-
220
-
221
-
222
-
223
-
224
-
225
-
226
-
227
-
228
-
229
-
230
 |
 |