Yamaha CLP-611 Owner's Manual - Page 26
Playback
 |
View all Yamaha CLP-611 manuals
Add to My Manuals
Save this manual to your list of manuals |
Page 26 highlights
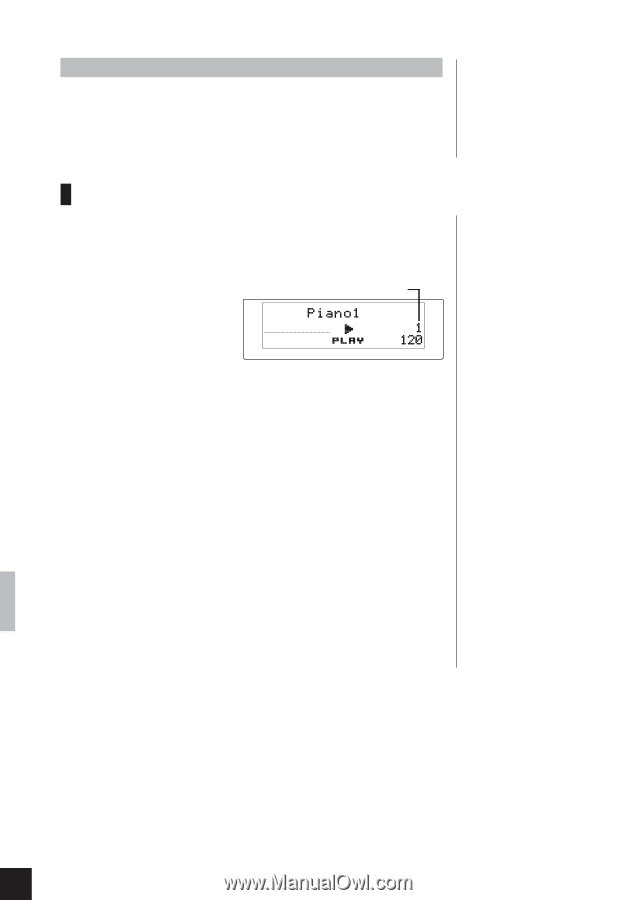
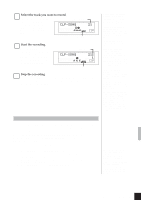
Erasing a track To erase a track, proceed as follows: (a) Press [REC] to enter RECORDING mode. (b) Select the track you want to erase (so that the indicator is red). (c) Press [START/STOP] twice. Playback To select a track for playback, press the corresponding track button so that the indicator comes on green. You can then start the playback by pressing [START/STOP]. Note that you are free to select either or both tracks. (If a track is empty, its indicator will not come on.) Playback always begins from the start of the recorded data, and Measure count stops automatically at the end of the recorded data. The LCD displays the measure count as playback progresses. You can stop ROOM NORMAL MEDIUM BRILLIANCE REVERB EFFECT TOUCH MEASURE TEMPO playback at any time by pressing the [START/STOP] button. If both tracks contain data, then once you have started playback you can toggle sound for either track ON or OFF by pressing the corresponding track button. You cannot start playback while the Clavinova is in DEMO/ PIANO SONG mode or FUNCTION mode. (But note that FUNCTION mode is automatically released when you press either of the track buttons.) It is possible to play along on the keyboard during playback. To adjust the playback volume and tempo... Use the [MASTER VOLUME] slider and the [TEMPO] buttons. To restore the initial TEMPO setting, press both TEMPO buttons at the same time. The Clavinova retains the recording even after power goes off, and will hold it for about a week without power. If you wish to maintain the data for a long period of time, be sure to switch the power on at least a few minutes each week. You can use the MIDI Bulk Dump function to save your recording to an external storage device (such as a Yamaha DOU10 Disk Orchestra Unit). See page 34 for details. If you use the metronome during playback... It will automatically switch off when playback is finished. A track will not produce any sound if its indicator is off. This is in contrast to built-in piano songs, where even a deselected track may play back at low volume as a practice aid (see page 11). Playback data is not transmitted through the MIDI OUT connector. 22 CLP-811/611 Using the Recorder
-
 1
1 -
2
-
3
-
4
-
5
-
6
-
7
-
8
-
9
-
10
-
11
-
12
-
13
-
14
-
15
-
16
-
17
-
18
-
19
-
20
-
 21
21 -
 22
22 -
 23
23 -
 24
24 -
 25
25 -
 26
26 -
 27
27 -
 28
28 -
 29
29 -
 30
30 -
 31
31 -
32
-
33
-
34
-
35
-
36
-
37
-
38
-
39
-
40
-
41
-
42
-
43
-
44
-
45
-
46
-
47
-
48
-
49
-
50
-
51
-
52
-
53
-
54
-
55
-
56
-
57
-
58
-
59
-
60
-
61
-
62
-
63
-
64
-
65
-
66
-
67
-
68
-
69
-
70
-
71
-
72
 |
 |