Yamaha CLP-611 Owner's Manual - Page 39
Local Local contr - clavinova model
 |
View all Yamaha CLP-611 manuals
Add to My Manuals
Save this manual to your list of manuals |
Page 39 highlights
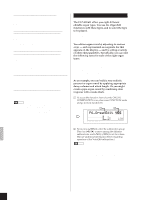
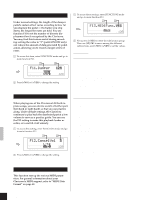
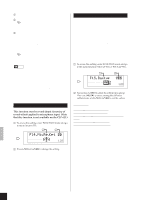
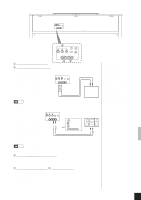
13.3 Local (Local control ON/OFF) Values: ON, OFF Default: ON Selects whether the Clavinova keyboard produces sound from the Clavinova. More precisely, determines whether the Clavinova's keyboard drives the Clavinova's internal tonegenerator system. Under normal circumstances this setting is left ON, so that the Clavinova keyboard produces sound from the Clavinova's tone generator. If you want to use the keyboard to control an external MIDI device only, however, you would set this value to OFF. This setting makes it possible, for example, to use the keyboard to play an external device, while at the same time using another external device to play the Clavinova. 13.4 PrgChg (Program Change enable/disable) Values: ON, OFF Default: ON A MIDI Program Change message instructs the receiving device to switch voices. If you are using the Clavinova to control an external device, for example, then each time you change the voice selection (by pressing a different voice selector), the Clavinova will issue a Program Change message telling the external device to switch to the same-numbered voice. (Each voice is associated with a unique program-change number.) Similarly, if the Clavinova is playing MIDI data received from an external device, then receipt of a Program Change message will cause the Clavinova to change the voice used to reproduce this data. (Note that this change applies only to the MIDI data; the voice produced by the Clavinova keyboard does not change.) There are times when you may want to disable the use of Program Change messages, so that voice switching at both sides must be handled locally. You can do this by setting the PrgChg value to OFF. In this case, the Clavinova will not generate messages when voice selectors are pressed, and will not respond to any Program Change messages that it receives. • Program-change numbers on the CLP-811/611 Program-change number assignments on the CLP-811/611 are in conformance with the XG standard. Refer to "MIDI Data Format" (page 48) for specific information. 13.5 CtrlChg (Control Change enable/disable) Values: ON, OFF Default: ON Control Change messages transfer performance-related control information from one MIDI device to another. Such information includes pedal actions and volume settings. If you are using the Clavinova to control an external device, for example, then each time you step on the damper pedal a corresponding Control Change message is issued to that device. If you are using an external device to control the Clavinova, then Control Change messages received from that device will cause appropriate changes at the Clavinova side. These changes apply only to incoming MIDI data; panel settings and keyboard sound do not change. (But note that reverb-depth control change is an exception, since it affects both MIDI and local sound.) There are times when you may want to disable the use of Control Change messages. You can do this by setting the CtrlChg value to OFF, so that the Clavinova will not generate these messages, and will not respond to any such messages that it receives. • Control Change implementation on the CLP-811/ 611... Refer to "MIDI Data Format" (page 48) for details. 13.6 MIDITrans (Transposition of outgoing MIDI data) Values: -12,...,12 (in semitones) Default: 0 (no transposition) Use this function to set transposition of note data being sent out from the Clavinova. Note that this operation has no relation to the keyboard transpotion set up by the [TRANSPOSE] button. 13.7 SetupSnd (Transmit Panel setup file.) This operation transmits the Clavinova's current panel configuration to an external MIDI sequencer such as the YAMAHA DOU-10 Disk Ochestra Unit, so that it can be restored to the Clavinova at a later time. For example, assume that you want to record a performance to a sequencer so that you can later play it back at the Clavinova while at the same time playing along locally at the keyboard. In this case you might find it convenient to first record the panel configuration you will want to use for local play. The panel will then set itself automatically just before playback begins. Procedure 1 Set the panel to the configuration that you want to record. 2 Run a MIDI cable from the MIDI OUT connector on the Clavinova to the MIDI IN connector on the sequencer. 3 Enter FUNCTION mode and move to subfunction 13.7 SetupSnd. 4 Press [+/YES] to transmit the setup. The screen displays Completed briefly to indicate that transfer is completed. • Transmitted data... In addition to the Panel data indicated on page 50 of the "MIDI Data Format" section, the Clavinova also transmits the key-by-key fine tuning data set up within the F2.KTune function. • To reload the data from the external device... 1. Run a MIDI cable from the MIDI OUT on the sequencer to the MIDI IN at the Clavinova. 2. Begin transmission from the sequencer. (Refer to the sequencer's operation manual.) The Clavinova automatically receives and loads the data. NOTE It is not possible to reload the setup data into a different Clavinova model. If you stored setup data for a CLP-811, for example, then you can reload the data to any CLP-811, but not to a CLP611. 13.8 BulkDump (Bulk data dump.) This feature lets you permanently save recordings you have made with the Clavinova's RECORDER. The Bulk Dump operation sends the performance data from both RECORDER tracks to an external MIDI storage device such as the Yamaha DOU-10 Disk Orchestra Unit. (Note that this information is sent in the form of bulk data, rather than as sequence data.) The saved data can later be restored by retransmission. Procedure 1 Run a MIDI cable from the MIDI OUT connector on the Clavinova to the MIDI IN connector on the storage device. 2 Set the storage device into the appropriate receiving mode. (Refer to the device's operating manual for instructions.) CLP-811/611 Configuration Functions (FUNCTION mode) 35
-
 1
1 -
2
-
3
-
4
-
5
-
6
-
7
-
8
-
9
-
10
-
11
-
12
-
13
-
14
-
15
-
16
-
17
-
18
-
19
-
20
-
21
-
22
-
23
-
24
-
25
-
26
-
27
-
28
-
29
-
30
-
31
-
32
-
33
-
 34
34 -
 35
35 -
 36
36 -
 37
37 -
 38
38 -
 39
39 -
 40
40 -
 41
41 -
 42
42 -
 43
43 -
 44
44 -
45
-
46
-
47
-
48
-
49
-
50
-
51
-
52
-
53
-
54
-
55
-
56
-
57
-
58
-
59
-
60
-
61
-
62
-
63
-
64
-
65
-
66
-
67
-
68
-
69
-
70
-
71
-
72
 |
 |