Yamaha MT1X Owner's Manual - Page 20
Connections, Getting ready - power
 |
View all Yamaha MT1X manuals
Add to My Manuals
Save this manual to your list of manuals |
Page 20 highlights
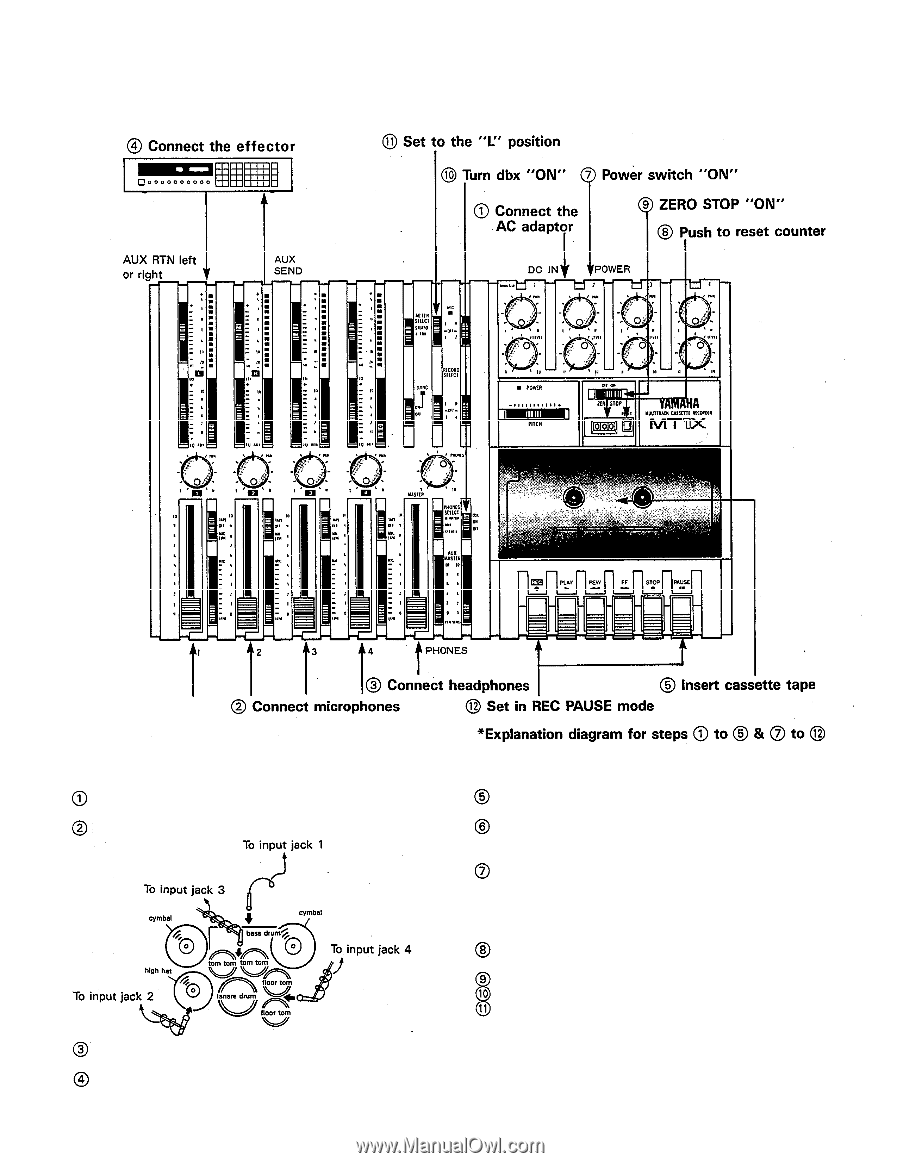
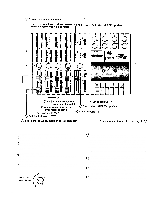
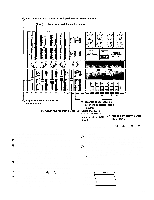
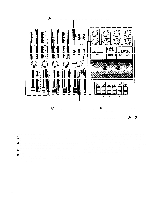
- Drum Recording Procedure - 1. Connections Plug the AC adaptor into an AC outlet, and insert the small round plug into the DC IN jack. Plug the four microphones into input jacks 1-4. Plug a pair of monitor headphones (rated 8-40 ohms) into the PHONES jack. When using an effect, connect it between the AUX SEND jack (input) and either of the AUX RTN jacks (output). 2. Getting ready Lift open the cassette door and insert a chrome position (CrO2) tape. Bias: HIGH, Eq: 70us. Return all the switches and controls to their normal positions, referring to the control panel illustration on pages 4~9. Turn the power switches on for the effect and microphones, and then turn the MT1X "ON". The POWER indicator will light. 3. Setting up the recorder section Press the RESET switch to return the counter to "000". Turn "ON" the ZERO STOP switch. Turn "ON" the dbx switch. Set the RECORD SELECT switch 1 to the "L" position. This is to record the Left stereo signal onto track 1. The REC indicator will begin flashing. 18
-
 1
1 -
2
-
3
-
4
-
5
-
6
-
7
-
8
-
9
-
10
-
11
-
12
-
13
-
14
-
 15
15 -
 16
16 -
 17
17 -
 18
18 -
 19
19 -
 20
20 -
 21
21 -
 22
22 -
 23
23 -
 24
24 -
 25
25 -
26
-
27
-
28
-
29
-
30
-
31
-
32
-
33
-
34
-
35
-
36
-
37
-
38
-
39
-
40
-
41
-
42
 |
 |