Yamaha MT1X Owner's Manual - Page 29
Recording The Keyboards By Overdubbing, Recording The Lead Guitar By Overdubbing, Recording
 |
View all Yamaha MT1X manuals
Add to My Manuals
Save this manual to your list of manuals |
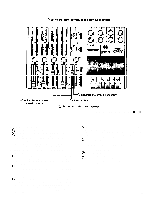
Page 29 highlights
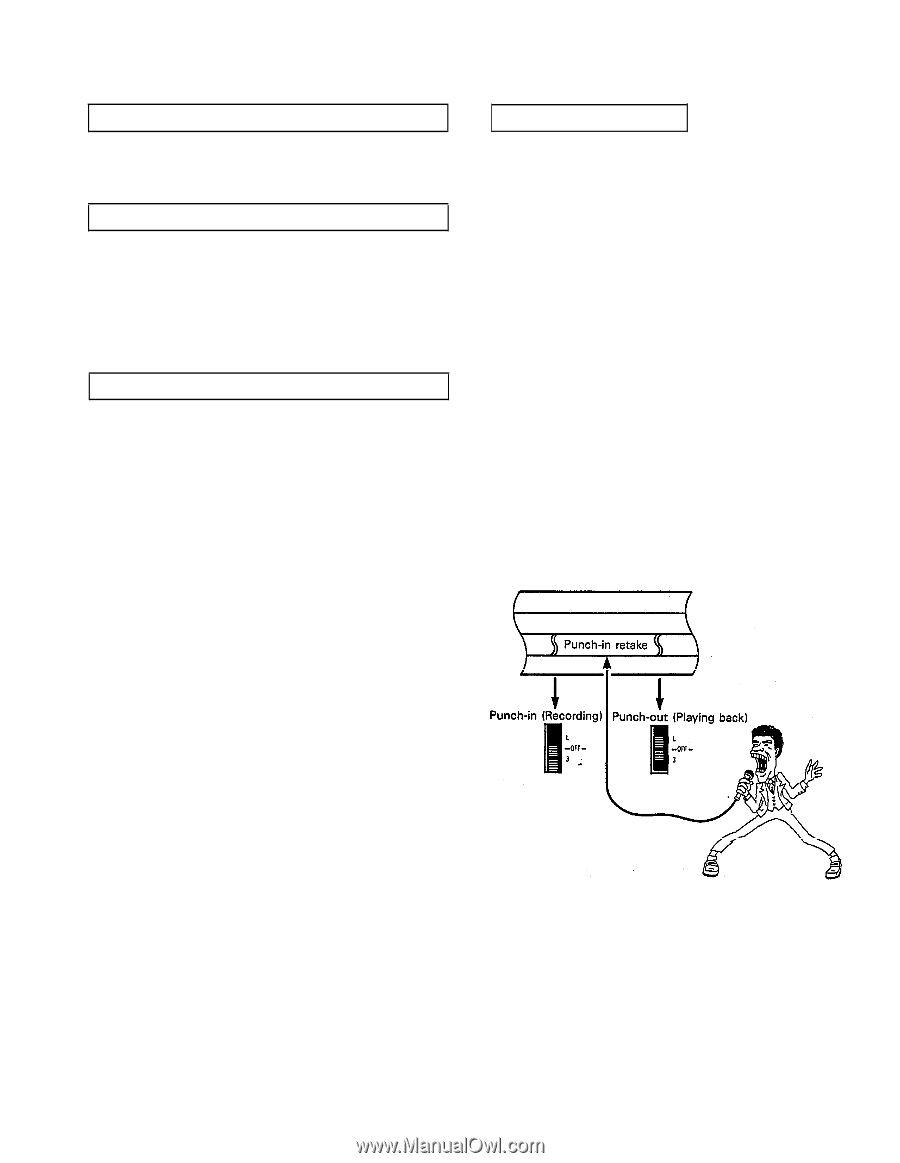
RECORDING THE KEYBOARDS BY OVERDUBBING Now that the recording of the drums on track 1 has been ping-ponged onto track 4, this track is free for recording the keyboards. RECORDING THE LEAD GUITAR BY OVERDUBBING Just like with the keyboards, the lead guitar can be recorded on track 2. Both the keyboards and the lead guitar can be positioned Left and Right with the PAN controls during mixdown. Since delay and chorus effects will be added separately in stereo during mixdown, distortion and compression effects added in mono should be done during this stage. RECORDING THE VOCALS BY OVERDUBBING Vocals will be recorded on track 3. Just like with the drums, vocal recording should be monitored through the headphones. PUNCH-IN/PUNCH-OUT Now let's explain the punch-in/punch-out technique. Mastering it will allow you to re-record even the smallest segment on a track without disturbing the rest of the track, or the other tracks. When all the tracks are playing back, press the REC switch to start the tape, "punch in" at the starting point of the section to be redone (set the RECORD SELECT switch of the track to be redone to the REC position for the new recording), and then "punch out" (return the RECORD SELECT switch of the track to the "OFF" position). With this technique, it's also possible to insert a lead solo into an empty section of the vocal track. However, this sort of operation requires a blank section of tape on a track. NOTE: The RECORD SELECT switches of the MT1X can be operated by the optional FS-1 Foot Switch. The RECORD SELECT switch for the track to be redone must be set, and then it can be the foot can be used to "punch in" and "punch out". Let's show you how "punch-in/punch-out" works. As an example, we'll explain how to re-do a segment of the vocal recorded on track 3. 27
-
 1
1 -
2
-
3
-
4
-
5
-
6
-
7
-
8
-
9
-
10
-
11
-
12
-
13
-
14
-
15
-
16
-
17
-
18
-
19
-
20
-
21
-
22
-
23
-
 24
24 -
 25
25 -
 26
26 -
 27
27 -
 28
28 -
 29
29 -
 30
30 -
 31
31 -
 32
32 -
 33
33 -
 34
34 -
35
-
36
-
37
-
38
-
39
-
40
-
41
-
42
 |
 |