1994 Chevrolet Camaro Owner's Manual - Page 172
1994 Chevrolet Camaro Manual

Page 172 highlights
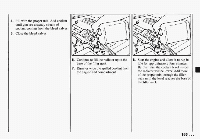
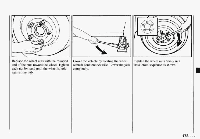
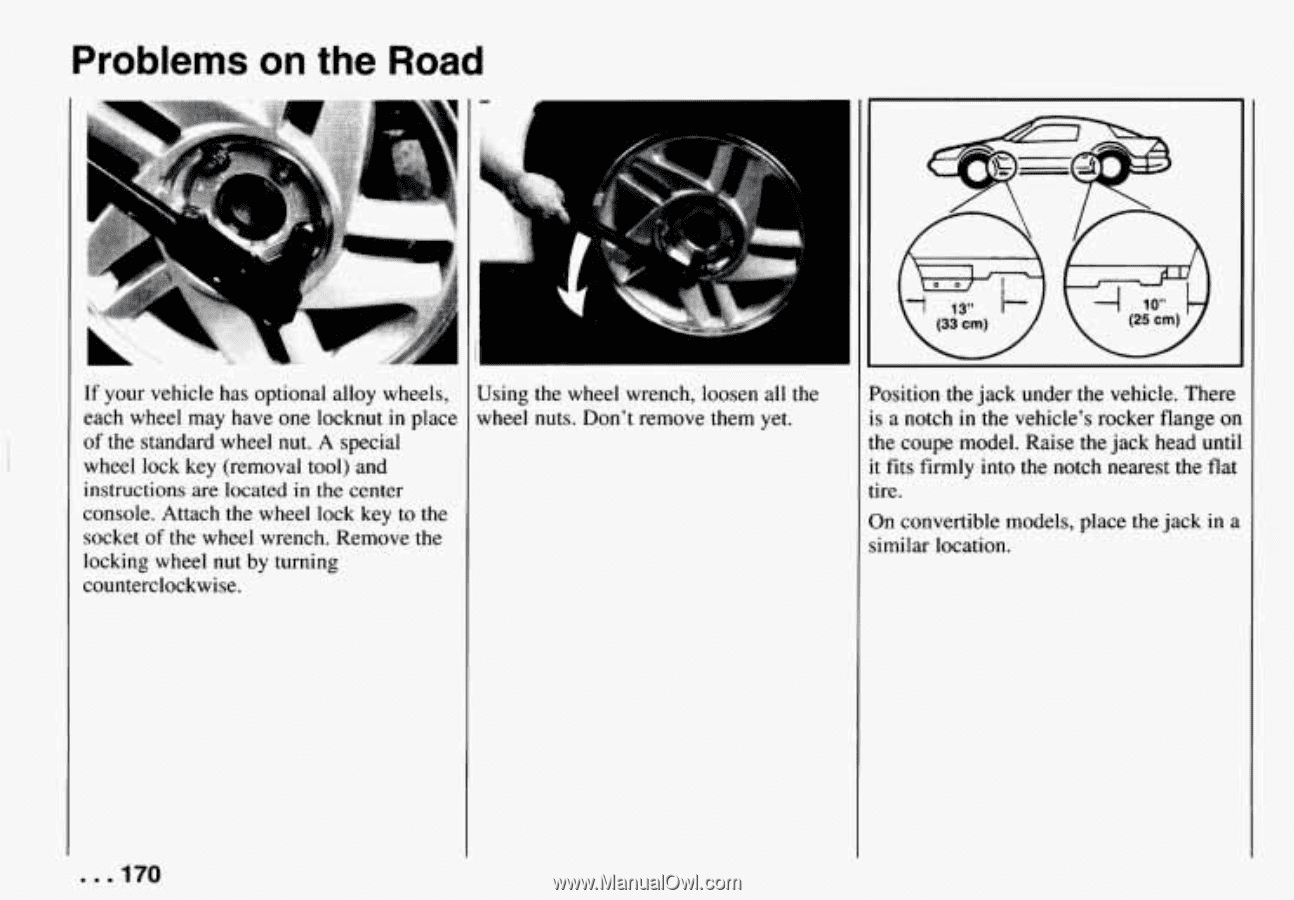
Problems on the Road ' ... .,.. ! If your vehicle has optional alloy wheels, Using the wheel wrench, loosen all the each wheel may have one locknut in place wheel nuts. Don't remove them yet. of the standard wheel nut. A special wheel lock key (removal tool) and instructions are located in the center console. Attach the wheel lock key to the socket of the wheel wrench. Remove the locking wheel nut by turning counterclockwise. Position the jackunder the vehicle. There is a notch in the vehicle's rocker flange on the coupe model. Raise the jack head until it fits firmly into the notch nearest the flat tire. On convertible models, place the jack in a similar location. ...I70
-
 1
1 -
2
-
3
-
4
-
5
-
6
-
7
-
8
-
9
-
10
-
11
-
12
-
13
-
14
-
15
-
16
-
17
-
18
-
19
-
20
-
21
-
22
-
23
-
24
-
25
-
26
-
27
-
28
-
29
-
30
-
31
-
32
-
33
-
34
-
35
-
36
-
37
-
38
-
39
-
40
-
41
-
42
-
43
-
44
-
45
-
46
-
47
-
48
-
49
-
50
-
51
-
52
-
53
-
54
-
55
-
56
-
57
-
58
-
59
-
60
-
61
-
62
-
63
-
64
-
65
-
66
-
67
-
68
-
69
-
70
-
71
-
72
-
73
-
74
-
75
-
76
-
77
-
78
-
79
-
80
-
81
-
82
-
83
-
84
-
85
-
86
-
87
-
88
-
89
-
90
-
91
-
92
-
93
-
94
-
95
-
96
-
97
-
98
-
99
-
100
-
101
-
102
-
103
-
104
-
105
-
106
-
107
-
108
-
109
-
110
-
111
-
112
-
113
-
114
-
115
-
116
-
117
-
118
-
119
-
120
-
121
-
122
-
123
-
124
-
125
-
126
-
127
-
128
-
129
-
130
-
131
-
132
-
133
-
134
-
135
-
136
-
137
-
138
-
139
-
140
-
141
-
142
-
143
-
144
-
145
-
146
-
147
-
148
-
149
-
150
-
151
-
152
-
153
-
154
-
155
-
156
-
157
-
158
-
159
-
160
-
161
-
162
-
163
-
164
-
165
-
166
-
 167
167 -
 168
168 -
 169
169 -
 170
170 -
 171
171 -
 172
172 -
 173
173 -
 174
174 -
 175
175 -
 176
176 -
 177
177 -
178
-
179
-
180
-
181
-
182
-
183
-
184
-
185
-
186
-
187
-
188
-
189
-
190
-
191
-
192
-
193
-
194
-
195
-
196
-
197
-
198
-
199
-
200
-
201
-
202
-
203
-
204
-
205
-
206
-
207
-
208
-
209
-
210
-
211
-
212
-
213
-
214
-
215
-
216
-
217
-
218
-
219
-
220
-
221
-
222
-
223
-
224
-
225
-
226
-
227
-
228
-
229
-
230
-
231
-
232
-
233
-
234
-
235
-
236
-
237
-
238
-
239
-
240
-
241
-
242
-
243
-
244
-
245
-
246
-
247
-
248
-
249
-
250
-
251
-
252
-
253
-
254
-
255
-
256
-
257
-
258
-
259
-
260
-
261
-
262
-
263
-
264
-
265
-
266
-
267
-
268
-
269
-
270
-
271
-
272
-
273
-
274
-
275
-
276
-
277
-
278
-
279
-
280
-
281
-
282
-
283
-
284
-
285
-
286
-
287
-
288
-
289
-
290
-
291
-
292
 |
 |
Problems
on
the
Road
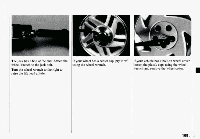
If
your vehicle has optional alloy wheels,
each wheel
may
have one locknut
in
place
of
the standard wheel
nut.
A
special
wheel
lock key (removal tool) and
instructions are located
in
the
center
console. Attach the wheel lock key
to
the
socket
of
the
wheel wrench. Remove the
locking wheel
nut
by turning
counterclockwise.
. .
.I70
‘
....
.,..
!
Using the wheel
wrench,
loosen
all
the
wheel
nuts.
Don’t
remove
them
yet.
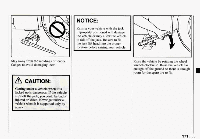
Position the
jack under
the vehicle. There
is a notch
in
the
vehicle’s rocker flange on
the coupe model. Raise the jack head
until
it fits firmly into the
notch nearest the flat
tire.
On
convertible models, place the jack
in
a
similar location.