Brother International DCP-8155DN Software User's Guide - English - Page 223
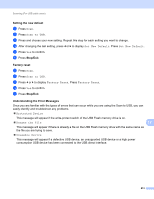
For Touchscreen models, Start, Device Scan Settings, Device Button, Home Mode, Advanced Mode
 |
View all Brother International DCP-8155DN manuals
Add to My Manuals
Save this manual to your list of manuals |
Page 223 highlights
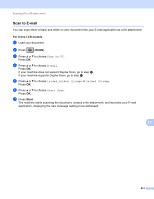
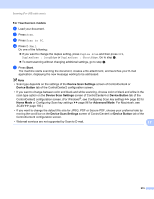
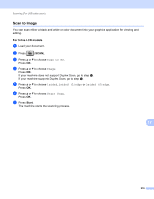
Scanning (For USB cable users) For Touchscreen models 12 a Load your document. b Press Scan. c Press Scan to PC. d Press E-Mail. Do one of the following: If you want to change the duplex setting, press Duplex Scan and then press Off, DuplexScan : LongEdge or DuplexScan : ShortEdge. Go to step e. To start scanning without changing additional settings, go to step e. e Press Start. The machine starts scanning the document, creates a file attachment, and launches your E-mail application, displaying the new message waiting to be addressed. Note • Scan type depends on the settings of the Device Scan Settings screen of ControlCenter4 or Device Button tab of the ControlCenter2 configuration screen. • If you want to change between color and black and white scanning, choose color or black and white in the scan type option on the Device Scan Settings screen of ControlCenter4 or Device Button tab of the ControlCenter2 configuration screen. (For Windows®, see Configuring Scan key settings uu page 82 for Home Mode or Configuring Scan key settings uu page 96 for Advanced Mode. For Macintosh, see SCAN uu page 180.) • If you want to change the default file size for JPEG, PDF or Secure PDF, choose your preferred rate by moving the scroll bar on the Device Scan Settings screen of ControlCenter4 or Device Button tab of the ControlCenter2 configuration screen. • Webmail services are not supported by Scan to E-mail. 12 215
-
 1
1 -
2
-
3
-
4
-
5
-
6
-
7
-
8
-
9
-
10
-
11
-
12
-
13
-
14
-
15
-
16
-
17
-
18
-
19
-
20
-
21
-
22
-
23
-
24
-
25
-
26
-
27
-
28
-
29
-
30
-
31
-
32
-
33
-
34
-
35
-
36
-
37
-
38
-
39
-
40
-
41
-
42
-
43
-
44
-
45
-
46
-
47
-
48
-
49
-
50
-
51
-
52
-
53
-
54
-
55
-
56
-
57
-
58
-
59
-
60
-
61
-
62
-
63
-
64
-
65
-
66
-
67
-
68
-
69
-
70
-
71
-
72
-
73
-
74
-
75
-
76
-
77
-
78
-
79
-
80
-
81
-
82
-
83
-
84
-
85
-
86
-
87
-
88
-
89
-
90
-
91
-
92
-
93
-
94
-
95
-
96
-
97
-
98
-
99
-
100
-
101
-
102
-
103
-
104
-
105
-
106
-
107
-
108
-
109
-
110
-
111
-
112
-
113
-
114
-
115
-
116
-
117
-
118
-
119
-
120
-
121
-
122
-
123
-
124
-
125
-
126
-
127
-
128
-
129
-
130
-
131
-
132
-
133
-
134
-
135
-
136
-
137
-
138
-
139
-
140
-
141
-
142
-
143
-
144
-
145
-
146
-
147
-
148
-
149
-
150
-
151
-
152
-
153
-
154
-
155
-
156
-
157
-
158
-
159
-
160
-
161
-
162
-
163
-
164
-
165
-
166
-
167
-
168
-
169
-
170
-
171
-
172
-
173
-
174
-
175
-
176
-
177
-
178
-
179
-
180
-
181
-
182
-
183
-
184
-
185
-
186
-
187
-
188
-
189
-
190
-
191
-
192
-
193
-
194
-
195
-
196
-
197
-
198
-
199
-
200
-
201
-
202
-
203
-
204
-
205
-
206
-
207
-
208
-
209
-
210
-
211
-
212
-
213
-
214
-
215
-
216
-
217
-
 218
218 -
 219
219 -
 220
220 -
 221
221 -
 222
222 -
 223
223 -
 224
224 -
 225
225 -
 226
226 -
 227
227 -
 228
228 -
229
-
230
-
231
-
232
-
233
-
234
-
235
-
236
-
237
-
238
-
239
-
240
-
241
-
242
-
243
-
244
-
245
-
246
-
247
-
248
-
249
-
250
-
251
-
252
-
253
-
254
-
255
-
256
-
257
-
258
-
259
-
260
-
261
-
262
-
263
-
264
-
265
-
266
-
267
-
268
-
269
-
270
-
271
 |
 |
