Brother International MFC 8840D Quick Setup Guide - English - Page 7
Release the Scanner Lock - check paper
 |
UPC - 012502610359
View all Brother International MFC 8840D manuals
Add to My Manuals
Save this manual to your list of manuals |
Page 7 highlights
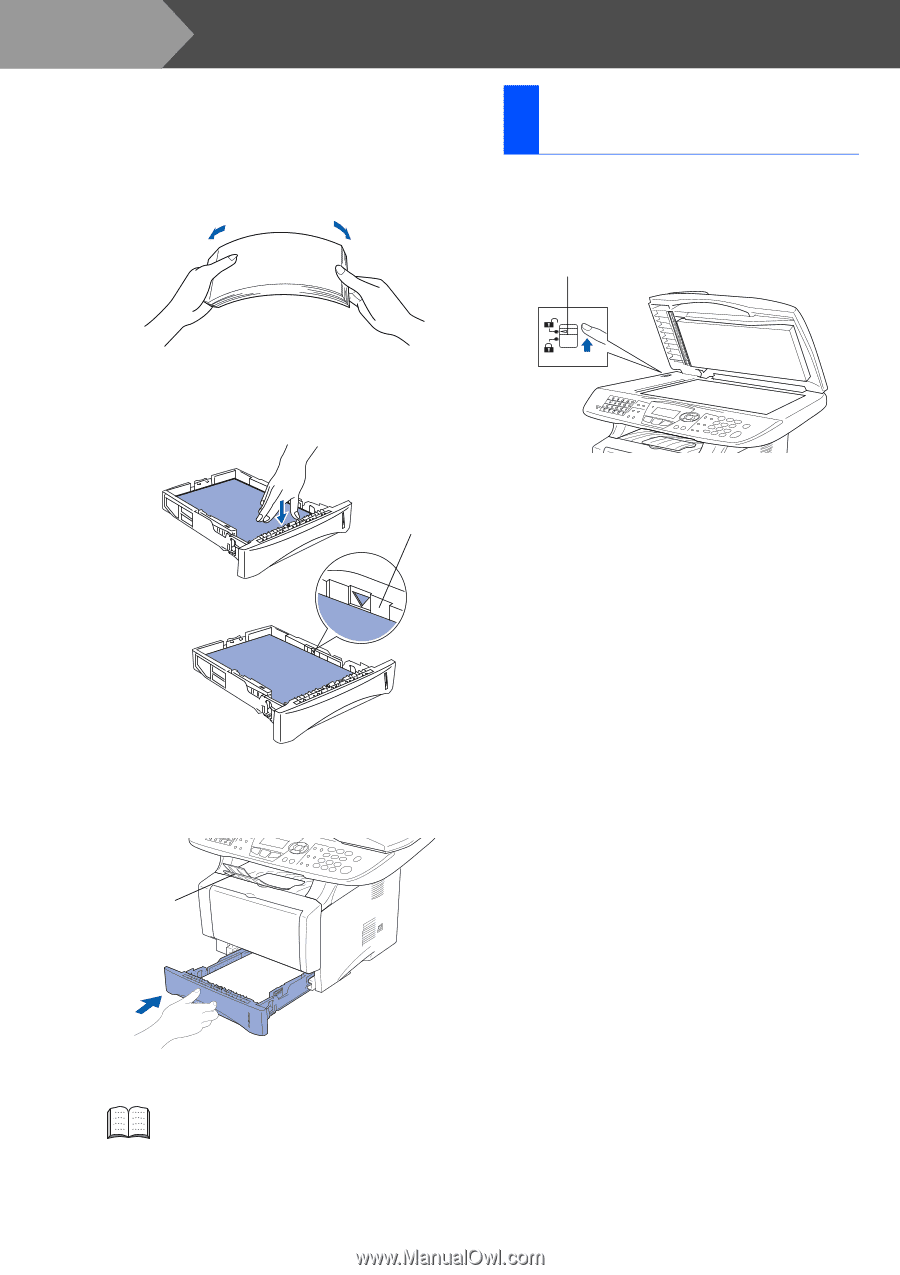
Step 1 Setting Up the Machine 3 Fan the stack of paper well to avoid paper jams and misfeeds. 4 Release the Scanner Lock 1 Push the lever up to unlock the scanner. (The gray scanner lock lever is located at the back left under side of the document cover.) Scanner Lock Lever 4 Put paper in the paper tray. Check that the paper is flat in the tray and below the maximum paper mark. Up to here. 5 Put the paper tray firmly back in the machine and unfold the support flap before you use the machine. Support Flap For details on supported paper specifications, see "Paper" in Chapter 2 (User's Guide). 6
-
 1
1 -
 2
2 -
 3
3 -
 4
4 -
 5
5 -
 6
6 -
 7
7 -
 8
8 -
 9
9 -
 10
10 -
 11
11 -
 12
12 -
13
-
14
-
15
-
16
-
17
-
18
-
19
-
20
-
21
-
22
-
23
-
24
-
25
-
26
-
27
-
28
-
29
-
30
-
31
-
32
-
33
-
34
-
35
-
36
-
37
-
38
-
39
-
40
-
41
-
42
-
43
-
44
-
45
-
46
-
47
-
48
-
49
-
50
-
51
-
52
-
53
-
54
-
55
-
56
 |
 |
6
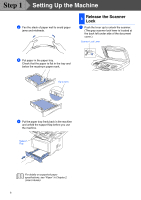
Setting Up the Machine
3
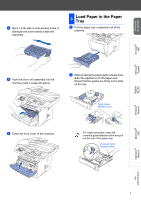
Fan the stack of paper well to avoid paper
jams and misfeeds.
4
Put paper in the paper tray.
Check that the paper is flat in the tray and
below the maximum paper mark.
5
Put the paper tray firmly back in the machine
and unfold the support flap before you use
the machine.
1
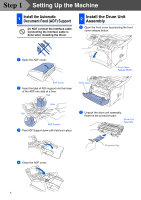
Push the lever up to unlock the scanner.
(The gray scanner lock lever is located at
the back left under side of the document
cover.)
For details on supported paper
specifications, see “Paper” in Chapter 2
(User’s Guide).
Up to here.
Support
Flap
4
Release the Scanner
Lock
Scanner Lock Lever
Step 1