Brother International MFC-9970CDW Software Users Manual - English - Page 200
Resolution, File Format Options, Scan to USB, 1sided, 2sided Ledge, Change Setting, Start Scan
 |
UPC - 012502625131
View all Brother International MFC-9970CDW manuals
Add to My Manuals
Save this manual to your list of manuals |
Page 200 highlights
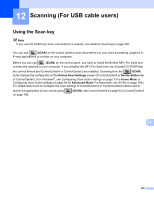
Scanning (For USB cable users) Resolution Color 100 dpi Color 200 dpi Color 300 dpi Color 600 dpi Gray 100 dpi Gray 200 dpi Gray 300 dpi B&W 200 dpi B&W 200x100 dpi File Format Options PDF / PDF/A / Secure PDF / Signed PDF / JPEG / XPS PDF / PDF/A / Secure PDF / Signed PDF / JPEG / XPS PDF / PDF/A / Secure PDF / Signed PDF / JPEG / XPS PDF / PDF/A / Secure PDF / Signed PDF / JPEG / XPS PDF / PDF/A / Secure PDF / Signed PDF / JPEG / XPS PDF / PDF/A / Secure PDF / Signed PDF / JPEG / XPS PDF / PDF/A / Secure PDF / Signed PDF / JPEG / XPS PDF / PDF/A / Secure PDF / Signed PDF / TIFF PDF / PDF/A / Secure PDF / Signed PDF / TIFF a Put a USB Flash memory drive into your machine. b Load your document. c Press (SCAN). d Press a or b to choose Scan to USB. Press OK. If your machine does not support Duplex Scan, go to step f. If your machine supports Duplex Scan, go to step e. e Press a or b to choose 1sided, 2sided (L)edge or 2sided (S)edge. Press OK. f Choose one of the options below: To change the setting press a or b to choose Change Setting. Press OK and go to step g. To start scanning with the settings you set in the Function Menu (Menu, 5, 2), choose Start Scan. 12 Press OK and go to step k. g Press a or b to choose the quality you want. Press OK. h Press a or b to choose the file type you want. Press OK. If you choose color or Gray in the resolution setting, go to step i. If you choose black & white in the resolution setting, go to step j. Note • If you choose color or Gray in the resolution setting, you cannot choose TIFF. • If you choose black & white in the resolution setting, you cannot choose JPEG or XPS. • If you choose Secure PDF, the machine will ask you to enter a 4 digit password using numbers 0-9 before it starts scanning. 193
-
 1
1 -
2
-
3
-
4
-
5
-
6
-
7
-
8
-
9
-
10
-
11
-
12
-
13
-
14
-
15
-
16
-
17
-
18
-
19
-
20
-
21
-
22
-
23
-
24
-
25
-
26
-
27
-
28
-
29
-
30
-
31
-
32
-
33
-
34
-
35
-
36
-
37
-
38
-
39
-
40
-
41
-
42
-
43
-
44
-
45
-
46
-
47
-
48
-
49
-
50
-
51
-
52
-
53
-
54
-
55
-
56
-
57
-
58
-
59
-
60
-
61
-
62
-
63
-
64
-
65
-
66
-
67
-
68
-
69
-
70
-
71
-
72
-
73
-
74
-
75
-
76
-
77
-
78
-
79
-
80
-
81
-
82
-
83
-
84
-
85
-
86
-
87
-
88
-
89
-
90
-
91
-
92
-
93
-
94
-
95
-
96
-
97
-
98
-
99
-
100
-
101
-
102
-
103
-
104
-
105
-
106
-
107
-
108
-
109
-
110
-
111
-
112
-
113
-
114
-
115
-
116
-
117
-
118
-
119
-
120
-
121
-
122
-
123
-
124
-
125
-
126
-
127
-
128
-
129
-
130
-
131
-
132
-
133
-
134
-
135
-
136
-
137
-
138
-
139
-
140
-
141
-
142
-
143
-
144
-
145
-
146
-
147
-
148
-
149
-
150
-
151
-
152
-
153
-
154
-
155
-
156
-
157
-
158
-
159
-
160
-
161
-
162
-
163
-
164
-
165
-
166
-
167
-
168
-
169
-
170
-
171
-
172
-
173
-
174
-
175
-
176
-
177
-
178
-
179
-
180
-
181
-
182
-
183
-
184
-
185
-
186
-
187
-
188
-
189
-
190
-
191
-
192
-
193
-
194
-
 195
195 -
 196
196 -
 197
197 -
 198
198 -
 199
199 -
 200
200 -
 201
201 -
 202
202 -
 203
203 -
 204
204 -
 205
205 -
206
-
207
-
208
-
209
-
210
-
211
-
212
-
213
-
214
-
215
-
216
-
217
-
218
-
219
-
220
-
221
-
222
-
223
-
224
-
225
-
226
-
227
-
228
-
229
 |
 |
