Brother International PC-420PRW Users Manual - English - Page 35
When using the twin needle, be sure to, attach zigzag foot J, otherwise
 |
View all Brother International PC-420PRW manuals
Add to My Manuals
Save this manual to your list of manuals |
Page 35 highlights
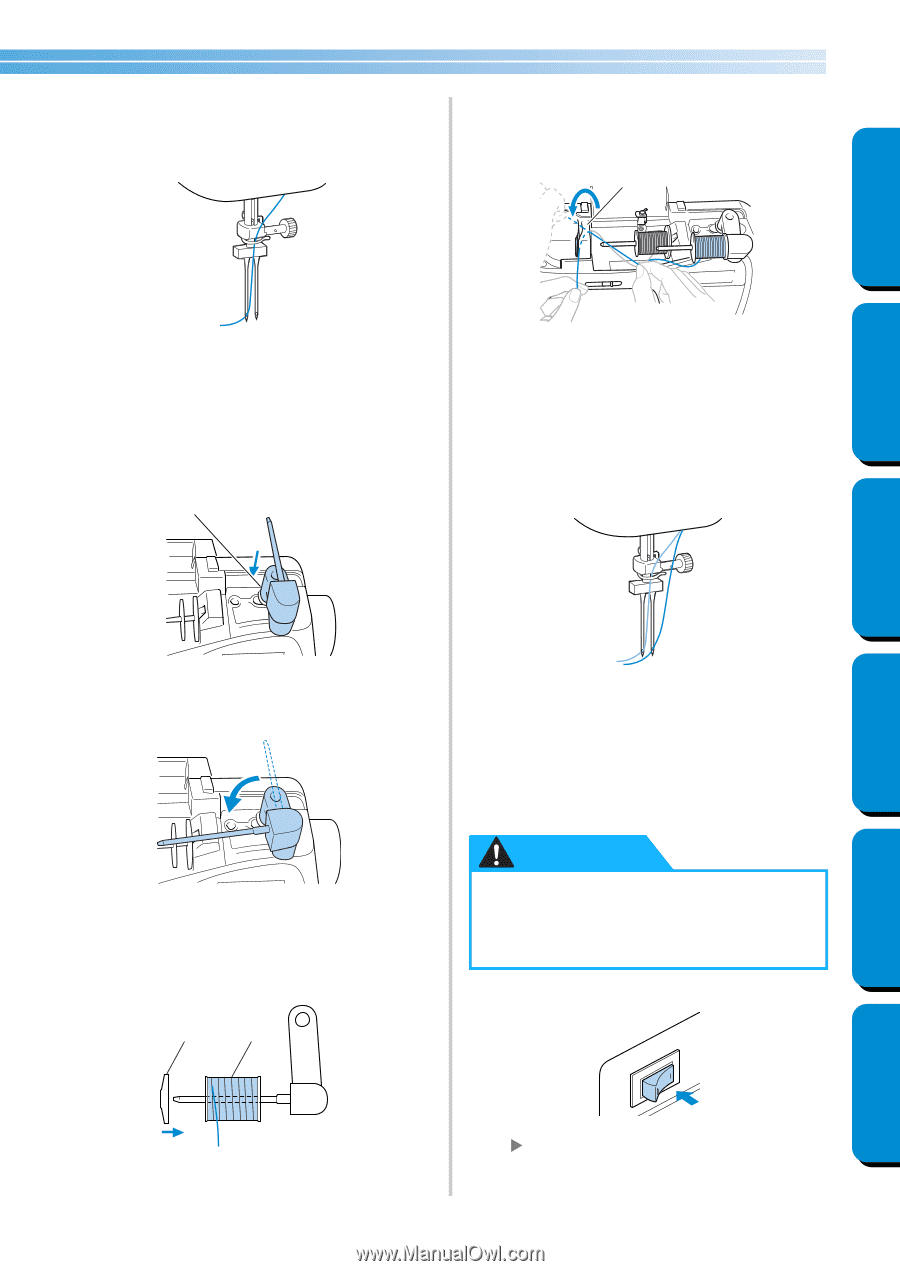
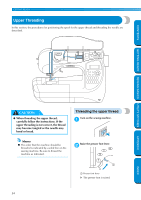
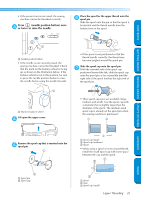
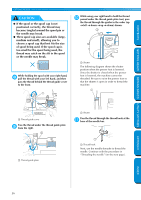
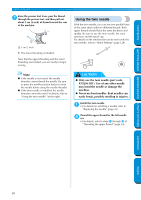
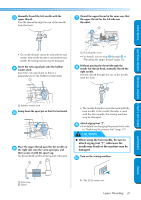
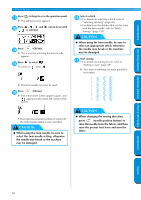
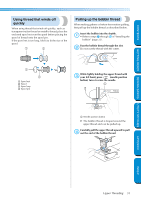
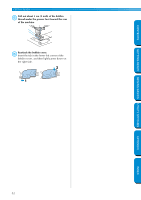
CONTENTS Manually thread the left needle with the 3 upper thread. Pass the thread through the eye of the needle from the front. Thread the upper thread in the same way that 7 the upper thread for the left side was threaded. 1 • The needle threader cannot be used with the twin needle. If the needle threader is used with the twin needle, the sewing machine may be damaged. Insert the extra spool pin onto the bobbin 4 winder shaft. Insert the extra spool pin so that it is perpendicular to the bobbin winder shaft. 1 1 Thread guide cover • For details, refer to step 8 through 0 of "Threading the upper thread" (page 26). Without passing the thread through the 8 needle bar thread hook, manually thread the right needle. Pass the thread through the eye of the needle from the front. GETTING READY SEWING BASICS UTILITY STITCHES APPENDIX 1 Bobbin winder shaft Swing down the spool pin so that it is horizontal. 5 Place the upper thread spool for the needle on 6 the right side onto the extra spool pin, and then secure it with the spool cap. The thread should unroll from the top front of the spool. 1 2 • The needle threader cannot be used with the twin needle. If the needle threader is used with the twin needle, the sewing machine may be damaged. Attach zigzag foot "J". 9 • For details on changing the presser foot, refer to "Replacing the presser foot" (page 37). CAUTION ● When using the twin needle, be sure to attach zigzag foot "J", otherwise the needle may break or the machine may be damaged. Turn on the sewing machine. 0 1 Spool cap 2 Spool X The LCD comes on. Upper Threading 29 INDEX
-
 1
1 -
2
-
3
-
4
-
5
-
6
-
7
-
8
-
9
-
10
-
11
-
12
-
13
-
14
-
15
-
16
-
17
-
18
-
19
-
20
-
21
-
22
-
23
-
24
-
25
-
26
-
27
-
28
-
29
-
 30
30 -
 31
31 -
 32
32 -
 33
33 -
 34
34 -
 35
35 -
 36
36 -
 37
37 -
 38
38 -
 39
39 -
 40
40 -
41
-
42
-
43
-
44
-
45
-
46
-
47
-
48
-
49
-
50
-
51
-
52
-
53
-
54
-
55
-
56
-
57
-
58
-
59
-
60
-
61
-
62
-
63
-
64
-
65
-
66
-
67
-
68
-
69
-
70
-
71
-
72
-
73
-
74
-
75
-
76
-
77
-
78
-
79
-
80
-
81
-
82
-
83
-
84
-
85
-
86
-
87
-
88
-
89
-
90
-
91
-
92
-
93
-
94
-
95
-
96
-
97
-
98
-
99
-
100
-
101
-
102
-
103
-
104
-
105
-
106
-
107
-
108
-
109
-
110
-
111
-
112
-
113
-
114
-
115
-
116
-
117
-
118
-
119
-
120
-
121
-
122
-
123
-
124
-
125
-
126
-
127
-
128
-
129
-
130
-
131
-
132
-
133
-
134
-
135
-
136
-
137
-
138
-
139
-
140
-
141
-
142
-
143
-
144
-
145
-
146
-
147
-
148
-
149
-
150
-
151
-
152
-
153
 |
 |