Brother International PC-420PRW Users Manual - English - Page 54
Positioning the fabric, While holding the end of the thread and
 |
View all Brother International PC-420PRW manuals
Add to My Manuals
Save this manual to your list of manuals |
Page 54 highlights
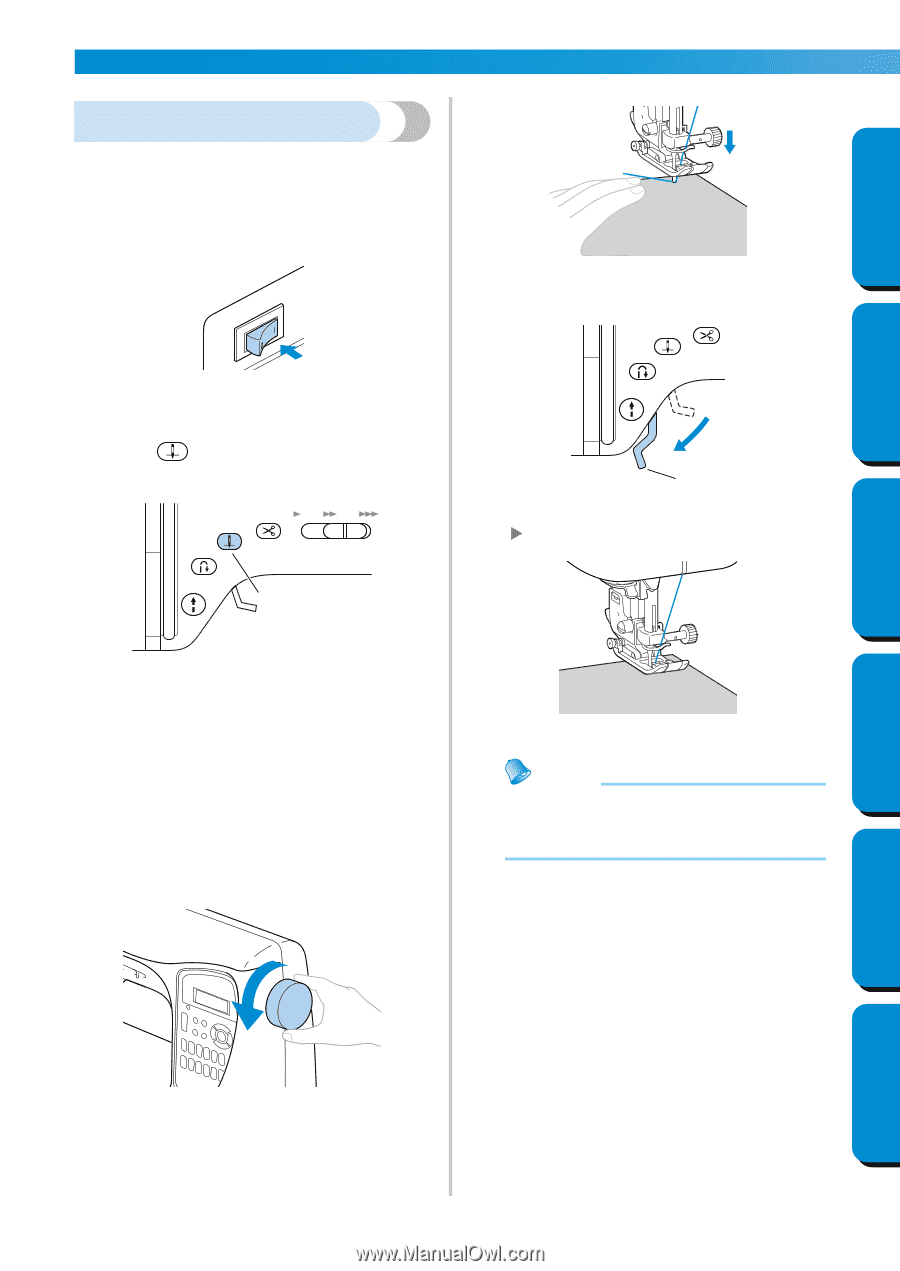
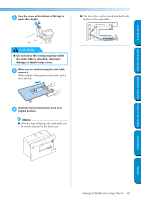
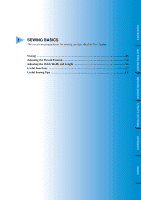
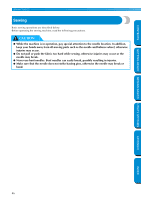
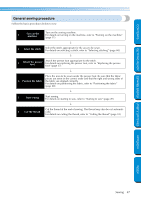
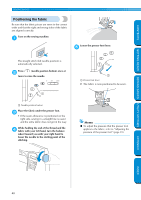
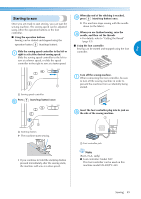
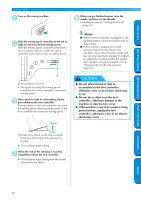
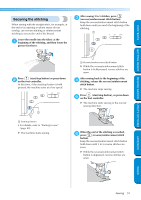
SEWING BASICS CONTENTS Positioning the fabric Be sure that the fabric pieces are sewn in the correct order and that the right and wrong sides of the fabric are aligned correctly. Turn on the sewing machine. 1 Lower the presser foot lever. 5 GETTING READY SEWING BASICS UTILITY STITCHES The straight stitch (left needle position) is automatically selected. Press 2 (needle position button) once or twice to raise the needle. 1 1 Needle position button Place the fabric under the presser foot. 3 • If the seam allowance is positioned on the right side, sewing in a straight line is easier and the extra fabric does not get in the way. While holding the end of the thread and the 4 fabric with your left hand, turn the balance wheel toward you with your right hand to lower the needle to the starting point of the stitching. 1 1 Presser foot lever X The fabric is now positioned to be sewn. Memo ● To adjust the pressure that the presser foot applies to the fabric, refer to "Adjusting the pressure of the presser foot" (page 39). APPENDIX INDEX 48
-
 1
1 -
2
-
3
-
4
-
5
-
6
-
7
-
8
-
9
-
10
-
11
-
12
-
13
-
14
-
15
-
16
-
17
-
18
-
19
-
20
-
21
-
22
-
23
-
24
-
25
-
26
-
27
-
28
-
29
-
30
-
31
-
32
-
33
-
34
-
35
-
36
-
37
-
38
-
39
-
40
-
41
-
42
-
43
-
44
-
45
-
46
-
47
-
48
-
 49
49 -
 50
50 -
 51
51 -
 52
52 -
 53
53 -
 54
54 -
 55
55 -
 56
56 -
 57
57 -
 58
58 -
 59
59 -
60
-
61
-
62
-
63
-
64
-
65
-
66
-
67
-
68
-
69
-
70
-
71
-
72
-
73
-
74
-
75
-
76
-
77
-
78
-
79
-
80
-
81
-
82
-
83
-
84
-
85
-
86
-
87
-
88
-
89
-
90
-
91
-
92
-
93
-
94
-
95
-
96
-
97
-
98
-
99
-
100
-
101
-
102
-
103
-
104
-
105
-
106
-
107
-
108
-
109
-
110
-
111
-
112
-
113
-
114
-
115
-
116
-
117
-
118
-
119
-
120
-
121
-
122
-
123
-
124
-
125
-
126
-
127
-
128
-
129
-
130
-
131
-
132
-
133
-
134
-
135
-
136
-
137
-
138
-
139
-
140
-
141
-
142
-
143
-
144
-
145
-
146
-
147
-
148
-
149
-
150
-
151
-
152
-
153
 |
 |