Brother International PC-420PRW Users Manual - English - Page 66
Saving stitch settings, arrow keys until
 |
View all Brother International PC-420PRW manuals
Add to My Manuals
Save this manual to your list of manuals |
Page 66 highlights
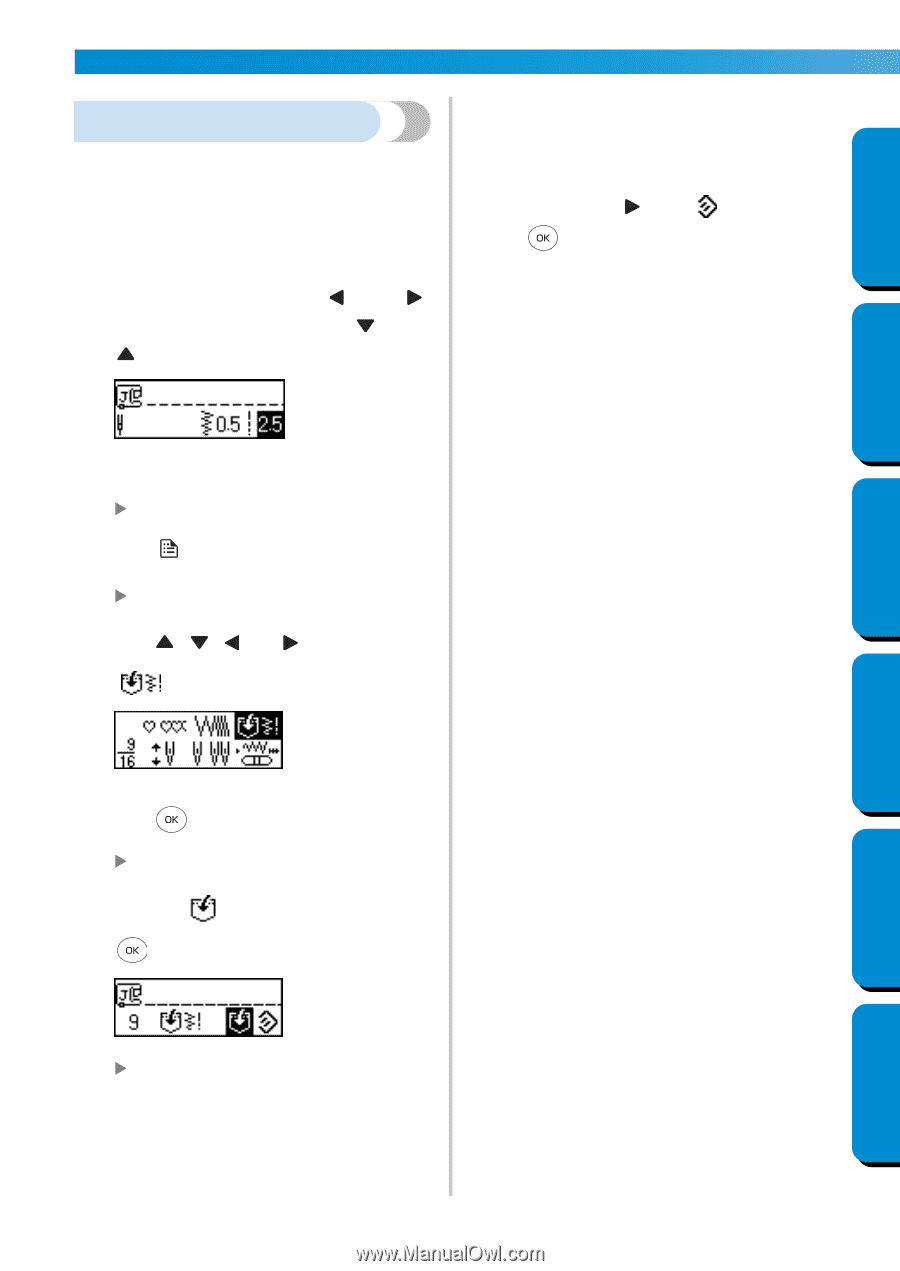
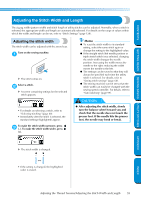
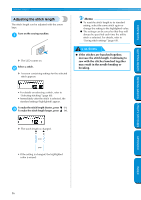
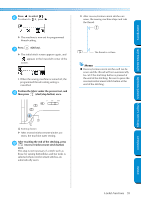
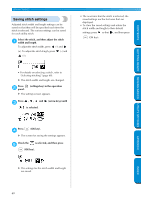
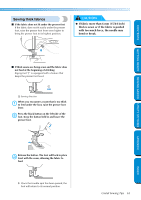
GETTING READY SEWING BASICS UTILITY STITCHES SEWING BASICS CONTENTS Saving stitch settings Adjusted stitch width and length settings can be saved so that they will be specified each time the stitch is selected. The various settings can be saved for each utility stitch. Select the stitch, and then adjust the stitch 1 width and length. To adjust the stitch width, press (-) and (+). To adjust the stitch length, press (-) and (+). • The next time that the stitch is selected, the saved settings are the first ones that are displayed. • To clear the saved settings and return the stitch width and length to their default settings, press so that , and then press (OK key). • For details on selecting a stitch, refer to "Selecting stitching" (page 68). X The stitch width and length are changed. Press 2 panel. (settings key) in the operation X The settings screen appears. Press , , and 3 is selected. (arrow keys) until APPENDIX Press 4 (OK key). X The screen for saving the settings appears. Check the 5 is selected, and then press (OK key). X The settings for the stitch width and length are saved. INDEX 60
-
 1
1 -
2
-
3
-
4
-
5
-
6
-
7
-
8
-
9
-
10
-
11
-
12
-
13
-
14
-
15
-
16
-
17
-
18
-
19
-
20
-
21
-
22
-
23
-
24
-
25
-
26
-
27
-
28
-
29
-
30
-
31
-
32
-
33
-
34
-
35
-
36
-
37
-
38
-
39
-
40
-
41
-
42
-
43
-
44
-
45
-
46
-
47
-
48
-
49
-
50
-
51
-
52
-
53
-
54
-
55
-
56
-
57
-
58
-
59
-
60
-
 61
61 -
 62
62 -
 63
63 -
 64
64 -
 65
65 -
 66
66 -
 67
67 -
 68
68 -
 69
69 -
 70
70 -
 71
71 -
72
-
73
-
74
-
75
-
76
-
77
-
78
-
79
-
80
-
81
-
82
-
83
-
84
-
85
-
86
-
87
-
88
-
89
-
90
-
91
-
92
-
93
-
94
-
95
-
96
-
97
-
98
-
99
-
100
-
101
-
102
-
103
-
104
-
105
-
106
-
107
-
108
-
109
-
110
-
111
-
112
-
113
-
114
-
115
-
116
-
117
-
118
-
119
-
120
-
121
-
122
-
123
-
124
-
125
-
126
-
127
-
128
-
129
-
130
-
131
-
132
-
133
-
134
-
135
-
136
-
137
-
138
-
139
-
140
-
141
-
142
-
143
-
144
-
145
-
146
-
147
-
148
-
149
-
150
-
151
-
152
-
153
 |
 |