Brother International PC-420PRW Users Manual - English - Page 86
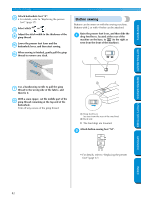
on the sides of the buttonhole foot, and then, buttonhole mark aligned with the red marks
 |
View all Brother International PC-420PRW manuals
Add to My Manuals
Save this manual to your list of manuals |
Page 86 highlights
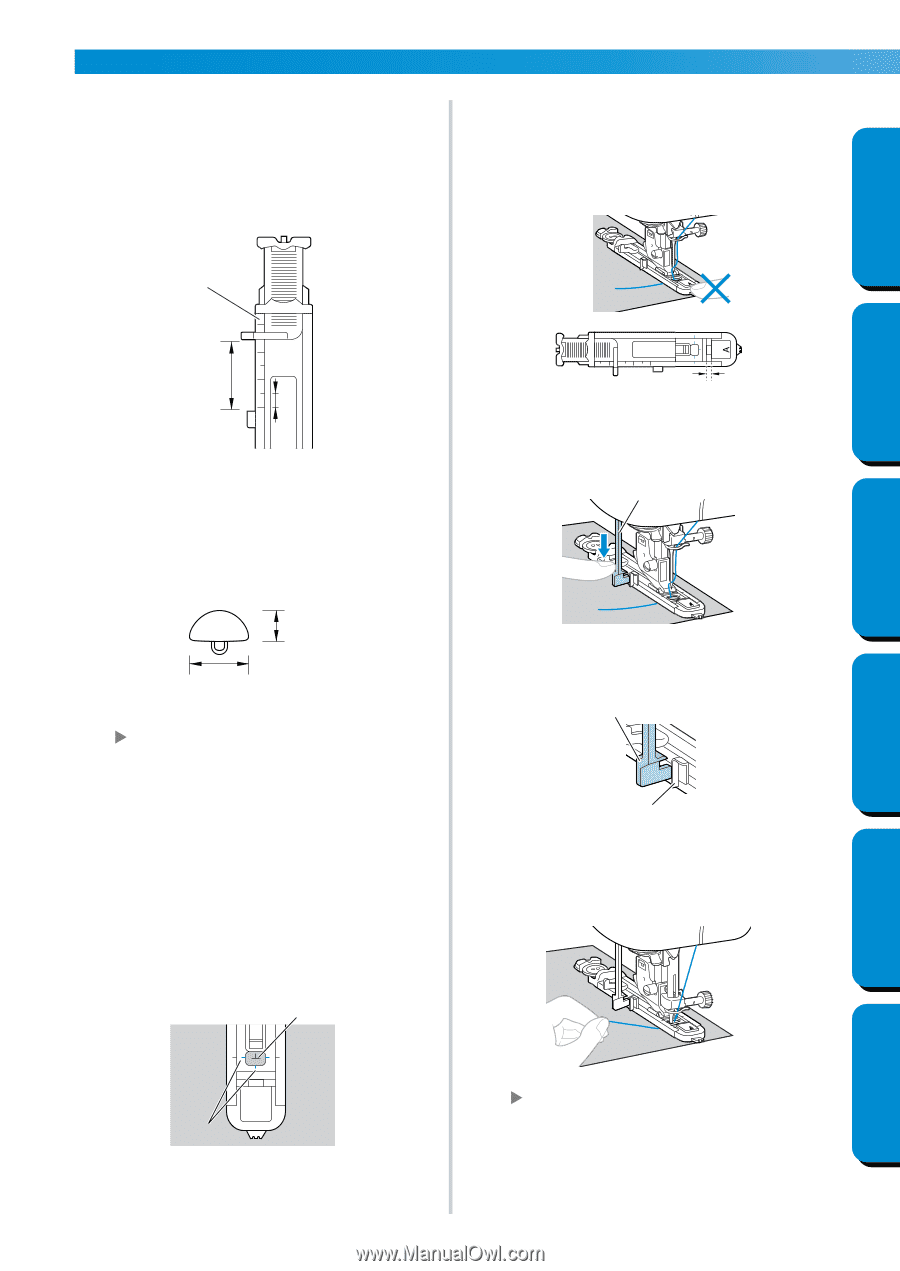
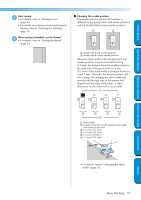
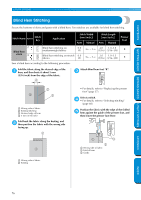
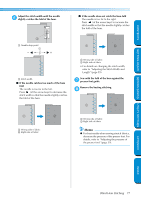
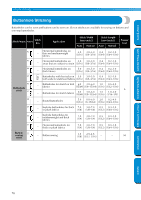
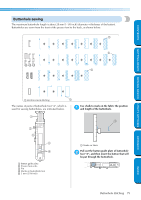
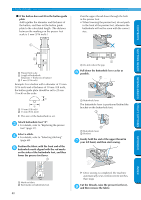
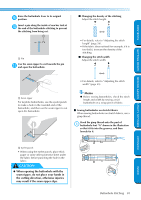
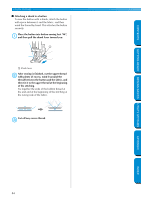
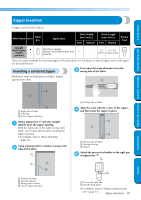
UTILITY STITCHES ■ If the button does not fit in the button guide plate Add together the diameter and thickness of the button, and then set the button guide plate to the calculated length. (The distance between the markings on the presser foot scale is 5 mm (3/16 inch).) Pass the upper thread down through the hole in the presser foot. • When lowering the presser foot, do not push in the front of the presser foot, otherwise the buttonhole will not be sewn with the correct size. CONTENTS 1 GETTING READY SEWING BASICS UTILITY STITCHES 2 3 1 Presser foot scale 2 Length of buttonhole (Diameter + thickness of button) 3 5 mm (3/16 inch) Example: For a button with a diameter of 15 mm (9/16 inch) and a thickness of 10 mm (3/8 inch), the button guide plate should be set to 25 mm (1 inch) on the scale. 1 2 1 10 mm (3/8 inch) 2 15 mm (9/16 inch) X The size of the buttonhole is set. Attach buttonhole foot "A". 3 • For details, refer to "Replacing the presser foot" (page 37). Select a stitch. 4 • For details, refer to "Selecting stitching" (page 68). Position the fabric with the front end of the 5 buttonhole mark aligned with the red marks on the sides of the buttonhole foot, and then lower the presser foot lever. 1 1 1 Do not reduce the gap. Pull down the buttonhole lever as far as 6 possible. 1 1 Buttonhole lever The buttonhole lever is positioned behind the bracket on the buttonhole foot. 1 2 1 Buttonhole lever 2 Bracket Gently hold the end of the upper thread in 7 your left hand, and then start sewing. APPENDIX INDEX A 2 1 Mark on fabric 2 Red marks on buttonhole foot 80 X Once sewing is completed, the machine automatically sews reinforcement stitches, then stops Cut the threads, raise the presser foot lever, 8 and then remove the fabric.
-
 1
1 -
2
-
3
-
4
-
5
-
6
-
7
-
8
-
9
-
10
-
11
-
12
-
13
-
14
-
15
-
16
-
17
-
18
-
19
-
20
-
21
-
22
-
23
-
24
-
25
-
26
-
27
-
28
-
29
-
30
-
31
-
32
-
33
-
34
-
35
-
36
-
37
-
38
-
39
-
40
-
41
-
42
-
43
-
44
-
45
-
46
-
47
-
48
-
49
-
50
-
51
-
52
-
53
-
54
-
55
-
56
-
57
-
58
-
59
-
60
-
61
-
62
-
63
-
64
-
65
-
66
-
67
-
68
-
69
-
70
-
71
-
72
-
73
-
74
-
75
-
76
-
77
-
78
-
79
-
80
-
 81
81 -
 82
82 -
 83
83 -
 84
84 -
 85
85 -
 86
86 -
 87
87 -
 88
88 -
 89
89 -
 90
90 -
 91
91 -
92
-
93
-
94
-
95
-
96
-
97
-
98
-
99
-
100
-
101
-
102
-
103
-
104
-
105
-
106
-
107
-
108
-
109
-
110
-
111
-
112
-
113
-
114
-
115
-
116
-
117
-
118
-
119
-
120
-
121
-
122
-
123
-
124
-
125
-
126
-
127
-
128
-
129
-
130
-
131
-
132
-
133
-
134
-
135
-
136
-
137
-
138
-
139
-
140
-
141
-
142
-
143
-
144
-
145
-
146
-
147
-
148
-
149
-
150
-
151
-
152
-
153
 |
 |