Brother International PC-420PRW Users Manual - English - Page 83
presser foot guide., Remove the basting stitching.
 |
View all Brother International PC-420PRW manuals
Add to My Manuals
Save this manual to your list of manuals |
Page 83 highlights
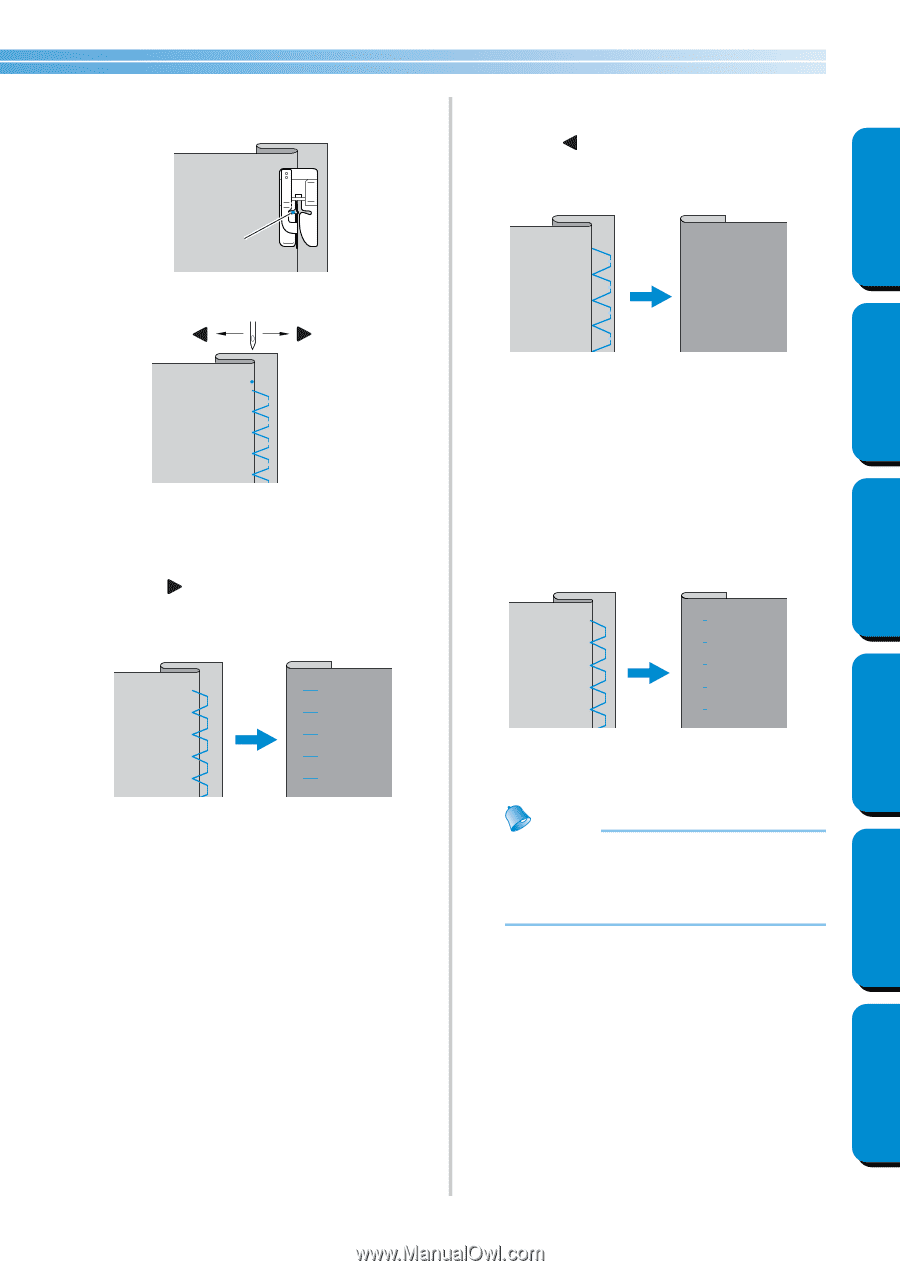
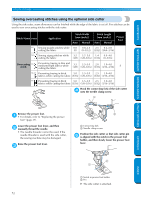
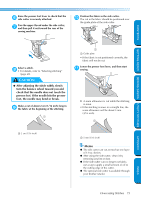
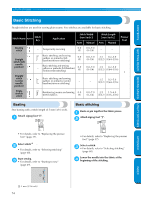
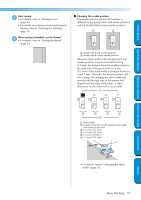
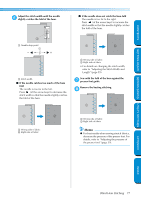
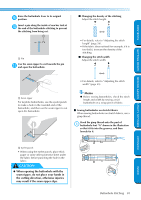
CONTENTS GETTING READY SEWING BASICS UTILITY STITCHES Adjust the stitch width until the needle 6 slightly catches the fold of the hem. R ■ If the needle does not catch the hem fold The needle is too far to the right. Press (of the arrow keys) to increase the stitch width so that the needle slightly catches the fold of the hem. 1 1 Needle drop point 1 - + 1 Stitch width ■ If the needle catches too much of the hem fold The needle is too far to the left. Press (of the arrow keys) to decrease the stitch width so that the needle slightly catches the fold of the hem. 1 2 1 Wrong side of fabric 2 Right side of fabric • For details on changing the stitch width, refer to "Adjusting the Stitch Width and Length" (page 55). Sew with the fold of the hem against the 7 presser foot guide. Remove the basting stitching. 8 1 2 1 2 1 Wrong side of fabric 2 Right side of fabric 1 Wrong side of fabric 2 Right side of fabric Memo ● For best results when sewing stretch fabrics, decrease the pressure of the presser foot. For details, refer to "Adjusting the pressure of the presser foot" (page 39). APPENDIX INDEX Blind Hem Stitching 77
-
 1
1 -
2
-
3
-
4
-
5
-
6
-
7
-
8
-
9
-
10
-
11
-
12
-
13
-
14
-
15
-
16
-
17
-
18
-
19
-
20
-
21
-
22
-
23
-
24
-
25
-
26
-
27
-
28
-
29
-
30
-
31
-
32
-
33
-
34
-
35
-
36
-
37
-
38
-
39
-
40
-
41
-
42
-
43
-
44
-
45
-
46
-
47
-
48
-
49
-
50
-
51
-
52
-
53
-
54
-
55
-
56
-
57
-
58
-
59
-
60
-
61
-
62
-
63
-
64
-
65
-
66
-
67
-
68
-
69
-
70
-
71
-
72
-
73
-
74
-
75
-
76
-
77
-
 78
78 -
 79
79 -
 80
80 -
 81
81 -
 82
82 -
 83
83 -
 84
84 -
 85
85 -
 86
86 -
 87
87 -
 88
88 -
89
-
90
-
91
-
92
-
93
-
94
-
95
-
96
-
97
-
98
-
99
-
100
-
101
-
102
-
103
-
104
-
105
-
106
-
107
-
108
-
109
-
110
-
111
-
112
-
113
-
114
-
115
-
116
-
117
-
118
-
119
-
120
-
121
-
122
-
123
-
124
-
125
-
126
-
127
-
128
-
129
-
130
-
131
-
132
-
133
-
134
-
135
-
136
-
137
-
138
-
139
-
140
-
141
-
142
-
143
-
144
-
145
-
146
-
147
-
148
-
149
-
150
-
151
-
152
-
153
 |
 |