Brother International PC-420PRW Users Manual - English - Page 57
Securing the stitching, on the foot controller.
 |
View all Brother International PC-420PRW manuals
Add to My Manuals
Save this manual to your list of manuals |
Page 57 highlights
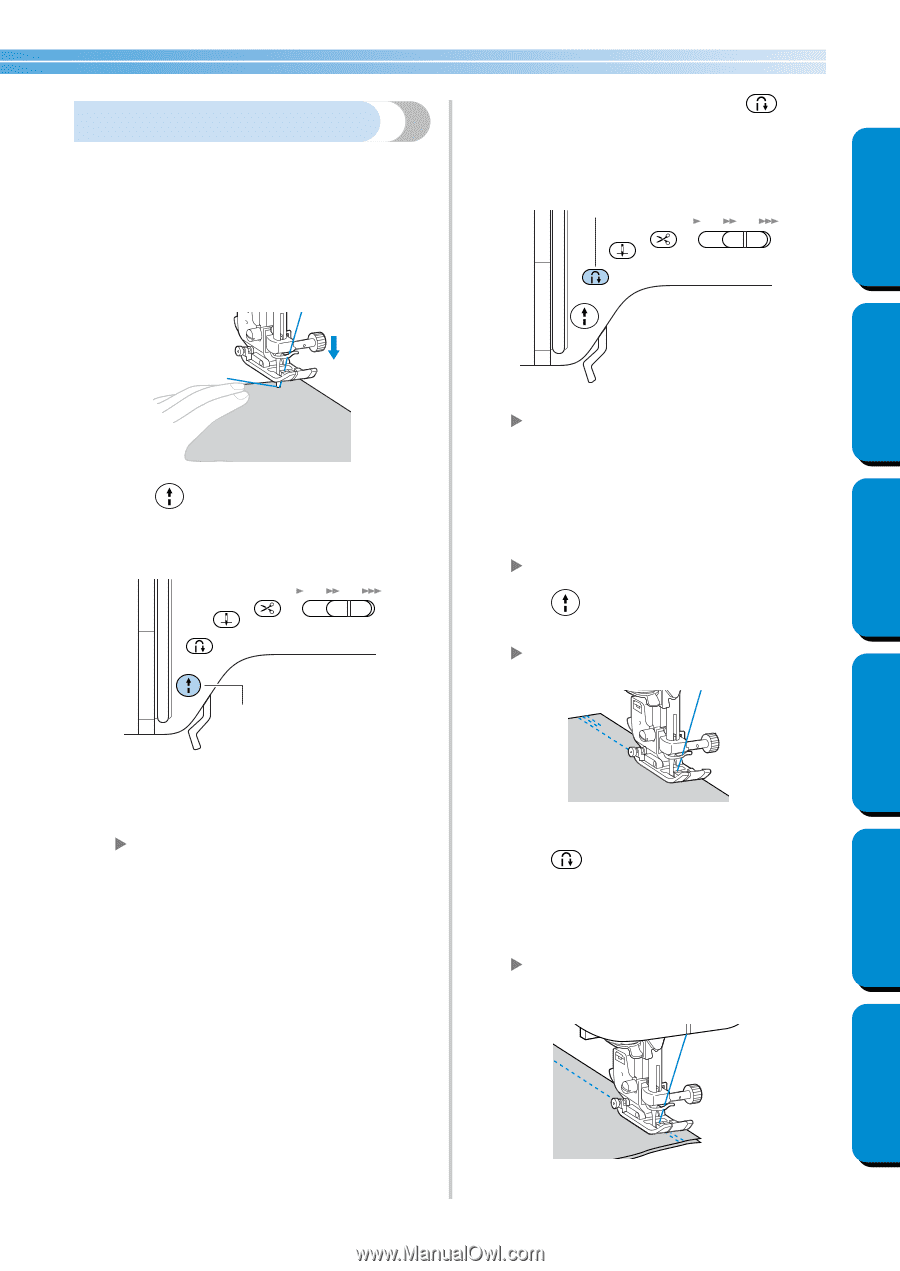
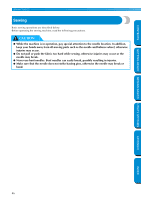
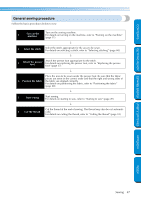
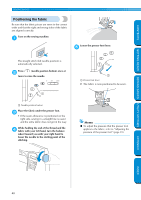
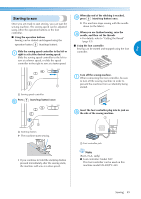
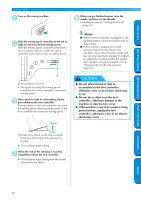
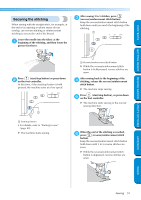
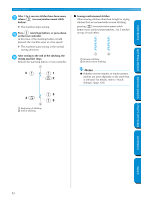
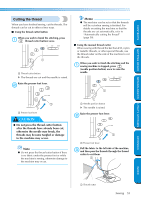
CONTENTS GETTING READY SEWING BASICS UTILITY STITCHES Securing the stitching When sewing with the straight stitch, for example, at the end of an opening or where seams do not overlap, use reverse stitching or reinforcement stitching to secure the end of the thread. Lower the needle into the fabric at the 1 beginning of the stitching, and then lower the presser foot lever. After sewing 3 to 5 stitches, press 3 (reverse/reinforcement stitch button). Keep the reverse/reinforcement stitch button held down until you reach the beginning of the stitching. 1 Press (start/stop button) or press down 2 on the foot controller. At this time, if the start/stop button is held pressed, the machine sews at a low speed. 1 1 Start/stop button • For details, refer to "Starting to sew" (page 49). X The machine starts sewing. 1 Reverse/reinforcement stitch button X While the reverse/reinforcement stitch button is held pressed, reverse stitches are sewn. After sewing back to the beginning of the 4 stitching, release the reverse/reinforcement stitch button. X The machine stops sewing. Press (start/stop button), or press down 5 on the foot controller. X The machine starts sewing in the normal sewing direction. When the end of the stitching is reached, 6 press (reverse/reinforcement stitch button). Keep the reverse/reinforcement stitch button held down until 3 to 5 reverse stitches are sewn. X While the reverse/reinforcement stitch button is depressed, reverse stitches are sewn. APPENDIX INDEX Sewing 51
-
 1
1 -
2
-
3
-
4
-
5
-
6
-
7
-
8
-
9
-
10
-
11
-
12
-
13
-
14
-
15
-
16
-
17
-
18
-
19
-
20
-
21
-
22
-
23
-
24
-
25
-
26
-
27
-
28
-
29
-
30
-
31
-
32
-
33
-
34
-
35
-
36
-
37
-
38
-
39
-
40
-
41
-
42
-
43
-
44
-
45
-
46
-
47
-
48
-
49
-
50
-
51
-
 52
52 -
 53
53 -
 54
54 -
 55
55 -
 56
56 -
 57
57 -
 58
58 -
 59
59 -
 60
60 -
 61
61 -
 62
62 -
63
-
64
-
65
-
66
-
67
-
68
-
69
-
70
-
71
-
72
-
73
-
74
-
75
-
76
-
77
-
78
-
79
-
80
-
81
-
82
-
83
-
84
-
85
-
86
-
87
-
88
-
89
-
90
-
91
-
92
-
93
-
94
-
95
-
96
-
97
-
98
-
99
-
100
-
101
-
102
-
103
-
104
-
105
-
106
-
107
-
108
-
109
-
110
-
111
-
112
-
113
-
114
-
115
-
116
-
117
-
118
-
119
-
120
-
121
-
122
-
123
-
124
-
125
-
126
-
127
-
128
-
129
-
130
-
131
-
132
-
133
-
134
-
135
-
136
-
137
-
138
-
139
-
140
-
141
-
142
-
143
-
144
-
145
-
146
-
147
-
148
-
149
-
150
-
151
-
152
-
153
 |
 |