Brother International IntelliFax-2840 Advanced Users Guide - English - Page 25
Electronic cover Composing your own comments, Send a cover for the next fax
 |
View all Brother International IntelliFax-2840 manuals
Add to My Manuals
Save this manual to your list of manuals |
Page 25 highlights
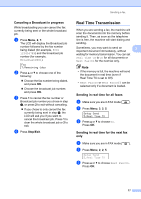
Sending a fax Electronic cover page 3 This feature will not work unless you have already programmed your Station ID. (See Quick Setup Guide: Set your Station ID.) You can automatically send a cover page with every fax. Your cover page includes your Station ID, a comment, and the name stored in the One Touch or Speed Dial memory. By choosing Next Fax:On you can also display the number of pages on the cover page. You can choose one of the following preset comments. 1.Comment Off 2.Please Call 3.Urgent 4.Confidential Instead of using one of the preset comments, you can enter two personal messages of your own, up to 27 characters long. See Basic User's Guide: Entering text. (See Composing your own comments uu page 19.) 5.(User Defined) 6.(User Defined) Note Next Fax:On or Next Fax:Off can be selected only if a document is loaded. Composing your own comments 3 You can set up two comments of your own. a Make sure you are in FAX mode . b Press Menu, 2, 2, 8. Setup Send 8.Coverpage Msg 3 c Press a or b to choose 5. or 6. to store your own comment. Press OK. d Enter your own comment using the dial pad. See Basic User's Guide: Entering text. Press OK. Send a cover page for the next fax 3 If you want to send a cover page only for the next fax, your machine will ask you to enter the number of pages you are sending so it can be printed on the cover page. a Make sure you are in FAX mode . b Load your document. c Press Menu, 2, 2, 7. Setup Send 7.Coverpg Setup d Press a or b to choose Next Fax:On (or Next Fax:Off). Press OK. e Press a or b to choose a comment. Press OK. f Enter two digits to show the number of pages you are sending. Press OK. For example, enter 0, 2 for 2 pages or 0, 0 to leave the number of pages blank. If you make a mistake, press d or Clear to back up and re-enter the number of pages. 19
-
 1
1 -
2
-
3
-
4
-
5
-
6
-
7
-
8
-
9
-
10
-
11
-
12
-
13
-
14
-
15
-
16
-
17
-
18
-
19
-
 20
20 -
 21
21 -
 22
22 -
 23
23 -
 24
24 -
 25
25 -
 26
26 -
 27
27 -
 28
28 -
 29
29 -
 30
30 -
31
-
32
-
33
-
34
-
35
-
36
-
37
-
38
-
39
-
40
-
41
-
42
-
43
-
44
-
45
-
46
-
47
-
48
-
49
-
50
-
51
-
52
-
53
-
54
-
55
-
56
-
57
-
58
-
59
-
60
-
61
-
62
-
63
-
64
-
65
-
66
-
67
-
68
-
69
-
70
-
71
-
72
 |
 |