Canon 3543B001AA ZR Instruction Manual - Page 16
Using the LCD Screen
 |
UPC - 013803108521
View all Canon 3543B001AA manuals
Add to My Manuals
Save this manual to your list of manuals |
Page 16 highlights
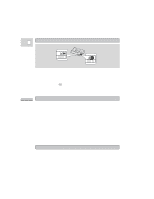
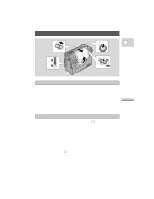
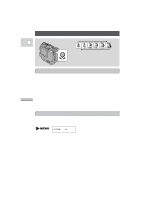
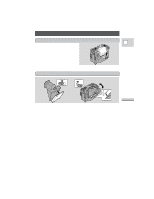
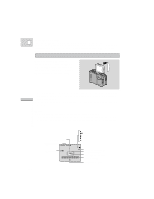
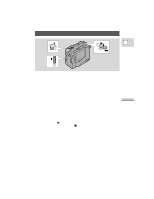
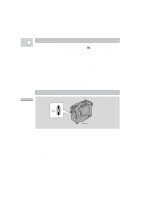
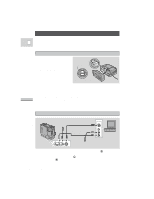
RELEASE Using the LCD Screen Changing the angle of the LCD screen You can choose the angle of the screen that suits you best by tilting it upwards and away from you. • You can use the screen for low and highangle recording. By lifting the screen up to face the opposite direction, you can also make recordings of yourself, or allow the subject to monitor recording (see p. 18). Attaching the FU-100 Finder Unit 1 3 RELEASE E 2 Mastering the Basics You can convert the LCD screen to a viewfinder by attaching the FU-100 Finder Unit. 1. Slide across the RELEASE switch and pull off the protective cap. 2. Attach the finder unit base-first and click the top into place. 3. To remove, slide and hold the RELEASE switch while gently pulling the unit off the LCD screen, from the top first. Notes: • Since the Finder Unit magnifies light, be careful not to leave it exposed to bright sunlight or it may damage the unit or the LCD screen when attached to the camera. You may be able to move the Finder Unit out of direct sunlight by changing the angle of the LCD screen. When not attached to the camera, always replace its protective cap, and never look through the Finder Unit directly at the sun or other bright light sources. • The Finder Unit comes complete with a case that you can attach to a belt or the camera strap (p. 60). • You can turn the viewfinder focusing wheel (to clearly see the display) to suit your eyesight. • Avoid touching the LCD screen or the mirror inside the Finder Unit. • Do not hold the camcorder by the LCD panel. • Bright light falling on the LCD screen may cause glare that makes it difficult for you to view the image. In this case, attach the finder unit. You are also able to adjust the brightness/backlight of the screen (p. 65). 17
-
 1
1 -
2
-
3
-
4
-
5
-
6
-
7
-
8
-
9
-
10
-
 11
11 -
 12
12 -
 13
13 -
 14
14 -
 15
15 -
 16
16 -
 17
17 -
 18
18 -
 19
19 -
 20
20 -
 21
21 -
22
-
23
-
24
-
25
-
26
-
27
-
28
-
29
-
30
-
31
-
32
-
33
-
34
-
35
-
36
-
37
-
38
-
39
-
40
-
41
-
42
-
43
-
44
-
45
-
46
-
47
-
48
-
49
-
50
-
51
-
52
-
53
-
54
-
55
-
56
-
57
-
58
-
59
-
60
-
61
-
62
-
63
-
64
-
65
-
66
-
67
-
68
-
69
-
70
-
71
-
72
-
73
-
74
-
75
-
76
-
77
-
78
-
79
-
80
-
81
-
82
-
83
-
84
-
85
 |
 |
