Canon FS10 FS10/FS11/FS100 Instruction Manual - Page 32
Video, Basic Recording, Shooting Video
 |
UPC - 013803092523
View all Canon FS10 manuals
Add to My Manuals
Save this manual to your list of manuals |
Page 32 highlights
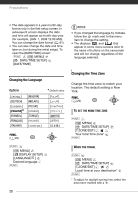
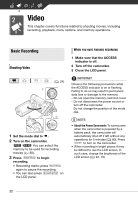
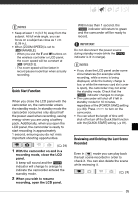
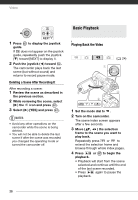
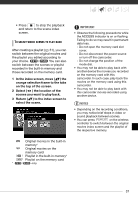
Video This chapter covers functions related to shooting movies, including recording, playback, menu options, and memory operations. Basic Recording Shooting Video ( 24) 1 Set the mode dial to . 2 Turn on the camcorder. / You can select the memory to be used for recording movies ( 30). 3 Press Start/Stop to begin recording. • Recording starts; press Start/Stop again to pause the recording. • You can also press START/STOP on the LCD panel. WHEN YOU HAVE FINISHED RECORDING 1 Make sure that the ACCESS indicator is off. 2 Turn off the camcorder. 3 Close the LCD panel. IMPORTANT Observe the following precautions while the ACCESS indicator is on or flashing. Failing to do so may result in permanent data loss or damage to the memory. - Do not open the memory card slot cover. - Do not disconnect the power source or turn off the camcorder. - Do not change the position of the mode dial. NOTES • About the Power Save mode: To save power when the camcorder is powered by a battery pack, the camcorder will automatically shut off if left without any operations for 5 minutes ( 80). Press ON/OFF to turn on the camcorder. • When recording in bright places it may be difficult to use the LCD screen. In such case, change the brightness of the LCD screen ( 22, 79). 32
-
 1
1 -
2
-
3
-
4
-
5
-
6
-
7
-
8
-
9
-
10
-
11
-
12
-
13
-
14
-
15
-
16
-
17
-
18
-
19
-
20
-
21
-
22
-
23
-
24
-
25
-
26
-
 27
27 -
 28
28 -
 29
29 -
 30
30 -
 31
31 -
 32
32 -
 33
33 -
 34
34 -
 35
35 -
 36
36 -
 37
37 -
38
-
39
-
40
-
41
-
42
-
43
-
44
-
45
-
46
-
47
-
48
-
49
-
50
-
51
-
52
-
53
-
54
-
55
-
56
-
57
-
58
-
59
-
60
-
61
-
62
-
63
-
64
-
65
-
66
-
67
-
68
-
69
-
70
-
71
-
72
-
73
-
74
-
75
-
76
-
77
-
78
-
79
-
80
-
81
-
82
-
83
-
84
-
85
-
86
-
87
-
88
-
89
-
90
-
91
-
92
-
93
-
94
-
95
-
96
-
97
-
98
-
99
-
100
-
101
-
102
-
103
-
104
-
105
-
106
-
107
-
108
-
109
-
110
 |
 |