Canon PowerShot SX160 IS User Guide - Page 116
View the filtered images., > dial.
 |
View all Canon PowerShot SX160 IS manuals
Add to My Manuals
Save this manual to your list of manuals |
Page 116 highlights
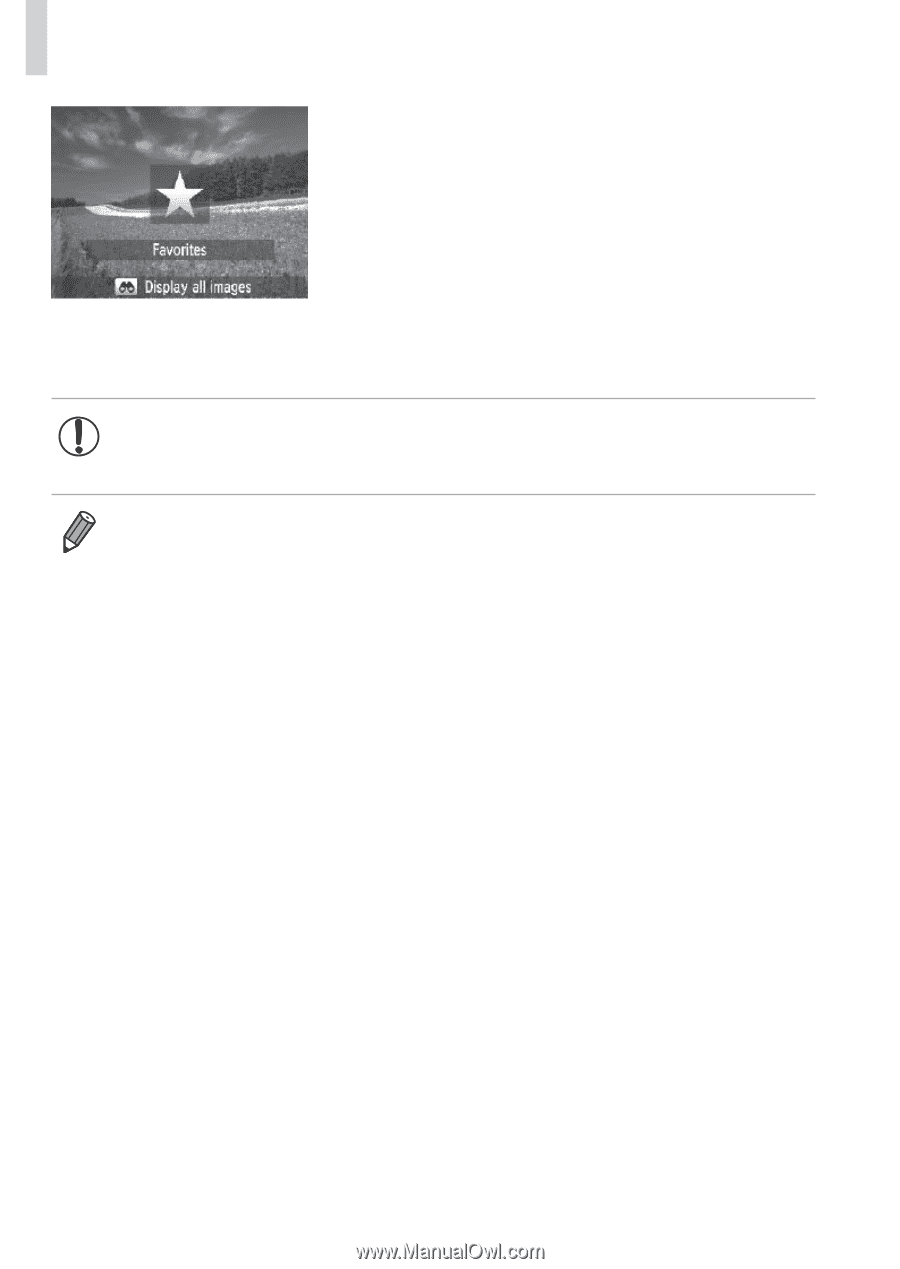
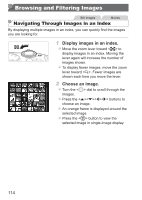
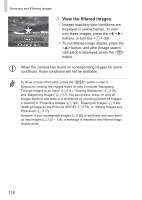
Browsing and Filtering Images 3 View the filtered images. zzImages matching your conditions are displayed in yellow frames. To view only these images, press the buttons, or turn the dial. zzTo exit filtered image display, press the button, and after [Image search canceled] is displayed, press the button. • When the camera has found no corresponding images for some conditions, those conditions will not be available. • To show or hide information, press the button in step 2. • Options for viewing the images found (in step 3) include "Navigating Through Images in an Index" (=114), "Viewing Slideshows" (=118), and "Magnifying Images" (=117). You can protect, erase, or print all images found or add them to a photobook by choosing [Select All Images in Search] in "Protecting Images" (=120), "Erasing All Images" (=124), "Adding Images to the Print List (DPOF)" (=173), or "Adding Images to a Photobook" (=177). • However, if you recategorize images (=130) or edit them and save them as new images (=133 - 138), a message is displayed and filtered image display ends. 116
-
 1
1 -
2
-
3
-
4
-
5
-
6
-
7
-
8
-
9
-
10
-
11
-
12
-
13
-
14
-
15
-
16
-
17
-
18
-
19
-
20
-
21
-
22
-
23
-
24
-
25
-
26
-
27
-
28
-
29
-
30
-
31
-
32
-
33
-
34
-
35
-
36
-
37
-
38
-
39
-
40
-
41
-
42
-
43
-
44
-
45
-
46
-
47
-
48
-
49
-
50
-
51
-
52
-
53
-
54
-
55
-
56
-
57
-
58
-
59
-
60
-
61
-
62
-
63
-
64
-
65
-
66
-
67
-
68
-
69
-
70
-
71
-
72
-
73
-
74
-
75
-
76
-
77
-
78
-
79
-
80
-
81
-
82
-
83
-
84
-
85
-
86
-
87
-
88
-
89
-
90
-
91
-
92
-
93
-
94
-
95
-
96
-
97
-
98
-
99
-
100
-
101
-
102
-
103
-
104
-
105
-
106
-
107
-
108
-
109
-
110
-
 111
111 -
 112
112 -
 113
113 -
 114
114 -
 115
115 -
 116
116 -
 117
117 -
 118
118 -
 119
119 -
 120
120 -
 121
121 -
122
-
123
-
124
-
125
-
126
-
127
-
128
-
129
-
130
-
131
-
132
-
133
-
134
-
135
-
136
-
137
-
138
-
139
-
140
-
141
-
142
-
143
-
144
-
145
-
146
-
147
-
148
-
149
-
150
-
151
-
152
-
153
-
154
-
155
-
156
-
157
-
158
-
159
-
160
-
161
-
162
-
163
-
164
-
165
-
166
-
167
-
168
-
169
-
170
-
171
-
172
-
173
-
174
-
175
-
176
-
177
-
178
-
179
-
180
-
181
-
182
-
183
-
184
-
185
-
186
-
187
-
188
-
189
-
190
-
191
-
192
-
193
-
194
-
195
-
196
-
197
-
198
-
199
-
200
-
201
-
202
-
203
-
204
-
205
-
206
-
207
-
208
-
209
-
210
-
211
-
212
-
213
-
214
 |
 |