Cisco SPA502G User Guide - Page 55
Back to List, Text for Email - quick start guide
 |
View all Cisco SPA502G manuals
Add to My Manuals
Save this manual to your list of manuals |
Page 55 highlights
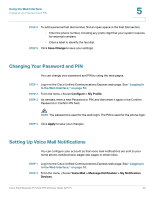
Using the Web Interface Setting Up Voice Mail Notifications 5 STEP 3 Optionally, in the Cascading Settings section, enter system notifications. If this feature is enabled by your phone system administrator, you can choose up to two internal extensions to be notified if you do not retrieve a new message within the specified number of minutes. • Enter the number of minutes in the After box. • Click the magnifying glass icon to choose an internal extension to be notified. STEP 4 In the Notification Devices section, click the hyperlink for the type of device that you want to receive notifications of new messages. Then enter the following information: • Enable notification to this device: Check the check box to enable the phone system to send a notification to this device. • Phone Number: Enter the phone number, including any prefix digit that your system requires for an outgoing call. • To (Email Address), Text for Email: These fields appear if you chose Email Inbox as the device type. Type the email address. Enter the text to appear in the message. • Notification Preferences: Choose either Urgent Messages or All Messages. If you choose Urgent Messages, you receive a notification only if a message is marked "urgent" by the sender. • Notification Schedule: Under Quick Add, select the Day, Start Time, and End Time when notifications will be sent. Then click Add to add the specified time period to the grid. Continue adding other time periods, as needed. To make adjustments, you can check or uncheck the check boxes in the grid. STEP 5 Click Apply to save your settings, and then click Back to List to return to the list. STEP 6 Set up additional notification devices, as needed. Cisco Small Business IP Phone SPA 50X User Guide (SPCP) 54
-
 1
1 -
2
-
3
-
4
-
5
-
6
-
7
-
8
-
9
-
10
-
11
-
12
-
13
-
14
-
15
-
16
-
17
-
18
-
19
-
20
-
21
-
22
-
23
-
24
-
25
-
26
-
27
-
28
-
29
-
30
-
31
-
32
-
33
-
34
-
35
-
36
-
37
-
38
-
39
-
40
-
41
-
42
-
43
-
44
-
45
-
46
-
47
-
48
-
49
-
 50
50 -
 51
51 -
 52
52 -
 53
53 -
 54
54 -
 55
55 -
 56
56 -
 57
57 -
 58
58 -
 59
59 -
 60
60 -
61
-
62
-
63
-
64
-
65
-
66
-
67
 |
 |