Compaq Evo n1050v Service Manual - Page 110
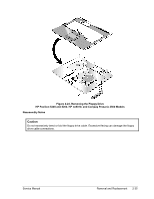
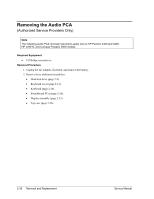
Removing the Audio PCA, Reassembly Note, Remove the audio PCA.
 |
View all Compaq Evo n1050v manuals
Add to My Manuals
Save this manual to your list of manuals |
Page 110 highlights
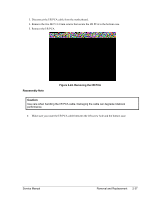
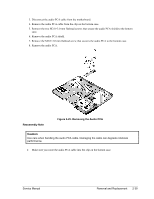
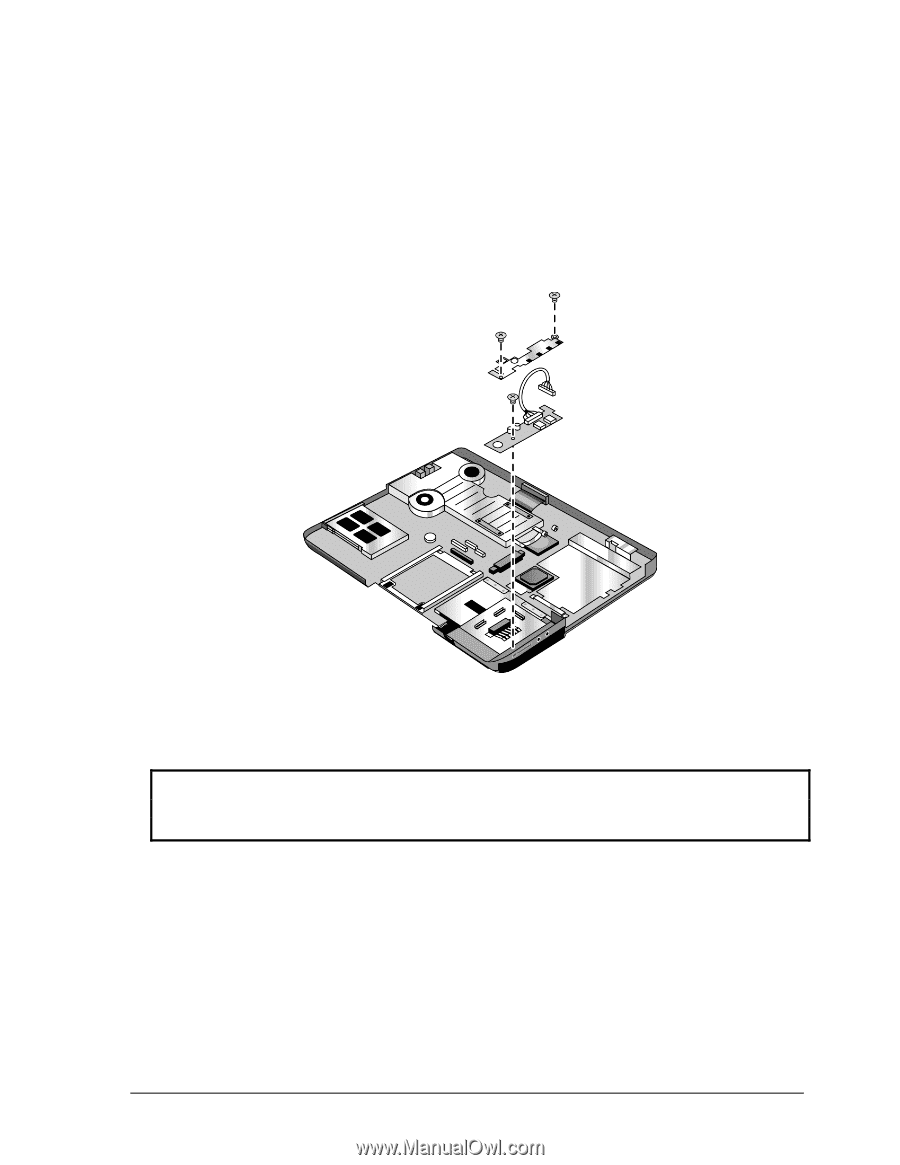
3. Disconnect the audio PCA cable from the motherboard. 4. Remove the audio PCA cable from the clip on the bottom case. 5. Remove the two M2.0×3.0 mm flathead screws that secure the audio PCA shield to the bottom case. 6. Remove the audio PCA shield. 7. Remove the M2.0×3.0 mm flathead screw that secures the audio PCA to the bottom case. 8. Remove the audio PCA. Reassembly Note Figure 2-25. Removing the Audio PCA Caution Use care when handling the audio PCA cable. Damaging the cable can degrade notebook performance. • Make sure you route the audio PCA cable into the clip on the bottom case. Service Manual Removal and Replacement 2-39
-
 1
1 -
2
-
3
-
4
-
5
-
6
-
7
-
8
-
9
-
10
-
11
-
12
-
13
-
14
-
15
-
16
-
17
-
18
-
19
-
20
-
21
-
22
-
23
-
24
-
25
-
26
-
27
-
28
-
29
-
30
-
31
-
32
-
33
-
34
-
35
-
36
-
37
-
38
-
39
-
40
-
41
-
42
-
43
-
44
-
45
-
46
-
47
-
48
-
49
-
50
-
51
-
52
-
53
-
54
-
55
-
56
-
57
-
58
-
59
-
60
-
61
-
62
-
63
-
64
-
65
-
66
-
67
-
68
-
69
-
70
-
71
-
72
-
73
-
74
-
75
-
76
-
77
-
78
-
79
-
80
-
81
-
82
-
83
-
84
-
85
-
86
-
87
-
88
-
89
-
90
-
91
-
92
-
93
-
94
-
95
-
96
-
97
-
98
-
99
-
100
-
101
-
102
-
103
-
104
-
 105
105 -
 106
106 -
 107
107 -
 108
108 -
 109
109 -
 110
110 -
 111
111 -
 112
112 -
 113
113 -
 114
114 -
 115
115 -
116
-
117
-
118
-
119
-
120
-
121
-
122
-
123
-
124
-
125
-
126
-
127
-
128
-
129
-
130
-
131
-
132
-
133
-
134
-
135
-
136
-
137
-
138
-
139
-
140
-
141
-
142
-
143
-
144
-
145
-
146
-
147
-
148
-
149
-
150
-
151
-
152
-
153
-
154
-
155
-
156
-
157
-
158
-
159
-
160
-
161
-
162
-
163
-
164
-
165
-
166
-
167
-
168
-
169
-
170
-
171
-
172
-
173
-
174
-
175
-
176
-
177
-
178
-
179
-
180
-
181
-
182
-
183
-
184
-
185
-
186
-
187
-
188
 |
 |
3.
4.
5.
6.
7.
8.
Disconnect the audio PCA cable from the motherboard.
Remove the audio PCA cable from the clip on the bottom case.
Remove the two M2.0µ3.0 mm flathead screws that secure the audio PCA shield to the bottom
case.
Remove the audio PCA shield.
Remove the M2.0µ3.0 mm flathead screw that secures the audio PCA to the bottom case.
Remove the audio PCA.
Figure 2-25. Removing the Audio PCA
Reassembly Note
Caution
Use care when handling the audio PCA cable. Damaging the cable can degrade notebook
performance.
•
Make sure you route the audio PCA cable into the clip on the bottom case.
Service Manual
Removal and Replacement
2-39