Compaq Evo n1050v Service Manual - Page 81
Recovering the Factory Software, Removing the Hard Disk Drive Tray
 |
View all Compaq Evo n1050v manuals
Add to My Manuals
Save this manual to your list of manuals |
Page 81 highlights
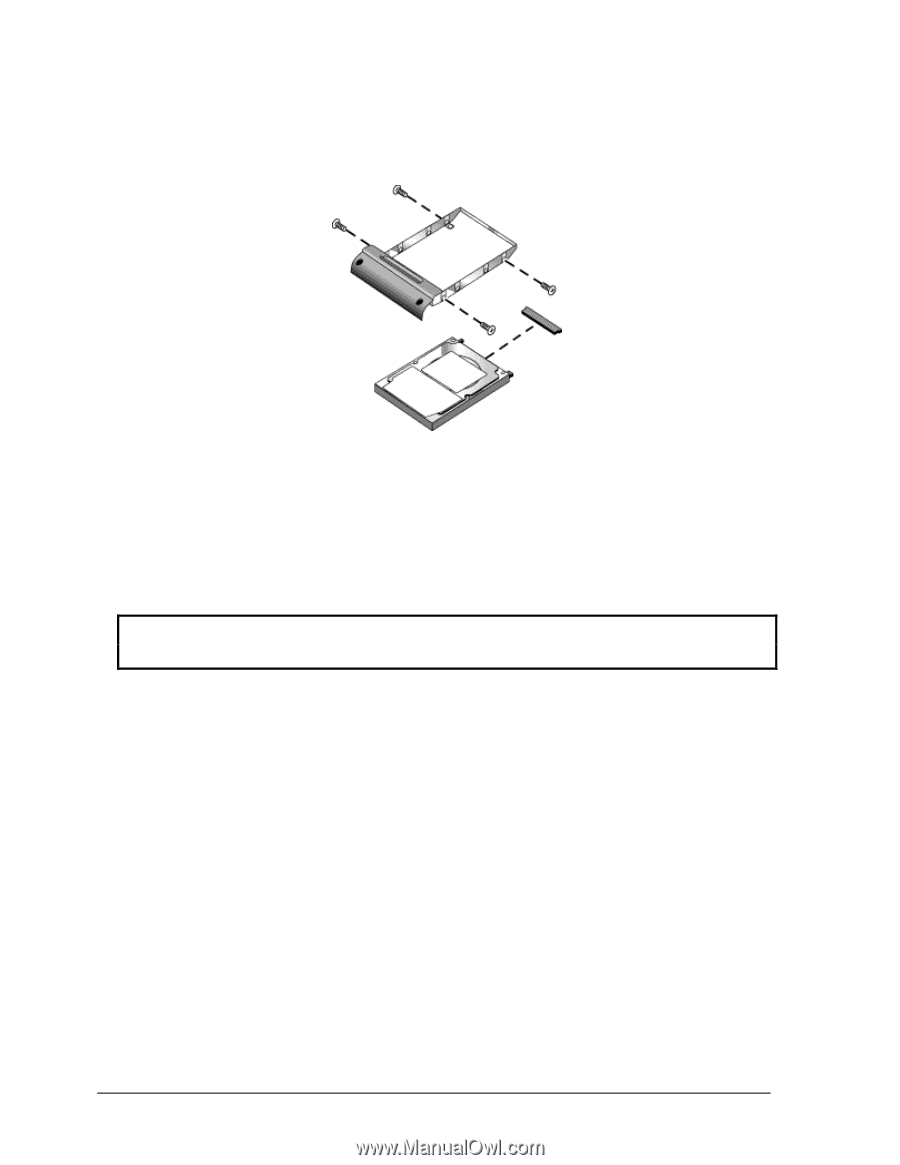
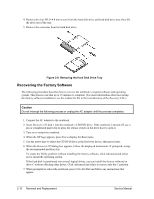
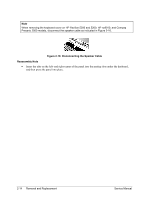
4. Remove the four M3.0×4.0 mm screws from the hard disk drive and hard disk drive tray, then lift the drive out of the tray. 5. Remove the connector from the hard disk drive. Figure 2-8. Removing the Hard Disk Drive Tray Recovering the Factory Software The following procedure describes how to recover the notebook's original software and operating system. This process can take up to 15 minutes to complete. (For more information about recovering the factory software installation, see the readme.txt file in the root directory of the Recovery CDs.) Caution Do not interrupt the following process or unplug the AC adapter until the process completes. 1. Connect the AC adapter to the notebook. 2. Insert Recovery CD disk 1 into the notebook's CD/DVD drive. If the notebook is turned off, use a pin or straightened paper clip to press the release switch on the drive door to open it. 3. Turn on or restart the notebook. 4. When the HP logo appears, press Esc to display the Boot menu. 5. Use the arrow keys to select the CD/DVD drive as the first boot device, then press Enter. 6. When the Recovery CD dialog box appears, follow the displayed instructions. If prompted, accept the recommended partition size. To create the Utility partition without installing the factory software, click Advanced and select not to install the operating system. If the hard disk is partitioned into several logical drives, you can install the factory software on drive C without affecting other drives. Click Advanced and select to restore only the C partition. 7. When prompted to reboot the notebook, press Ctrl+Alt+Del and follow any instructions that appear. 2-10 Removal and Replacement Service Manual
-
 1
1 -
2
-
3
-
4
-
5
-
6
-
7
-
8
-
9
-
10
-
11
-
12
-
13
-
14
-
15
-
16
-
17
-
18
-
19
-
20
-
21
-
22
-
23
-
24
-
25
-
26
-
27
-
28
-
29
-
30
-
31
-
32
-
33
-
34
-
35
-
36
-
37
-
38
-
39
-
40
-
41
-
42
-
43
-
44
-
45
-
46
-
47
-
48
-
49
-
50
-
51
-
52
-
53
-
54
-
55
-
56
-
57
-
58
-
59
-
60
-
61
-
62
-
63
-
64
-
65
-
66
-
67
-
68
-
69
-
70
-
71
-
72
-
73
-
74
-
75
-
 76
76 -
 77
77 -
 78
78 -
 79
79 -
 80
80 -
 81
81 -
 82
82 -
 83
83 -
 84
84 -
 85
85 -
 86
86 -
87
-
88
-
89
-
90
-
91
-
92
-
93
-
94
-
95
-
96
-
97
-
98
-
99
-
100
-
101
-
102
-
103
-
104
-
105
-
106
-
107
-
108
-
109
-
110
-
111
-
112
-
113
-
114
-
115
-
116
-
117
-
118
-
119
-
120
-
121
-
122
-
123
-
124
-
125
-
126
-
127
-
128
-
129
-
130
-
131
-
132
-
133
-
134
-
135
-
136
-
137
-
138
-
139
-
140
-
141
-
142
-
143
-
144
-
145
-
146
-
147
-
148
-
149
-
150
-
151
-
152
-
153
-
154
-
155
-
156
-
157
-
158
-
159
-
160
-
161
-
162
-
163
-
164
-
165
-
166
-
167
-
168
-
169
-
170
-
171
-
172
-
173
-
174
-
175
-
176
-
177
-
178
-
179
-
180
-
181
-
182
-
183
-
184
-
185
-
186
-
187
-
188
 |
 |