Compaq Evo n1050v Service Manual - Page 132
Repairing the BIOS IC - bios password
 |
View all Compaq Evo n1050v manuals
Add to My Manuals
Save this manual to your list of manuals |
Page 132 highlights
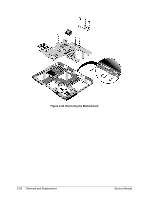
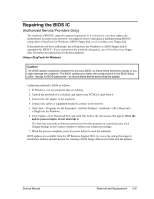
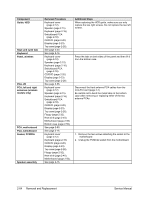
Repairing the BIOS IC (Authorized Service Providers Only) The notebook's BIOS IC cannot be replaced separately. If it is defective, you must replace the motherboard. In some cases, however, you might be able to reprogram a malfunctioning BIOS IC using either e-DiagTools for Windows, a BIOS floppy disk, or a Crisis Recovery floppy disk. If the notebook will boot sufficiently, use e-DiagTools for Windows or a BIOS floppy disk to reprogram the BIOS IC. If you cannot boot the notebook adequately, use a Crisis Recovery floppy disk. See below for instructions for all three methods. Using e-DiagTools for Windows Caution The BIOS update completely replaces the previous BIOS, so follow these directions exactly or you might damage the notebook. The BIOS update also resets the configurations in the BIOS Setup utility-except for BIOS passwords-so record these before performing the update. Update the notebook's BIOS as follows: 1. In Windows, exit any programs that are running. 2. Undock the notebook if it is docked, and remove any PCMCIA cards from it. 3. Connect the AC adapter to the notebook. 4. Connect any cables or equipment needed to connect to the Internet. 5. Click Start > Programs (or All Programs) > Hewlett-Packard > Notebook > HP e-DiagTools > e-DiagTools for Windows. 6. Click Update, select Download New and click OK. Follow the instructions that appear. Once the update process begins, do not interrupt it. The first time you make an Internet connection from this program on a particular unit, click Change Settings in the Connect window to define your connection settings. 7. When the process completes, press the power button to reset the notebook. BIOS updates are available from the HP Business Support Web site (www.hp.com/go/bizsupport). Installation utilities and instructions for creating a BIOS floppy disk are provided with the updates. Service Manual Removal and Replacement 2-61
-
 1
1 -
2
-
3
-
4
-
5
-
6
-
7
-
8
-
9
-
10
-
11
-
12
-
13
-
14
-
15
-
16
-
17
-
18
-
19
-
20
-
21
-
22
-
23
-
24
-
25
-
26
-
27
-
28
-
29
-
30
-
31
-
32
-
33
-
34
-
35
-
36
-
37
-
38
-
39
-
40
-
41
-
42
-
43
-
44
-
45
-
46
-
47
-
48
-
49
-
50
-
51
-
52
-
53
-
54
-
55
-
56
-
57
-
58
-
59
-
60
-
61
-
62
-
63
-
64
-
65
-
66
-
67
-
68
-
69
-
70
-
71
-
72
-
73
-
74
-
75
-
76
-
77
-
78
-
79
-
80
-
81
-
82
-
83
-
84
-
85
-
86
-
87
-
88
-
89
-
90
-
91
-
92
-
93
-
94
-
95
-
96
-
97
-
98
-
99
-
100
-
101
-
102
-
103
-
104
-
105
-
106
-
107
-
108
-
109
-
110
-
111
-
112
-
113
-
114
-
115
-
116
-
117
-
118
-
119
-
120
-
121
-
122
-
123
-
124
-
125
-
126
-
 127
127 -
 128
128 -
 129
129 -
 130
130 -
 131
131 -
 132
132 -
 133
133 -
 134
134 -
 135
135 -
 136
136 -
 137
137 -
138
-
139
-
140
-
141
-
142
-
143
-
144
-
145
-
146
-
147
-
148
-
149
-
150
-
151
-
152
-
153
-
154
-
155
-
156
-
157
-
158
-
159
-
160
-
161
-
162
-
163
-
164
-
165
-
166
-
167
-
168
-
169
-
170
-
171
-
172
-
173
-
174
-
175
-
176
-
177
-
178
-
179
-
180
-
181
-
182
-
183
-
184
-
185
-
186
-
187
-
188
 |
 |