Craftsman 21829 Operation Manual
Craftsman 21829 - Professional 10 in. Portable Table Saw Manual
 |
View all Craftsman 21829 manuals
Add to My Manuals
Save this manual to your list of manuals |
Craftsman 21829 manual content summary:
- Craftsman 21829 | Operation Manual - Page 1
's Manual 10 in. TABLE SAW Model No, 315.218290 _k WARNING: To reduce the risk of injury,the user must read and understandthe operator's manual before using this product. Customer Help Line: 1-800-932-3188 Seam, Roebuck and Co., 3333 BeverPy Rd., Hoffman Estates, IL 60179 USA Visit the Craftsman web - Craftsman 21829 | Operation Manual - Page 2
...g Features...10-13 Tools Needed ...13 Loose Parts ...14-15 Assembly...16-22 Operation...22-39 Adjustments ...40-44" Maintenance...45 Accessories...46 Troubleshooting...46-47 Exploded View ...4-8-57 Parts Ordering/Service...Back Page ONE YEAR FULL WARRANTY ON CRAFTSMAN TOOL If this Craftsman tool - Craftsman 21829 | Operation Manual - Page 3
injury. READ ALL iNSTRUCTIONS • KNOW YOUR POWER TOOL. Read the operator's manual carefully.Learn the saw's applicationsand Iimftatioansswet[ its oparatien. A guard or o_er part _at is damaged must be properlyrepairedor replaced by _.nau'thofized service centerto avoid risk of personal ir_u_ • - Craftsman 21829 | Operation Manual - Page 4
. • WHEN SERVICING use only identica]replacement parts. Use of any other parts may create a hazard or cause product damage. • USE ONLY RECOMMENDED ACCESSORIES listed in this manual or addendums. Use of accessories that are not listed may cause the risk of personal injury. Instructions for safe use - Craftsman 21829 | Operation Manual - Page 5
any operation =freehand" which means using onlyyour hands to support or guide the workplace. AJwaysuse either the rip fence or miter fence to positionand guide the work. • NEVER stand or have any part of your body in line with the path of the saw blade. • NEVER reach behind, over,or within three - Craftsman 21829 | Operation Manual - Page 6
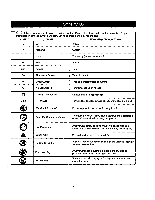
Do not expose to rain or use in damp locations. Read The Operator's Manual Toopereradtuocre'stmheanriusakl obfeifnojrueruys,uisnegrthmiusspt rroedaudcat,nd understand O Eye Protection Sa_e_ Alert Ashlwiealdyss wanedarasfauflleftaycgeogshgilelsdowrhseanfeotpyegr_aLtiqnsgetshwisithpraoiddeuct - Craftsman 21829 | Operation Manual - Page 7
When servicing, use on}yidenticalreplacement parts. _k WARNING" To avoid serious personal injury,do not attempt to use this product until you read,thoroughty and understand completely the operator's manual. Save this operator'smanual and review h'equentty for continuingsafe oparat_oannd instructing - Craftsman 21829 | Operation Manual - Page 8
in an extension cord. Only round jacketed cords listed by Underwriters Laboratories(UL)should be used. • "Ampere rel,ing(on tool dab= plate) 0-2.0 2.1-3.4 3.5-5.0 5.1-7.0 7.1-12.0 Cord Length 25' "_6 Wire Size (A.W.G.) 16 "_6 t6 14 50' 16 16 16 14 14 100' 1'6 1'6 1'4 1'2 10 12 - Craftsman 21829 | Operation Manual - Page 9
help centre] the workpless by guidingit securelyagainst the table or fence duringany ripping operation. FPM or $PM Feetperminute(orstrokesperminute)u,sedinreference toblademovement. Freehand Performinga cut without the workpiece being guided by a fence, miter gauge, or other aide. Gum A stick'34s,ap - Craftsman 21829 | Operation Manual - Page 10
, Cutting Depth at 0 3-9116 in, Cutting Depth at 45 2-1/2 in, • AHTI-KICK)BACI[ PAWI.S SI.IOING MITER TABLE GUARD/DUST COVERWITH PIVOTASSEMBLY BLADE GUARD ACCESSORY TABLE RIPFENCE FRONT RAIL STORAGE DRACI_T(S} BEVEL INDICATOR SCALE ALIGN-A-CUT INSERT LOCKING HANDLE HEIGHT/BEVEL ADJUSTING - Craftsman 21829 | Operation Manual - Page 11
the grooves on the accessory table. MOTOR - The powerful inductionmotor,with capacitor start and V-belt drive, is housed in a sturdysteel base. RA]L_ - Front end rear railsprovide support for large workpiecas and the rip fence. RIP FENCE - A sturdy metal fence guidesthe workplace and is securedwith - Craftsman 21829 | Operation Manual - Page 12
an insertcalled the throat prate.The height of the blade is sat with a handwhsel on the front of the cabinet. To accommodate wide panels, the saw table has rails on each side. Detailed instructions are provided in the Opera,on section of this rnanualfor the basic cuts: crosscuts, miter cuts, bevel - Craftsman 21829 | Operation Manual - Page 13
BLADES Formaximum performance, it is recommendedthat you use the Craftsman 36-tooth, 10 in. carbide combination blade provided with your saw. Additionalblade stylesof the same high quality are availablefor specific operations such as ripping.Your local dealer can provideyou with complete information - Craftsman 21829 | Operation Manual - Page 14
your table saw: G Fig. 5 i A. Sliding MiterTable ...1 B. Miter Fance with AdjustingClamp ...1 C. Miter Gauge ...1 D. Hex Key (1/8 In., 3/16 in., 2/32 (n., 5/32 In.)...4 E. Large Btada Wrench ...1 E Small B[adeWrench ...G. AccessoryTable ...1 H. I_vel Hartdle Assembly...1 I. Rip Fence ...1 J. Blade - Craftsman 21829 | Operation Manual - Page 15
your table saw: @ D F d A. Guide Fence w_thGuide Block 2 B. Flat Washer (1/4 in. x 16 4 C. Knob Bolt (1/2 In 4 D. Table Clamping Bracket 1 E. Washer(5/16 in 1 F. Knob Bolt (3/4 in 1 G. Throat Prate (1 in 1 H. Throat Plate (1-1/2 in 1 I. Throat Prate(2 its 1 Fig. 6 J. Throat PLate - Craftsman 21829 | Operation Manual - Page 16
the center brace lockingthe leg stand in an upright poslton. GRIPS SAW BASE _1= WARNING: Do not attempt to modify this tool or create accessories not recommendedfor use with this tool. Any such aiteratlonor modification is misuse and could resultin a hazardous condition leading to possible se_oL - Craftsman 21829 | Operation Manual - Page 17
S'fORE THE TABLE SAW ACCESSORIES See Figures 10. - 11 The table saw has two convenientstorage areas specifically designed for the saw's accessories. These accessories must be sooure_ystored priorto closing the leg stand and moving the saw. The rip fence, miter fence, and miter gauge shouldbe stored - Craftsman 21829 | Operation Manual - Page 18
TO IN_rALL BEVEL HANDLE ASSEMBLY See F-t_re 12. • Lift the end rap offthe bevel handle assembly usinga fiat b|ade screwdriver, • Hold the nylonnut securelyand turn the screw counterclockwise toremove thenutcompletely. NOTE: Do not remove the screw from the handle or the washer from the end of the - Craftsman 21829 | Operation Manual - Page 19
or attempt to move the table saw untilboth the above steps are complsted. TO REMOVE / REPLACE THE THROAT PLATE ,..%eFigure 1.7, • Raise the blade 2 in. above the saw table. • Loosen tha screws in the throat prate. • Liftthe throat plate from the saw, • To reinstallthe threat plate, af(gn the holes - Craftsman 21829 | Operation Manual - Page 20
. • Remove the miter fence from the miter fence storage on the side of the saw cabinet. • To install the miter fence to the slidingmiter table, Icesen the adjusting clamp knobso the bolt hasenough olsaranoa to slide _nthe table slot, LOCKINGCLAMPS LARGE WBRLEANDCEH THROAT PLATE SMALL REAR RAIL - Craftsman 21829 | Operation Manual - Page 21
operatorto elide the workplsce across the saw, A miter slide lock is mounted on the front of the miter table to lock it in place. The miter slide lock is placed in a slot on the base to align the miter tabla with the h'ont edge of the saw table. The sliding miter table shouldbe locked for any cut in - Craftsman 21829 | Operation Manual - Page 22
below:. • Straight line cutting operationssuch as cross cutting, r_pping,mitering,beveling, and compound cutting • Dado or molding outs with optional accessories • Cabinet making and woodworking NOl'F.: This table saw Jsdesigned to cut wood and wood compoe_i_nl:_mdu_sonly, BASIC OPERATION OF - Craftsman 21829 | Operation Manual - Page 23
. • Inspect the work for knots or nailsbefore beginninga cut KnocY,out any loose knots w_tha hamme_'N. ever saw into a loose knot or na|(. • Always use the rip fence when rip cutting and the miter gauge when cross cutting.This helps preventtwisting the wood in the cut. • Always use cLsans, harp, and - Craftsman 21829 | Operation Manual - Page 24
bevel rip Gutsare with the grain.The rip fence must always be on the left side of the blade for bevel rip cuts. Compound (or bevel} miter cuts rip cuts, bevel cuts, and miter cuts beforetrying a compound miter cuL CUTTING TIPS Dado and rabbet cuts are non-throughcutswhich can be either rip saw. 24 - Craftsman 21829 | Operation Manual - Page 25
the table or fence. Faatharboardsare especially usefulwhen ripping small workpiecesand miter cuts). Mark the board from the point at 6 in., 8 in., 10 in., and 12 in. Drill a 3/8 in. hote at the 8 in., 10 in., and 12 in. marks. Prepare the saw for ripping as discussed on page 31. Set the rip fence - Craftsman 21829 | Operation Manual - Page 26
SLIDING MITER TABLE AND MAKING ADJUSTMENTS TO CHECK MITER BASE PARALLELISM See Figures 30 - 31. • Unplug the saw. • Set saw up throat plate. • Place a framing square (G) againstthe blade and alignwith referencemark on miter fable. Measure the distance between the blade end the edge of miter table - Craftsman 21829 | Operation Manual - Page 27
• Remove framinQs,quare and slide miter table to the rear o1rafterbase as far as ft w(fl go. • Rotate the blade so the reference markon the blade is at the rear of the throat plate. Measuringfrom the s_ms mark on the blade at the rear wiif eriminatsthe effect of blade wobble. • Place framing square - Craftsman 21829 | Operation Manual - Page 28
• Push left rear of miter table snugly against miter base as shown by the arrow (S) in figure 35 and secure, • P_ca a fi_'nlng square firmlyagainst the miter fence, with the other ,ride againstthe blade. • Adjust left rear screw from undern_th miter table until miter fence end brads are square with - Craftsman 21829 | Operation Manual - Page 29
,e to preve_ =oookir=_=which will resultin excessive play in miter table. TO ADJUST QUICK STOP See Figure 38. The quick stop is preset at the factory to stop the miter fence at sxactiy zero degrees. However,when sliding miter table adjustmentsare made, these adiustmentsmay cause the quick stop to - Craftsman 21829 | Operation Manual - Page 30
indicator. • Tighten the screw and check the dimension and the rip fence. TO USE THE RIP FENCE Figure 38. • Place the mar lip on the rear of the saw table and pull slighttytoward the front of the unit. • Lower the front end of the rip fence onto the guide surfaces on top ofthe front rail. • Push the - Craftsman 21829 | Operation Manual - Page 31
the rip fence by liftingthe lockinghandle. • Set the blade to the correct depth for the workpiece. • Set the miter fence to 0 ° and tighten the lock knob. PLACELEFTHANDON WORKPIECAEND MITERFENCEHERE CROSSCUT '8WITCHIN LOCI_DPOSITION Rg. 41 • Place a support (the same height as saw table) behind - Craftsman 21829 | Operation Manual - Page 32
installedand working pmper]y to avoid serious poes_is injury. • Remove the rip fence by liftingthe locking handle. • Set the miter gauge to the desired angle and tightsn the lock knob. • Place a support(the same height as saw table) bah'rod the saw for the cut work. • Make sure the wood is clear 0f - Craftsman 21829 | Operation Manual - Page 33
the blade has made contact with the workplace, use the hand closest to the rip fence to guide it. Make sure the edge of the workplace remains in solid contact with both the rip fence and the surface of the table. If rippinga narrow piece, use a push stickto movethe piece through the cut and past - Craftsman 21829 | Operation Manual - Page 34
miter gauge, set the miter gaugeto the desired angle and tighten lock knob. • Turnthe power switch to the ON position. • Positionthe workpiece fiat on the table with the edge flushagainst the miter to avoid sadoue posaiblainjury. • Remove the rip fence by liftingthe lock down handle, • Unlock:he - Craftsman 21829 | Operation Manual - Page 35
the top of the saw table behind the saw for the cut work. Add supportsto the sides as needed. • Depending on the shape of the pansl, use the rip fence or miteTgauge, ff the panel is too large to use s_'herthe rip {once or the miter gauge, it is too {argofor this saw. _IL WARNING: Nsvsr make - Craftsman 21829 | Operation Manual - Page 36
throat plate screw. NON-THROUGHCUT MAKING A DADO CUT See _gurs 50. An optior_l _Ladothroat plate _sreq_drsdfor this procadurs (max. dado wirtth _3/16 in.). See the Accessorles sectionof this manua! and check with your nearest Sears in proper locationwhen changingback to saw blade. Failure to do so - Craftsman 21829 | Operation Manual - Page 37
Fig, 52 TO INSTALL T-NU'£_ FOR GUIDE FENCE BRACKETS See Figures52.53. • Place rip fence against blade and lock in place, • Usingthe appropriate hex key supplied with your table saw, remove the rear adjustment screw and washer on top of the rip fence. • Slide one of the T-nutsintothe top - Craftsman 21829 | Operation Manual - Page 38
tightening the knob nut attached to the carriagebolt. Fig.53 TO INSTALLGUIDEFENCEBRACKETS See F/gum 54. • To install the guide fence brackets, align each bracket with two of the T-nuts on top of the rip fence. NOTE=Usa the hnt two T-nuts and the back two T-nuts leaving the one in the middle empty - Craftsman 21829 | Operation Manual - Page 39
the screws through the table and intothe router. • Tighten all screws with a screwdriver. • Select the correcstize throat plate for the size of the router bit. Align the tab on the throat platewith the slot in the muter extension and snap in place. Make sure the throat plate is firmly seated below - Craftsman 21829 | Operation Manual - Page 40
BLADE NUT Fig. 58 To replace the blade with an accessory blade, follow the instructionsprov'_ed with the accessory. To Inatall e standard blade: throat plate. NOTE: Seaurelytighten throat plate screws. Do not allow the throat plate to bow up above the table surface. BLADE THROATPLATE THROM PLATE - Craftsman 21829 | Operation Manual - Page 41
in slots that permit front-to-back adjusb'nent. "Tocheck a_gnment of the _vin 9 knife: • Unplug the saw. • Raisethe saw blade byturningthe knife and saw blade am not In alignment, adjustment is needed. To adjust:. • Unplug the saw and raise the b_adeguard assambly. • Remove the throat plate and the - Craftsman 21829 | Operation Manual - Page 42
table. • If the blade is not perfectly vertical (0_),loosen the lock nut on the 0° bolt _nside the cabinet, positionthe blade, adjust the bolt, then retighten lock nut. See Figure 62, insall, if the banal indicator is not at zero, adjust_tw_.h the "twoscrews above the slot, beside the heighVbevel - Craftsman 21829 | Operation Manual - Page 43
saw. • Raise the (ooking handle to permitthe rip fence to be moved. BLADE TO ADJUST THE BEVEL LOCKING LEVER See FTgura65. "Fhebevel looking levermay work loose and require adjusting. To adjust: • Unplug the saw on the hsx nut. • Replace set screw and tighten securely. • Replace the cam so that the - Craftsman 21829 | Operation Manual - Page 44
rails may need adjusting. • Unplug the saw. • Remove the miter table and accessory tabla. • Remove the _ont emdrear rails saw table. • Tighten rait holder nut until it is snug. • Loosen rail holder nut one-fourth (1/4) turn. • Replace the rails and check the rail clamps. 44 HAl _"IAFT BACKUP PLATE - Craftsman 21829 | Operation Manual - Page 45
A Am, WARNING: When servicing, use only identice_ repianementpaps. Use of any other parts m_y create a hazardorcause product miter fence. • Protect the bb.de by cleaningout saw dust from underneath the _b(e and in the b{ade teeth. Use a reamsolvent on _heb_ade teeth. • Clean plastio parts only - Craftsman 21829 | Operation Manual - Page 46
of injury,use recommended 4070331 Dado Throat Plate dado and zero clearance throat plata when amp}eying Item No. 9-22214 Micro-Position Rip-Fence Accessory a dado accessory. Item No. 9-22215 Item No. 9-22217 Item No. 9-22220 Quick Fold Table Long Miter/Rip Fence Miter Clamp Kit I ONLY USE - Craftsman 21829 | Operation Manual - Page 47
I PROBLEM CAUSE SOLUTION ! Wood edges away from rip fence when ripping. Sliding miter table aSSembly does not move smoothly, Saw does not make accurate 90 or 45 degree cuts. Blade adjusting handle is hard to turn, Rip fence is misaligned. Blade not properlyeh,_rpenedor set, Miter base or slides - Craftsman 21829 | Operation Manual - Page 48
FORMITERTABLEASSEMBLY, REFERTD RRUREB FORMITERGAUGE, REFERTONOTEF CRAFTSMAN 10 in. TABLE SAW - MODEL NO. 315.218290 , FIGURE A" 10 in. TABLESAW FORHEIGHT/BEVEALDJUSTMENT HANDWHEELR,EFERTORGURE0 FORRIPFENCEASSEMBLY, REFERTORGUREC i FORlEG STANDASSEMBLY, REFERTORGURBG 11 ld 12 44 8O 81 120 F) 0 - Craftsman 21829 | Operation Manual - Page 49
CRAFTSMAN 10 in. TABLE SAW - MODEL NO, 3t5.2t8290 PARTS LIST - FIGURE A [ J The model number will be found on a plate attached to the side panel of the cabinet. Always mention the | model number in all correspondenceregardingyour TABLE SAW or when orderingrepair parts. Key Part Key Part No. - Craftsman 21829 | Operation Manual - Page 50
p_ CRAFTSMAN 10 in. TABLE SAW - MODEL NO. 3t5.218290 PARTS LIST - FIGURE A - Cont'd Key Part No, Number Description Key Part Qty. No. Number Description Qty. 70 0181010905 71 0181010312 Needle Roller 2 97 0182010105-58 Locker Support 2 98 410071705 Bevel LockingLever 1 * Sat Screw 72 - Craftsman 21829 | Operation Manual - Page 51
CRAFTSMAN 10 in. TABLE SAW- MODEL NO. 815.218290 FIGURE B: SLIDING MITER TABLE ASSEMBLY I I I I I I % I I l 2o k , \ \ \ \ j- Key Part No. Number Deecdptlon Key Part Qty. No. Number Description Qty. 1 0182010103-126 Miter Table "l'op 1 2 410011717 *Boll: (5/I6-18 x 3-1/4 in., Hex Hd_ - Craftsman 21829 | Operation Manual - Page 52
, CRAFTSMAN 10 in. TABLE SAW - MODEL NO. 315.218290 FIGURE C: RIP FENCE ASSEMBLY 8 [ey Part No. Number "L 0182011805 2 0181010805 3 414050006 4 0181010218 5 414O11024 6 410139719 7 0181010319 8 0181010220 g 018101O9O7 10 414011030 11 0181010906 12 4104.91703 13 412011064 14 411011711 15 0181010243 - Craftsman 21829 | Operation Manual - Page 53
CRAFTSMAN t0 in. TABLE SAW - MODEL NO. 3t5.218290 FIGURE D: HEIGHT/BEVEL ADJUSTMENT HANDWHEEL 1 / I'p, 5 No, Number Oescdpgon Qty. 1 411072702 *Lock Item - May Be Purchased Locally FIGURE E: REPLACEMENT PARTS Key Part No. Number DescripSon Q_. 422010044 Saw Blade (10 in. x 36"i 1 \ 2 - Craftsman 21829 | Operation Manual - Page 54
CRAFTSMAN 10 in. TABLE SAW - MOOEL NO. 815.218290 FIGURE F: MITER GAUGE ASSEMBLY 11 12 _ey Pert No. Number Desoripl_on Key Part Qty. No. Number Des_dptian 1 A182015201 Miter Gauge Handle 1 2 4_,2012705 * FLa_Washer (1/4 x 16 x 4,.5T)...... 1 3 &12080702 "Nylon Washer {1/4 x 18 x 2"0 .,... - Craftsman 21829 | Operation Manual - Page 55
CRAFTSMAN 10 in. TABLE SAW - MODEL NO. 315.218290 FIGURE G: ROUTER ACCESSORIES r_ey Part No. Number Description Key Part Qty. No. Number DeaoripUon Qty. 1 A181014605 Guide Fence w/Guide 10 018101025a-127 Throat Plate (2 in 1 Block (left)and Screws 1 11 0161010250-127 Throat Plate (1/2 in - Craftsman 21829 | Operation Manual - Page 56
CRAFTSMAN t0 in. TABLE SAW - MODEL NO. 315.218290 % I TrehgeamrdoindgeylonuurmTbAeBrwLEillSbAeWfoournwdhoennaoprdlaetreinatgtarecpheadir ptoartthse. side panel of the cabinet.Always mention the model number in all correspondence J] 17 13 14 FIGUREG - Craftsman 21829 | Operation Manual - Page 57
CRAFTSMAN 10 in. TABLE SAW - MODEL NO. 315.218290 l rehgeamrdoindgelynoumrTbAeBrwLEillSbAeWfouonrdwhoenneoprdlaetreinatgtareophaeidr ptoartthse. side panel of the cabinet. Always mentionthe model number in all correspondence i Key Part NO. Number DescdpUon PARTS LIST FOR FIGURE G Key Part Qty. - Craftsman 21829 | Operation Manual - Page 58
it] For the replacement parts, accessories and owners manuals that you need to do-it-yourself. For Sears professional installation of home SU-HOGAR s" (1-888-784-6427) Au Canada pour service en fmnr_rais: 1-800-LE-FOYER _ www.sears.ca Sears O I_ "l_rademarkI _ _ I =4 Set_k_ Markof Sere
-
 1
1 -
 2
2 -
 3
3 -
 4
4 -
 5
5 -
 6
6 -
 7
7 -
8
-
9
-
10
-
11
-
12
-
13
-
14
-
15
-
16
-
17
-
18
-
19
-
20
-
21
-
22
-
23
-
24
-
25
-
26
-
27
-
28
-
29
-
30
-
31
-
32
-
33
-
34
-
35
-
36
-
37
-
38
-
39
-
40
-
41
-
42
-
43
-
44
-
45
-
46
-
47
-
48
-
49
-
50
-
51
-
52
-
53
-
54
-
55
-
56
-
57
-
58
 |
 |
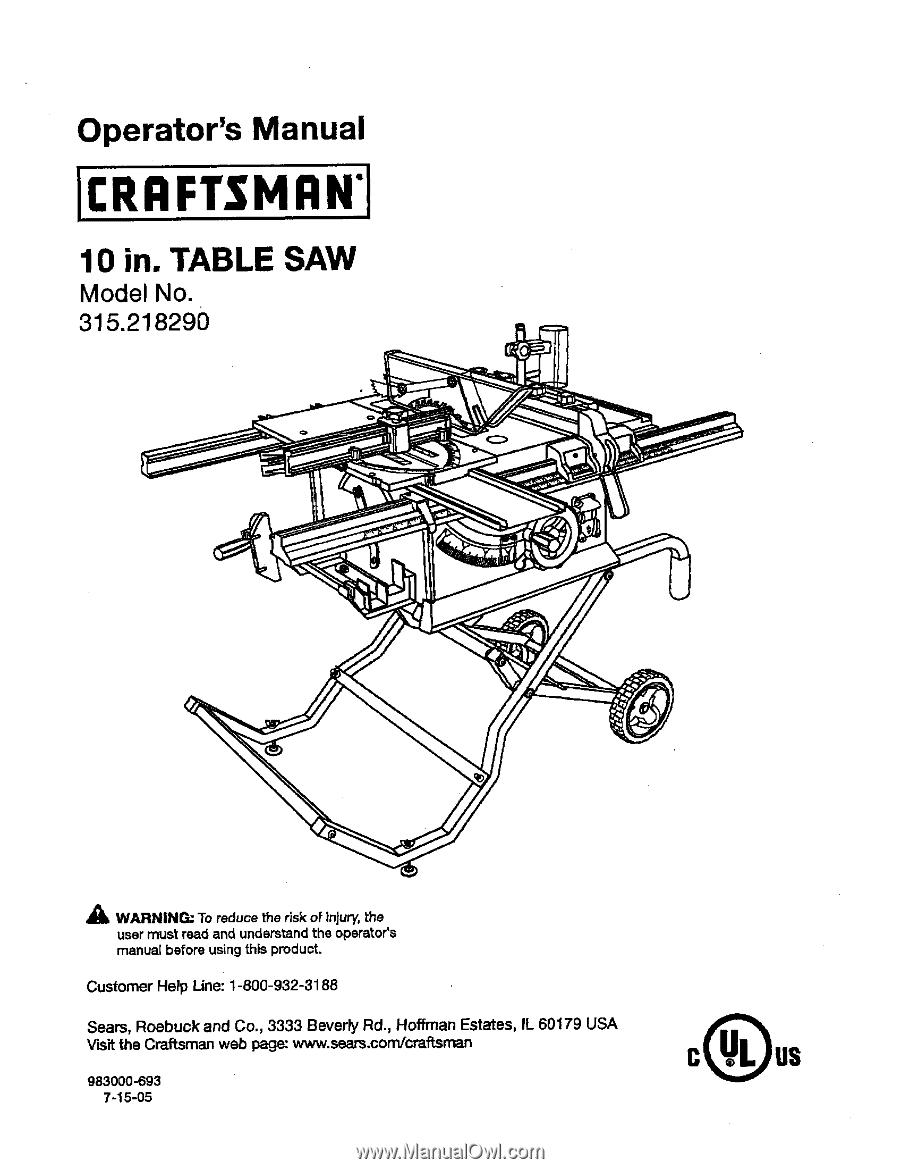
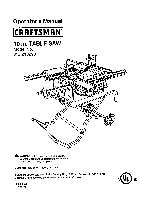
Operator's
Manual
10 in. TABLE SAW
Model No,
315.218290
_k
WARNING:
To
reduce
the
risk
of
injury,
the
user must read and understandthe operator's
manual
before using
this
product.
Customer Help Line: 1-800-932-3188
Seam, Roebuck
and Co., 3333
BeverPy Rd., Hoffman
Estates, IL 60179
USA
Visit the Craftsman web page: www.seam.com!cmffsman
983000-693
7-15-05