Craftsman 21829 Operation Manual - Page 17
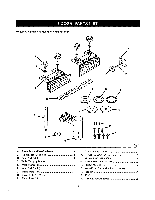
Tosecure/level, Thesaw - table saw parts
 |
View all Craftsman 21829 manuals
Add to My Manuals
Save this manual to your list of manuals |
Page 17 highlights
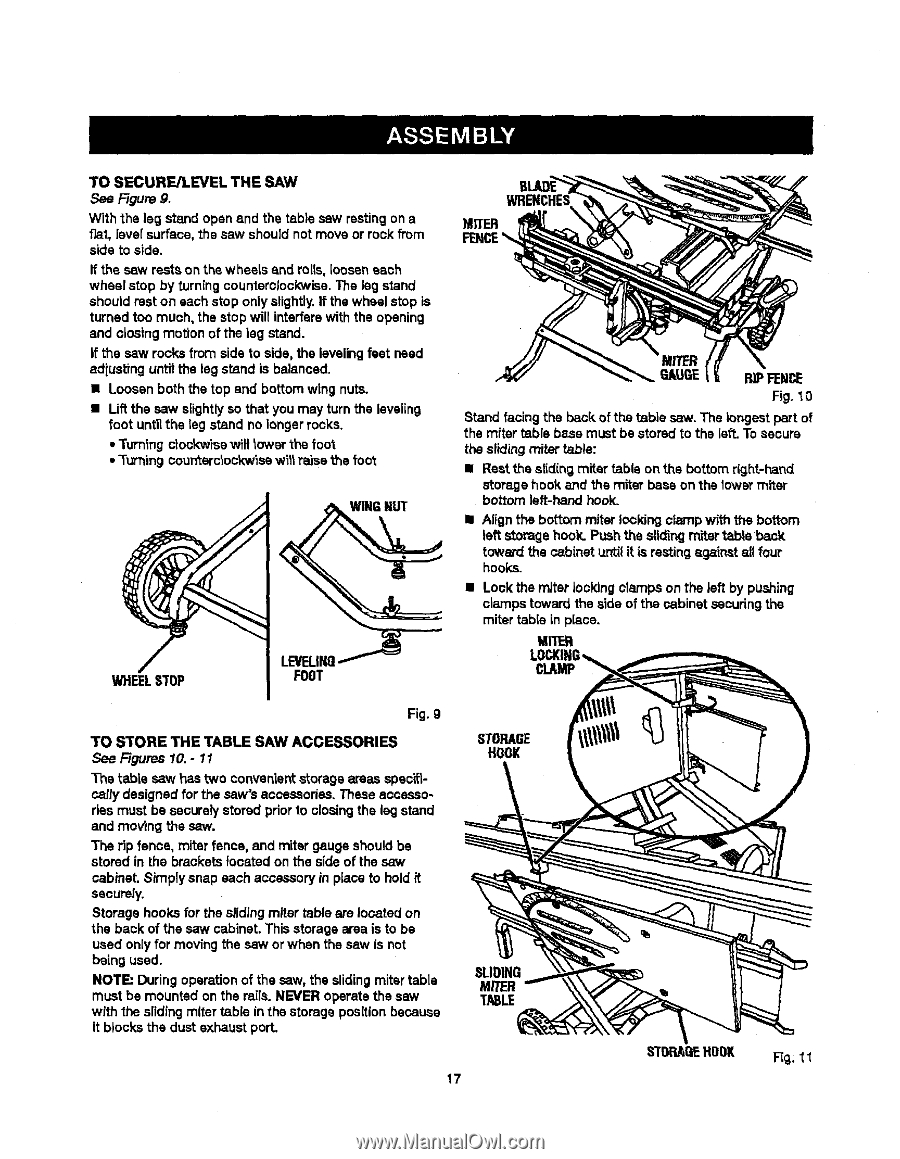
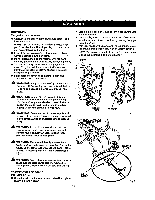
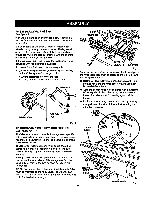
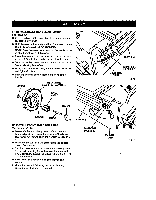
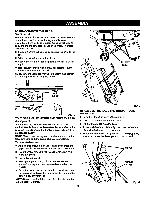
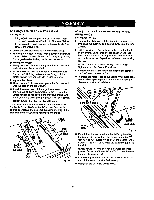
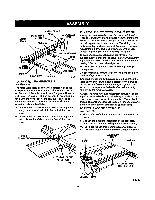
TOSECURE/LEVETLHESAW See F-igum9. With the leg stand open and the table saw resting on a fiat, level surface, the saw shou]d not move or rook fl'om side to side. ff the sew rests on the wheels and roils, [oosaneach wheel stop by turning counterclockwise.The leg stand should met on each stop only slightly.If the wheel stop is turned too much, the stop will interferewith the opening and closing motion of the leg stand. if the saw rocks from side to side, the levelingfeet need adiustlng until the leg stand is balanced. • Loosen both the top and bottomwing nuts. • Lift the saw slightlyso that you may turn the kiveiin9 foot untilthe leg stand no longerrocks. • Turning ctookwise wilt lower thefoot •Turning countarclockwisaw_llra'lsathe fog WINGNUT FOOT MZTER RIPFENCE Fig. 10 Stand facing the back of the table saw. The longest part of the miter table base must be stored to the left. To secure the sliding miter table: • Restthe slidingmiter table on the bottom right-hand storage hook and +,hemiter base on the lower miter bottom left-hand hook. I Alignthe bottom miter lookingcfe_npwith the bottom left storage hock. Push the slidingm'rtertable back toward the cabinet _zntiilt is restingagainst all four hooks. • Look the miter lookingclamps on the left by pushing clamps toward the side of the oabinst securingthe miter table in place. MI'IER Fig. g TO S'fORE THE TABLE SAW ACCESSORIES See Figures 10. - 11 The table saw has two convenientstorage areas specifically designed for the saw's accessories. These accessories must be sooure_ystored priorto closing the leg stand and moving the saw. The rip fence, miter fence, and miter gauge shouldbe stored in the brackets located on the side of the saw cabinet. Simply snap each accessoryin place to hold _t securely. Storage hooks for the slidingmiter table are located on the back of the saw cabinet. This storagearea is to be used onlyfor moving the saw or when the saw is not being used. NOTE: During operation of the saw, the slidingmiter table must be mounted on the mile. NEVER operate the sew with the sliding miter table in the storage position because it blocksthe dust exhaust port. STORAGE HOOK SLIDING MITER TABLE 17 STOPA,BEHDDK F_g;11
-
 1
1 -
2
-
3
-
4
-
5
-
6
-
7
-
8
-
9
-
10
-
11
-
 12
12 -
 13
13 -
 14
14 -
 15
15 -
 16
16 -
 17
17 -
 18
18 -
 19
19 -
 20
20 -
 21
21 -
 22
22 -
23
-
24
-
25
-
26
-
27
-
28
-
29
-
30
-
31
-
32
-
33
-
34
-
35
-
36
-
37
-
38
-
39
-
40
-
41
-
42
-
43
-
44
-
45
-
46
-
47
-
48
-
49
-
50
-
51
-
52
-
53
-
54
-
55
-
56
-
57
-
58
 |
 |