Craftsman 21829 Operation Manual - Page 31
MAKINGCUTS, Thebladeprovided
 |
View all Craftsman 21829 manuals
Add to My Manuals
Save this manual to your list of manuals |
Page 31 highlights
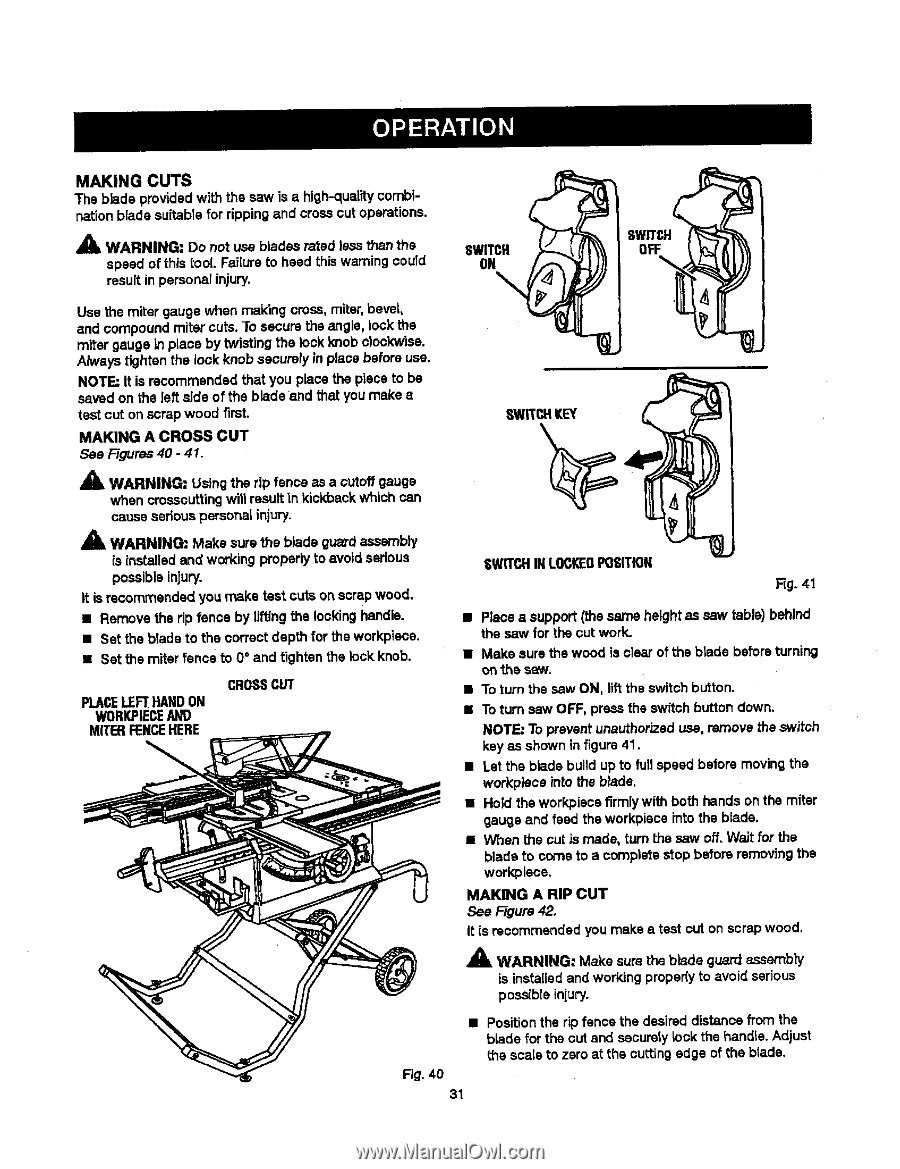
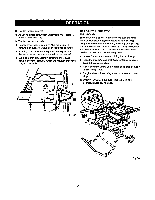
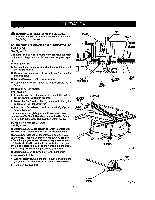
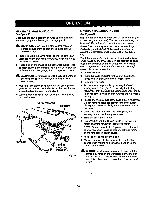
MAKINGCUTS Thebladeprovidewdiththe saw is a high-quality combi- nation blade sultabTefor ripping and crossout operations. _1, WARNING: Do not use blades rated less than the speed of this tool. FaiKureto heed this warningcould resultin perscnal injury. Use the miter gauge when making cross, miter,bevel, and compound miter cuts. To secure the angle, lock the miter gauge in place by twisting the lock knob clockwise. Always tighten the lock knobsecurely in pJaoebefore use. NOTE=It is recommended that you place the piece to be saved on the left side of the blade and that you make a test cut on scrap wood first. MAKING A CROSS CUT See Figures40 - 41. SWITCH ON \ SWITCHKEY SV//T_H °? WARNING: Using the rip fence as a cutoff gauge when crosscuttingwit1resultin kickback which can cause seriouspersonat injury. WARNING=: Make sure the blade guard assembly is installed and working properly to avoid serious possible injury. It is recommended you make test cuts on scrap wood. • Remove the rip fence by liftingthe lockinghandle. • Set the blade to the correct depth for the workpiece. • Set the miter fence to 0 ° and tighten the lock knob. PLACELEFTHANDON WORKPIECAEND MITERFENCEHERE CROSSCUT '8WITCHIN LOCI_DPOSITION Rg. 41 • Place a support (the same height as saw table) behind the saw for the cut work. • Make sure the wood is clear of the blade beforeturning on the saw. • To turn the saw ON, lift the switch button. • To turn saw OFF, press the switch button down. NOTE: To prevent unauthorizeduse, remove the switch key as shown in figure 41. • Let the blade build up to fullspeed before movingthe wot_piece _ntothe b_ade. • Hold the workpieca firmlywith both hands on the miter gauge and feed the workpiece into the blade. • When the cut_ made, turn the saw off. Wait for the blade to come to a complete Hop betore removing the workpiese. MAKING A RiP CUT See Figure 42. It is recommendedyou make a test cut on scrap wood. ,_ WARNING: Make sure the blade guard assembly is installedand working proper(y to avoid serious possibleinjLIry. • Fig. 40 31 Positionthe rip fence the desired distance from the blade for the out and sasurstylook the handle. Adjust the scale to zero at the cutting edge of the blade.
-
 1
1 -
2
-
3
-
4
-
5
-
6
-
7
-
8
-
9
-
10
-
11
-
12
-
13
-
14
-
15
-
16
-
17
-
18
-
19
-
20
-
21
-
22
-
23
-
24
-
25
-
 26
26 -
 27
27 -
 28
28 -
 29
29 -
 30
30 -
 31
31 -
 32
32 -
 33
33 -
 34
34 -
 35
35 -
 36
36 -
37
-
38
-
39
-
40
-
41
-
42
-
43
-
44
-
45
-
46
-
47
-
48
-
49
-
50
-
51
-
52
-
53
-
54
-
55
-
56
-
57
-
58
 |
 |