Craftsman 21829 Operation Manual - Page 34
A Compound
 |
View all Craftsman 21829 manuals
Add to My Manuals
Save this manual to your list of manuals |
Page 34 highlights
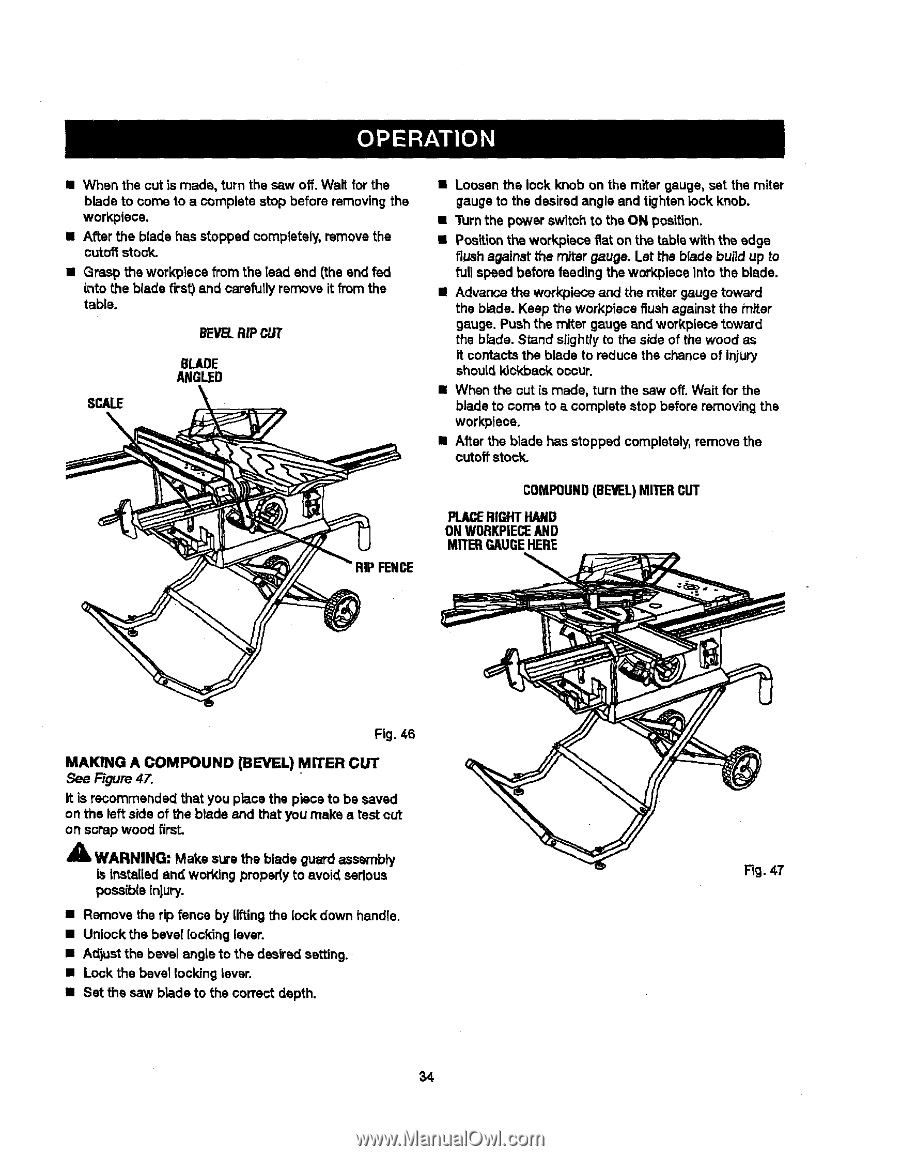
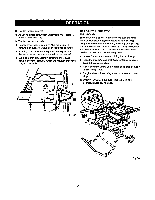
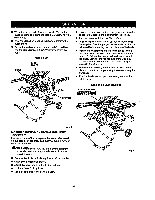
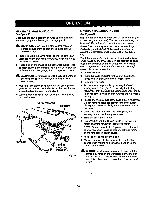
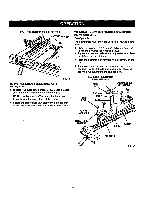
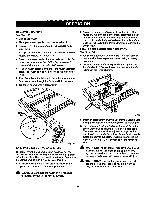
= When the out la made, turn the saw off. Wait for the blade to come to a complete stop before removingthe workplace. • After the blade has stopped oomplateiy, remove the cutoff stock. • Grasp the workplece from the lead end (the and fed into the b{ade first) and carefully remove it from the table. BEVELR.iP CUT SCALE \ 8LADE ANGLED • Loosen the lock knob on the miter gauge, set the miter gaugeto the desired angle and tighten lock knob. • Turnthe power switch to the ON position. • Positionthe workpiece fiat on the table with the edge flushagainst the miter gauge. Let the blade build up to full speed before feeding the workplace Into the blade. • Advance the workplace and the miter gauge toward the blade. Keep the workpiece flushagainst the miter gauge. Push the miter gauge and workplace toward the blade. Stand slightlyto the side of the wood as it contacts the blade to reduos the chance of injury should kickback occur. II When the out Is made, turn the saw off. Wait for the blade to come to a complete stop beforeremovingthe workplace. • After the blade has stopped completely,remove the cutoff stock. COMPOUND(BEVELM) ITERCUT PL_ RIGHTHAND ONWORKPIECAEND MR'ERGAUGEHERE Fig. 46 MAKING A COMPOUND (BEVEL) MITER CUT See Figure 47. It is recommended that you place the piece to be saved on the left side of the blade and that you make a test cut on scrap wood firsL _1, WARNING: Make sure the blade guard ass_"nbly is installedand working propedy to avoid sadoue posaiblainjury. • Remove the rip fence by liftingthe lock down handle, • Unlock:he bevel locking lever. • Adjust the bevel angle to the desired setting. • Lock the bevel locking lever. • Set the saw blade to the correct depth. 34
-
 1
1 -
2
-
3
-
4
-
5
-
6
-
7
-
8
-
9
-
10
-
11
-
12
-
13
-
14
-
15
-
16
-
17
-
18
-
19
-
20
-
21
-
22
-
23
-
24
-
25
-
26
-
27
-
28
-
 29
29 -
 30
30 -
 31
31 -
 32
32 -
 33
33 -
 34
34 -
 35
35 -
 36
36 -
 37
37 -
 38
38 -
 39
39 -
40
-
41
-
42
-
43
-
44
-
45
-
46
-
47
-
48
-
49
-
50
-
51
-
52
-
53
-
54
-
55
-
56
-
57
-
58
 |
 |