Craftsman 21829 Operation Manual - Page 20
Tochecksawbladeinstallation - miter slot
 |
View all Craftsman 21829 manuals
Add to My Manuals
Save this manual to your list of manuals |
Page 20 highlights
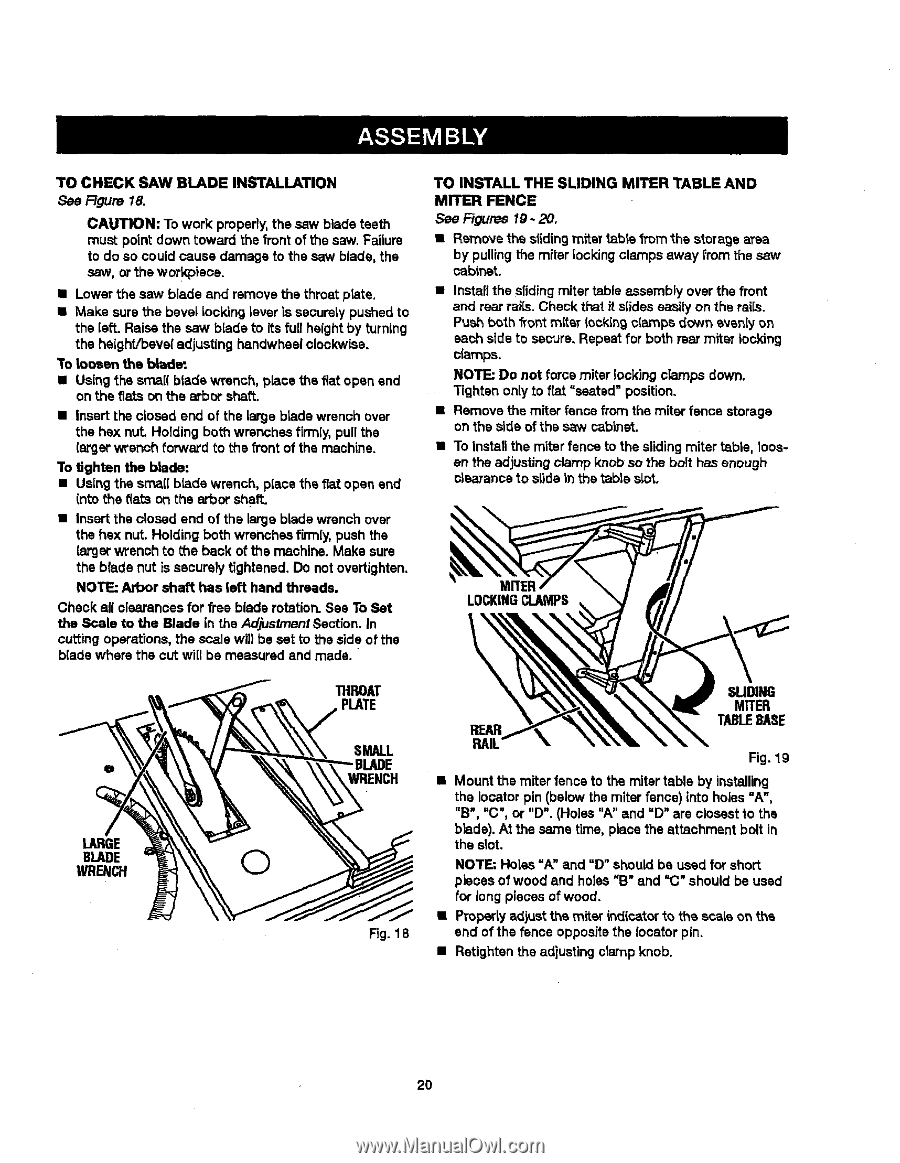
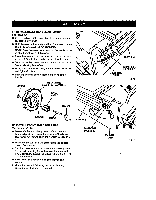
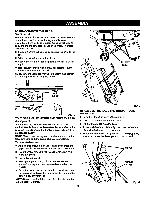
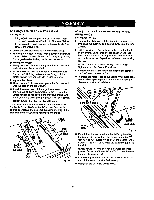
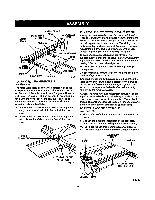
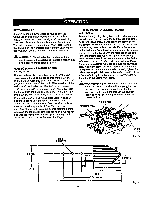
TOCHECKSAWBLADEINSTALLATION See Figure 18. CAUTION: To work: properly,the saw blade teeth must point down toward the front of t'nesaw. Failure to do so could cause damage to the saw blade, the saw, or the workpisce. • Lowerthe saw blade and remove the throat p_te. • Make sure the bevel Locking lever is securely pushed to the left. Raise the saw blade to its fu[I height by turning the height/bevel adjusting hsndwheel clockwise. To Loosen the blade. • Using ';hesmall blade wrench, place the flat open and on the fiats on the arbor shat'_. • Insert the closed end of the large blade wrench over the hex nut Holding both wrenches firmly, pull the larger wrench forward to the front of the machine. To *dghtenthe blade: • Using the srnaflbradswrench, place the flat open end (rite the _(atosn the arbor shaft. • Insert the closed end of the large blade wrench over the hex nut. Holding both wrenches firmly,push the {argerwrench to the back of the machine. Make sure the blade nut is securelytightened. Do not ovsrtighten. NOTE: Arbor shaft has left hand threads. Check all clearancesfor free blade rotation. See To Set the Scale to the Blade in the AdjustmentSection. In cutting operations,the scale wil} be set to the side of the blade where the cut will be measured and made. TO INSTALL THE SLIDING MITER TABLE AND MITER FENCE See Figures fg - 20, • Remove the slidingrofter table from the storage area by pullingthe miter lockingclamps away from the saw ¢ablnst • Install the sliding miter table assembly over the front and rear rails. Check that it slides easily on the rsi[s. Push both front miter looking clamps down evenlyon each side to secure, Repeat for both rear miter locking _arnps. NOTE: Do not force miter look}rig clamps down. Tighten only to f_t "seated" position. • Remove the miter fence from the miter fence storage on the side of the saw cabinet. • To install the miter fence to the slidingmiter table, Icesen the adjusting clamp knobso the bolt hasenough olsaranoa to slide _nthe table slot, LOCKINGCLAMPS LARGE WBRLEANDCEH THROAT PLATE SMALL REAR RAIL SUDII_ MITER TABt.EBASE Fig. 19 WRENCH Mount the miter fence to the miter table by installing the locater pin (below the miter fence) into holes =A", "B", =C", or "D". (Holes "A" and =D" are closest 1othe b}ade).At the same time, place the attachment bolt in the s_ot. O NOTE: Holes =A" and "D" should be used for short pieces of wood and holes"B" and "C" should be used for long pieces of wood. Fig. 18 • Property a_}ust the miter indicatorto the scale on the end of the fence oppositethe locater pin. • Retightan the adiusting ctarnp knob. 2O
-
 1
1 -
2
-
3
-
4
-
5
-
6
-
7
-
8
-
9
-
10
-
11
-
12
-
13
-
14
-
 15
15 -
 16
16 -
 17
17 -
 18
18 -
 19
19 -
 20
20 -
 21
21 -
 22
22 -
 23
23 -
 24
24 -
 25
25 -
26
-
27
-
28
-
29
-
30
-
31
-
32
-
33
-
34
-
35
-
36
-
37
-
38
-
39
-
40
-
41
-
42
-
43
-
44
-
45
-
46
-
47
-
48
-
49
-
50
-
51
-
52
-
53
-
54
-
55
-
56
-
57
-
58
 |
 |