Craftsman 21829 Operation Manual - Page 36
Making, A Dado Cut - sears
 |
View all Craftsman 21829 manuals
Add to My Manuals
Save this manual to your list of manuals |
Page 36 highlights
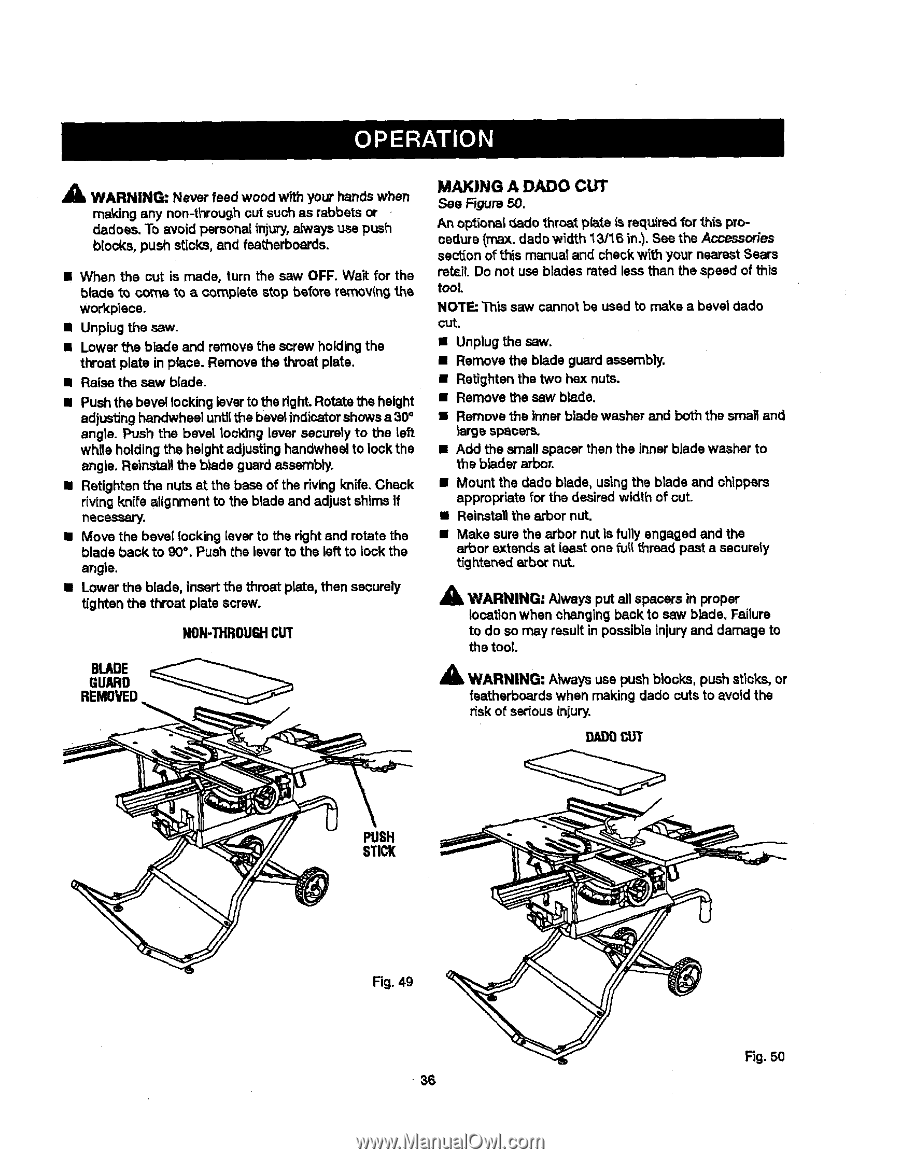
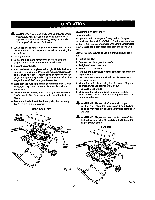
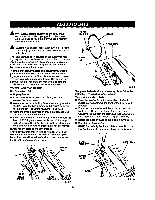
,_ WARNING: Never feed wood with your handswhen ma_dngany non-throughcut such as rabbets or dadoes. To avoid personal injury, aJways use push blocks, push sticks, and featherboards. • When the cut is made, turn the saw OFF. Wait for the blade to come to a complete stop before removingthe workpieca. • Unplug the saw. • Lower the blade and remove the screw holding the throat plate in place. Remove the throat plate. • Raise the saw b(ade. • Push the bevei lockingleveeto the right.Rotate the height adjustinghandwheelunUithe bevelindicatorshowsa 30+ angle. Push the bevel Iocldng leveesecurelyto the left while holdingthe height adjustinghandwheelto lock the angle. Reinsta_the b_adeguard assembly. • Retighten the nuts at the base of the riving knife.Check riving kni_'ealignment to the blade and adjust shims if necessary. • Move the bevel locking [everto the right and rotate the blade back to 90% Push the leverto the left to lock the angle. • Lower the blade, insert the throat plate, then securely tighten the throat plate screw. NON-THROUGHCUT MAKING A DADO CUT See _gurs 50. An optior_l _Ladothroat plate _sreq_drsdfor this procadurs (max. dado wirtth _3/16 in.). See the Accessorles sectionof this manua! and check with your nearest Sears retsil. Do not use blades rated less than the speed of this tooL NOTE: This saw cannot be used to make a bevel dado CUt. • Unplug the saw. • Remove the blade guard aseembly. • Ratlghtanthe two hex nuts. • Remove the saw blade. • Remove _he inner blade washer and both the sma_ and _eegespacers. • Add the smell spacer then the inner b]ade washer to the bladesarbor. • Mount the dado blade, usingthe blade and chippers appropriatefor the desired width of cut. • Reinstallthe arbor nut. • Make sure the arbor nut Is fullyengaged and the eebor extends at loast one fiJll_rsad past a sacurely tightened arbornut. _k WARNING; Always put all spacers in proper locationwhen changingback to saw blade. Failure to do so may resultin possible injuryand damage to the tool. RGEBMULAAODRVEDED A WARNING: Akvays use push blocks, push stlc_, or fsatharbcardswhen making dado cuts to avoid the risk of serious injury. 9J_l}0CUT PUSH STICK Fig. 4g • 36 F_g.50
-
 1
1 -
2
-
3
-
4
-
5
-
6
-
7
-
8
-
9
-
10
-
11
-
12
-
13
-
14
-
15
-
16
-
17
-
18
-
19
-
20
-
21
-
22
-
23
-
24
-
25
-
26
-
27
-
28
-
29
-
30
-
 31
31 -
 32
32 -
 33
33 -
 34
34 -
 35
35 -
 36
36 -
 37
37 -
 38
38 -
 39
39 -
 40
40 -
 41
41 -
42
-
43
-
44
-
45
-
46
-
47
-
48
-
49
-
50
-
51
-
52
-
53
-
54
-
55
-
56
-
57
-
58
 |
 |