Dell 3010cn Color Laser Printer Printer Menus
Dell 3010cn Color Laser Printer Manual
 |
View all Dell 3010cn Color Laser Printer manuals
Add to My Manuals
Save this manual to your list of manuals |
Dell 3010cn Color Laser Printer manual content summary:
- Dell 3010cn Color Laser Printer | Printer Menus - Page 1
, and Replace Toner menus only. However, you can use your printer driver to override printer user defaults and select settings for individual print jobs. Using the Printer Menus Setting of Panel Lock Using the Printer Menus Stored Print This menu provides applicable printing services such as Secure - Dell 3010cn Color Laser Printer | Printer Menus - Page 2
asterisk (*) are the factory default menu settings. Paper Type Purpose: To specify the type of paper loaded in each tray. Values: Plain 1 Tray 1* 1 Plain 2 Plain 1 Tray 2* 1 Plain 2 MPF Plain 1 Plain 2 Transparency Covers 1 Covers 2 Label Coated 1 Coated 2 Envelope Plain 1 S2 Plain 2 S2 - Dell 3010cn Color Laser Printer | Printer Menus - Page 3
to the correct values. Replace Toner Use the Replace Toner menu to select the color of the toner cartridge that you need to replace. Values: Cyan Toner(C) Magenta Toner(M) Yellow Toner(Y) Black Toner(K) Configure Use the Configure menu to configure a variety of printer features. Basic Settings - Dell 3010cn Color Laser Printer | Printer Menus - Page 4
data from the computer. You can also return the printer to the print mode by pressing any button on the operator panel. Error Alarm Purpose: To establish whether the printer sounds an alarm when an error occurs. Values: Does not sound an alarm when an error occurs. Off* Sounds an alarm when an - Dell 3010cn Color Laser Printer | Printer Menus - Page 5
* French Italian German Spanish Auto Log Print Purpose: To specify whether the printer outputs logs automatically. Values: Does not print the logs. Off* Prints the logs. On Print logs can also be printed using the Reports menu. See also: "Reports" ID Print Purpose: To specify a location where the - Dell 3010cn Color Laser Printer | Printer Menus - Page 6
Only displayed when two optional tray modules are installed on the printer. RAM Disk Purpose: To allocate memory to the RAM Disk file system for the Secure Print and Proof Print features. The change becomes effective after the printer is turned off and then on again. Values: Does not allocate - Dell 3010cn Color Laser Printer | Printer Menus - Page 7
. When there is no larger paper size, the printer substitutes paper of nearest size. Larger Size Substitutes paper of nearest size. Nearest Size MPF Feed Substitutes paper from the multipurpose feeder. Maintenance Use the Maintenance menu to initialize the NV (non-volatile) memory, configure - Dell 3010cn Color Laser Printer | Printer Menus - Page 8
to their default values. Clear Storage Purpose: To clear all files that are stored as Secure and Proof Print in the RAM Disk. NOTE: The Clear Storage menu is only displayed when the RAM Disk is set to Auto. Non-Dell Toner Purpose: To specify whether to use the refilled Toner Cartridge or not - Dell 3010cn Color Laser Printer | Printer Menus - Page 9
and Proof Print in the RAM Disk. Network Use the Network menu to change printer settings affecting jobs sent to the printer through a network port. Ethernet Purpose: To specify the communication speed and the duplex settings of Ethernet. The change becomes effective after the printer is turned - Dell 3010cn Color Laser Printer | Printer Menus - Page 10
Uses 100base-TX full-duplex. 100Base Full TCP/IP Purpose: To specify the TCP/IP settings. The change becomes effective after the printer is turned off and then on again. Values: Automatically sets the IP address. IP AddressSetup AutoIP* Uses BOOTP to set the IP address. BOOTP RARP - Dell 3010cn Color Laser Printer | Printer Menus - Page 11
Init NVRAM Purpose: To initialize network data stored in NVRAM. Security Use the Security menu to set a password to limit access to the menus. This prevents items from being change accidentally. NOTE: Values marked by an asterisk (*) are the factory default menu settings. See also: "Setting - Dell 3010cn Color Laser Printer | Printer Menus - Page 12
the settings, enter 0000), and then press . 9. Enter the new password, and then press . 10. Reenter the password to confirm the password that you entered, and then press . The password has been changed. NOTE: If you forget your password, turn off the printer. Then, while holding Menu, turn on the - Dell 3010cn Color Laser Printer | Printer Menus - Page 13
5. Press until Off appears, and then press . - Dell 3010cn Color Laser Printer | Printer Menus - Page 14
Installing a Memory Card Your printer supports 128, 256, and 512 MB additional memory cards. 1. Make sure that the printer is turned off. 2. Remove the control board cover on the left side of the printer by pulling the notch. 3. Hold the memory card so the notch is aligned with the projection on the - Dell 3010cn Color Laser Printer | Printer Menus - Page 15
- Dell 3010cn Color Laser Printer | Printer Menus - Page 16
the best print quality in color, use 75 g/m2 (20 lb) xerographic, grain long paper. For the best print quality in black and white, use 90 g/m2 (24 lb) xerographic, grain long paper. Before buying large quantities of any print media, Dell recommends trying a sample first. When loading paper, identify - Dell 3010cn Color Laser Printer | Printer Menus - Page 17
-consumer waste that do not meet DIN 19 309 l Multiple-part forms or documents l Label paper with Cut Selecting Paper Proper paper selection helps prevent jams and ensures trouble-free printing. To help avoid jams or poor print quality: l Always use new, undamaged paper. l Before loading the paper - Dell 3010cn Color Laser Printer | Printer Menus - Page 18
the preprinted letterhead you have selected is acceptable for laser printers. Page orientation is important when printing on letterhead. Use the following table for help when loading letterhead in the print media sources. Print media source Print side Optional 250-sheet tray module or 500-sheet - Dell 3010cn Color Laser Printer | Printer Menus - Page 19
quantities of any print media, Dell recommends trying a sample first. See "Loading the Multipurpose Feeder" for instructions on loading an envelope. When printing on envelopes: l Use only high-quality envelopes that are designed for use in laser printers. l Set the print media source to MPF. Set the - Dell 3010cn Color Laser Printer | Printer Menus - Page 20
" for instructions on loading an envelope. l Use one envelope size during a print job. l Make sure the humidity is low because high humidity (more than 60%) and the high printing temperatures may seal the envelopes. Labels Your printer can print on many labels designed for use with laser printers - Dell 3010cn Color Laser Printer | Printer Menus - Page 21
Folio (8.5 x 13 in.) Y N Y N Legal (8.5 x 14 in.) Y N Y N Executive Y Y Y N COM-10 envelope Y N N N Monarch Y N N N C5 Y N N N DL Y N N N User-specified print media Y N N N Print Media Supported Multipurpose feeder Optional 250-sheet tray module Optional 500 - Dell 3010cn Color Laser Printer | Printer Menus - Page 22
-163 - Covers2 164-216 - Coated1 106-163 BJP (Bubble Jet Printer) paper cannot be used. Coated2 164-216 BJP (Bubble Jet Printer) paper cannot be used. Transparency - BJP (Bubble Jet Printer) paper cannot be used. Label - BJP (Bubble Jet Printer) paper cannot be used. Envelopes - - - Dell 3010cn Color Laser Printer | Printer Menus - Page 23
from the Printing Status Window, the All Programs menu, or the desktop icon. You can also launch it from the Status Window when a toner error occurs. You can order consumables by phone or from the web. 1. Click Start ® All Programs ® Dell Printers ® Dell Color Laser Printer 3010cn ® Dell Supplies - Dell 3010cn Color Laser Printer | Printer Menus - Page 24
in a floppy disk or in a server on the network. Using the setup disk that you have created reduces the amount of work required when installing the printer driver. l Install in advance the Dell Color Laser Printer 3010cn printer driver in the computer on which the setup disk is to be created. l The - Dell 3010cn Color Laser Printer | Printer Menus - Page 25
If you use the point and print method, a subset of driver information is copied from the server to the client computer. This is just enough information to send a print job to the printer. 1. On the Windows desktop of the client computer, double-click Network Neighborhood. 2. Locate the host name of - Dell 3010cn Color Laser Printer | Printer Menus - Page 26
. If this is a new printer, you may be prompted to install a printer driver. If no system driver is available, then you need to provide a path to available drivers. 6. Select whether you want this printer to be the default printer for the client, and then click Finish. 7. Print a test page to verify - Dell 3010cn Color Laser Printer | Printer Menus - Page 27
mm (5.5 in. to 14 in.) Loading the Multipurpose Feeder In addition to plain paper, the multipurpose feeder can use various other sizes and types of print media such as envelopes, and transparencies. 1. Gently pull open the multipurpose feeder cover. 2. Slide the width guides to the edge of the tray - Dell 3010cn Color Laser Printer | Printer Menus - Page 28
media. 5. Make sure the size and type settings for the multipurpose feeder are set to the correct value for the print media you have loaded. 6. Select print media source, size, and type in your software program and select the print media size and type on the printer operator panel. Loading Envelopes - Dell 3010cn Color Laser Printer | Printer Menus - Page 29
(using DL or Monarch), specify Portrait & Landscape (For envelopes) in Turn Image by 180deg in the Booklet/Poster/Mixed Document dialog box of your printer driver. Using the Multipurpose Feeder l Load only one size and type of print media during a single print job. l To achieve the best possible - Dell 3010cn Color Laser Printer | Printer Menus - Page 30
should be fully extended. 3. Squeeze the length guide and slide it to the front edge of the tray. 4. Before loading the print media, flex the sheets back and forth, and then fan them. Straighten the edges of the stack on a level surface. 5. Place the print media into the tray with the recommended - Dell 3010cn Color Laser Printer | Printer Menus - Page 31
Face up Page orientation Back of tray Multipurpose feeder Face up Letterhead enters the printer first. Linking Trays Tray linking allows you to load the same size and type of print media in multiple sources. The printer automatically links the source/trays and uses the first tray until it runs - Dell 3010cn Color Laser Printer | Printer Menus - Page 32
sheets of transparency: or l 20 sheets of label: or l 10 sheets of envelope Using the Support Extension The support extension is designed to prevent print media from falling from the printer after the print job is complete. Before printing a document, make sure the paper extender is fully extended. - Dell 3010cn Color Laser Printer | Printer Menus - Page 33
, and Interface Cartridge and Printer Life Environmental Cables OS Compatibility Compatible with Windows (XP, Server 2003, XP x64, Server 2003 x64, 2000, NT 4.0) 1 Dell networked Printers are compatible with Microsoft operating systems, but Dell telephone support only supports factory-installed - Dell 3010cn Color Laser Printer | Printer Menus - Page 34
, and so on. Cartridge and Printer Life Toner cartridge yield at approximately 5% coverage 1,000 pages, 2,000 pages Drum cartridge 24,000 pages Duty cycle (maximum) 45,000 pages/month (25% coverage color) 60,000 pages/month (black and white only) (Reference) Printer life 100,000 pages - Dell 3010cn Color Laser Printer | Printer Menus - Page 35
2 10/100Base-Tx Ethernet CAT-5E - Dell 3010cn Color Laser Printer | Printer Menus - Page 36
Printers ® Dell Color Laser Printer 3010cn ® Dell Supplies Management System. The Dell Supplies Management System window appears. 2. If ordering from the Web: a. When you cannot get information from the printer automatically by two-way communication, a window that prompts you to type the Service - Dell 3010cn Color Laser Printer | Printer Menus - Page 37
by phone, see your Owner's Manual. Dell recommends Dell drum cartridges for your printer. Dell does not provide warranty coverage for problems caused by using accessories, parts, or components not supplied by Dell. Removing the Used Drum Cartridge NOTE: Remove any print jobs from the center output - Dell 3010cn Color Laser Printer | Printer Menus - Page 38
hot. Allow time for the printer to cool before attempting to remove parts in this area. Installing the New Drum Cartridge 1. Remove the protective sheet from the drum cartridge. CAUTION: Do not touch the drum at the bottom of the drum cartridge. 2. To insert the drum cartridge, push up the lever on - Dell 3010cn Color Laser Printer | Printer Menus - Page 39
3. Pull down the lever on the right to lock the drum cartridge in place. 4. Close the top cover. Replacing the Cleaning Pad 1. Pull out the slide bar that is inside the printer on the right side until it stops. The access window cover slides open. - Dell 3010cn Color Laser Printer | Printer Menus - Page 40
2. Pull the cleaning rod until the cleaning pad comes out of the printer. 3. Push the two tabs on the cleaning pad inward to remove the pad. 4. Hold the new cleaning pad under the cleaning rod and push it in until it clicks. 5. Push the cleaning rod back to its original position until it stops. 6. - Dell 3010cn Color Laser Printer | Printer Menus - Page 41
online at http://www.dell.com/supplies or by phone. To order by phone, see "Ordering Toner Cartridges" in your Owner's Manual. Dell recommends Dell toner cartridges for your printer. Dell does not provide warranty coverage for problems caused by using accessories, parts, or components not supplied - Dell 3010cn Color Laser Printer | Printer Menus - Page 42
. CAUTION: Do not touch inside the printer with your hands. Some parts may be hot. Installing the New Toner Cartridge 1. Make sure the color of the toner cartridge matches the slot on the toner cartridge carrier. Gently shake the cartridge to distribute the toner evenly. 2. Lift the tab up 90 - Dell 3010cn Color Laser Printer | Printer Menus - Page 43
a. Guide the cartridge until it snaps into place. CAUTION: Do not do not force the cartridge. b. Push down the handhold to lock the cartridge in place. CAUTION: If you find it difficult to push down the handhold, remove the cartridge and insert the cartridge again. 4. If replacing just one toner - Dell 3010cn Color Laser Printer | Printer Menus - Page 44
the front door. 2. Pull out the slide bar that is inside the printer on the right side until it stops. The access window cover slides open. 3. Hold the cleaning rod and push the rod in and pull out once to clean inside the printer. 4. Push the slide bar back to its original position. 5. Close the - Dell 3010cn Color Laser Printer | Printer Menus - Page 45
and only one additional tray can be added. Some instructions may vary depending on the tray module configuration in your printer. NOTE: Some tray module configurations differ from those described in this manual. 1. Unpack the tray and remove all packing material and tape. 2. Place the tray module in - Dell 3010cn Color Laser Printer | Printer Menus - Page 46
by installing the optional tray you just removed on top and inserting the two screws provided. Tighten the screws until they are secure. 7. Place the printer on top of the tray module(s). 8. Lock the tray(s) into place by removing the top tray from the tray module and rotating the locking mechanism - Dell 3010cn Color Laser Printer | Printer Menus - Page 47
load the paper. 10. Turn on the printer. NOTE: The printer automatically detects the attached tray(s) but does not detect the paper type. 11. Print a Printer driver by following the instructions for each operating system. If the printer is on a network, update the driver for each client. Windows - Dell 3010cn Color Laser Printer | Printer Menus - Page 48
, and use your email address as your password. l Electronic Support Service [email protected] [email protected] [email protected] (for Asian/Pacific countries only) support.euro.dell.com (for Europe only) l Electronic Quote Service [email protected] (for Asian/Pacific countries only - Dell 3010cn Color Laser Printer | Printer Menus - Page 49
from your software program or printer driver. If your printer is attached to the network, you can change settings from the Dell Printer Configuration Web Tool. To launch the Dell Printer Configuration Web Tool, type the printer IP address in your Web browser. Print a Printer Settings page to find - Dell 3010cn Color Laser Printer | Printer Menus - Page 50
user default menu settings you select from the operator panel. NOTE: Settings you choose from your software program may override the settings you select from the operator panel. Using the Dell Printer Configuration Web Tool to Change Printer Settings If your printer is connected to the network, you - Dell 3010cn Color Laser Printer | Printer Menus - Page 51
3. Press until Network appears, and then press or . 4. Press until Init NVRAM appears, and then press or . 5. The Init NVRAM Are you sure? message appears on the operator panel. Press . 6. Turn off the printer, and then on again. - Dell 3010cn Color Laser Printer | Printer Menus - Page 52
large quantities of any print media, Dell recommends trying a sample first. Avoiding Jams l Use only recommended print media. See "Print Media Guidelines" for more information. l See "Loading Print Media in Optional Trays" and "Loading the Multipurpose Feeder" to load printer media properly. l Do - Dell 3010cn Color Laser Printer | Printer Menus - Page 53
attempt to clear any jams using tools or instruments. This may permanently damage the printer. 1 Paper cover 2 Feeder cover 3 Regi cover 4 Bias Transfer Roll (BTR) cover 5 Fuser cover Removing Print Jams Near the Fuser Unit NOTE: To resolve the message displayed on the operator panel, you must clear - Dell 3010cn Color Laser Printer | Printer Menus - Page 54
media from the print media path. 1. Open the paper cover. CAUTION: The inside of the printer is hot. 2. Lift up the levers on both sides. CAUTION: Never touch the outer levers located on both sides of the fuser unit, which are used to remove or install the fuser unit. 3. Open the fuser cover and - Dell 3010cn Color Laser Printer | Printer Menus - Page 55
message displayed on the operator panel, you must clear all print media from the print media path. 1. Remove the print media from the back of the printer. The accessible portion of the print media determines how it should be removed. If the print media is not accessible, go to step 3. 2. Close the - Dell 3010cn Color Laser Printer | Printer Menus - Page 56
Source NOTE: To resolve the message displayed on the operator panel, you must clear all print media from the print media path. 1. Pull the tray halfway out. 2. Remove the print media depending on how it has jammed. l If print media is located on a tilted surface or a wall at the front of the tray - Dell 3010cn Color Laser Printer | Printer Menus - Page 57
NOTE: To resolve the message displayed on the operator panel, you must clear all print media from the print media path. - Dell 3010cn Color Laser Printer | Printer Menus - Page 58
Choosing the Right Cable Connecting the Printer Locally Connecting the Printer to the Network Choosing the Right Cable Your Dell Color Laser Printer 3010cn interconnection cable must meet the following requirements: Connection Cable certification USB USB 2.0 10/100Base-TX Ethernet CAT-5E 1 USB - Dell 3010cn Color Laser Printer | Printer Menus - Page 59
the other end into a properly grounded outlet. 2. Turn on the computer and the printer. Connecting the Printer to the Network To attach the printer to a network: 1. Make sure the printer, computer, and any other attached devices are turned off and unplugged. 2. Plug one end of a standard category - Dell 3010cn Color Laser Printer | Printer Menus - Page 60
for network printing. 1. Press Menu. 2. Press until Configure appears, and then press or . 3. Press until Reports appears, and then press or . 4. Printer Settings is displayed. Press . The Printer Settings page is printed. 5. If the IP address shows anything other than 0.0.0.0 (the factory default - Dell 3010cn Color Laser Printer | Printer Menus - Page 61
10 printer drivers with installer. When you use the Network Installation feature, and the IP AddressSetup is set to AutoIP on the operator panel menu, you can set the IP address from 0.0.0.0 to the desired IP address on the printer selection window. Verify the IP Settings 1. Print another Printer - Dell 3010cn Color Laser Printer | Printer Menus - Page 62
Removing Options If the printer location needs to change or the printer and print media handling options need to be shipped to a new location, all print media handling options must be removed from the printer. For shipping, pack the printer and print media handling options securely to avoid damage. - Dell 3010cn Color Laser Printer | Printer Menus - Page 63
the optional 250-sheet tray module or 500-sheet tray module. 6. Replace the printer. Removing the Optional Memory Card 1. Make sure that the printer is turned off. 2. Remove the control board cover on the left side of the printer by pulling the notch. 3. Push the knobs on both sides of the slot - Dell 3010cn Color Laser Printer | Printer Menus - Page 64
4. Reattach the control board cover to the printer. For more information, see "Installing a Memory Card". - Dell 3010cn Color Laser Printer | Printer Menus - Page 65
Dell™ Color Laser Printer 3010cn User's Guide Notes, Notices, and Cautions Click the links to the left for information on the features, options, and operation of your printer. For information on other documentation included with your printer, see "Finding Information." 1 Optional 250-sheet tray - Dell 3010cn Color Laser Printer | Printer Menus - Page 66
or loss of data and tells you how to avoid the problem. CAUTION: A CAUTION indicates a potential for property damage, personal injury, or death. Information in this document is subject to change without notice. © 2006 Dell Inc. All rights reserved. Reproduction in any manner whatsoever without the - Dell 3010cn Color Laser Printer | Printer Menus - Page 67
Manual prior to setting up and operating your printer. Troubleshooting Guide · User Settings · Configuration · Troubleshooting Instructions · Other Problems Setup diagram Express Service Code and Service Express Service Code and Service Tag number. Tag number The Express Service Code and Service - Dell 3010cn Color Laser Printer | Printer Menus - Page 68
to display the asset tag number. The Dell Printer Configuration Web Tool feature also lets you change printer settings and keep track of printing trends. If you are a network administrator, you can easily copy the printer's settings to one or all printers on the network - right from your Web browser - Dell 3010cn Color Laser Printer | Printer Menus - Page 69
printed. If the IP address shows 0.0.0.0 (the factory default), an IP address has not been assigned. To assign one for your printer, see "Assign an IP Address." Use the Dell Printer Configuration Web Tool for: Printer Status Get immediate feedback on printer supply status. When toner is running low - Dell 3010cn Color Laser Printer | Printer Menus - Page 70
change the printer settings you selected. NOTE: You must be a network administrator to use this feature. Online Help Click Help to visit the User's Guide on the Dell website to verify configured settings. Order Supplies at: www.dell.com/supplies Contact Dell Support at: support.dell.com - Dell 3010cn Color Laser Printer | Printer Menus - Page 71
Frame. Dell Color Laser Printer 3010cn IP Address: Location: Contact Person: Printer Console Help Printer Bitmap Left Frame Displays the printer product name. Displays the printer's IP address. Displays the printer's location. The location can be changed in Basic Information on the Print Server - Dell 3010cn Color Laser Printer | Printer Menus - Page 72
default password is password. You can change only the password in the Set Password page in the Print Server Settings menu. The user name cannot be changed. See "Set Password" for more information. Details of Menu Items "Printer Status" "Printer Jobs" "Printer Settings" "Printer Status" "Printer - Dell 3010cn Color Laser Printer | Printer Menus - Page 73
Settings" "Init NVRAM" "Clear Storage"* "Non-Dell Toner" "Print Server Setup Page" "E-Mail Alert Setup Page" "Basic Information" "Port Settings" "TCP/IP" "E-Mail Alert" "SNMP" "Set Password" "Reset Print Server" "Copy Printer Settings" "Copy Printer Settings Report" * This item is only available - Dell 3010cn Color Laser Printer | Printer Menus - Page 74
Displays Dell's service tag number. Asset Tag Number Displays the printer's asset tag number. Printer Serial Number Displays the printer's serial number. Memory Capacity Displays the memory capacity. Processor Speed Displays the processing speed. Printer Revision Levels Firmware Version - Dell 3010cn Color Laser Printer | Printer Menus - Page 75
Displays the status of the host interface. Job Submitted Time Displays the date the print job was submitted. Printer Settings Use the Printer Settings menu to display the printer settings report and to configure printer settings. The following tabbed pages are displayed at the top of the Right - Dell 3010cn Color Laser Printer | Printer Menus - Page 76
Paper Density Settings BTR Adjustments Non-Dell Toner Tray Settings Power Saver Time Displays the amount of time before the printer enters power saver mode after it finishes a print job. Error Alarm Displays whether the printer sounds an alarm when an error occurs. Job Timeout Displays specify - Dell 3010cn Color Laser Printer | Printer Menus - Page 77
is loaded in the specified tray does not match the paper size settings for the current job. Security Settings Purpose: To set or change the password to limit access to the menus from the operator panel. Set the password of the Dell Printer Configuration Web Tool from Set Password in Print Server - Dell 3010cn Color Laser Printer | Printer Menus - Page 78
changing the password for the Dell Printer Configuration Web Tool, click Set Password on the left frame and set the password. Printer Maintenance Printer Maintenance tab includes Paper Density Settings, BTR Adjustments, Registration Adjustments, Init NVRAM, Clear Storage, and Non-Dell Toner pages - Dell 3010cn Color Laser Printer | Printer Menus - Page 79
. Non-Dell-brand toner cartridges may disable some printer features, reduce print quality and reduce the reliability of your printer. Dell recommends only new Dell-brand toner cartridges for your printer. Dell does not provide warranty coverage for problems caused by using accessories, parts, or - Dell 3010cn Color Laser Printer | Printer Menus - Page 80
set the type of printer interface and necessary conditions for communications. The following tabbed pages are displayed in the top of the Right Frame. Print Server Reports The Print Server Reports tab includes Print Server Setup Page, and E-Mail Alert Setup Page. Print Server Setup Page Purpose: To - Dell 3010cn Color Laser Printer | Printer Menus - Page 81
E-Mail Alert for Service Calls. Print Server Settings The Print Server Settings tab includes Basic Information, Port Settings, TCP/IP, E-Mail Alert, and SNMP pages. Basic Information Purpose: To configure the printer's basic information. Values: System Settings Printer Name Location Contact - Dell 3010cn Color Laser Printer | Printer Menus - Page 82
Duplex as the default value. 100BASE-TX FullDuplex Selects 100Base-T Full-Duplex as the default value. Current Ethernet Settings Displays the current settings of Ethernet. MAC Address Displays the printer's MAC printer is rebooted. When you change or set this item, click the Restart printer - Dell 3010cn Color Laser Printer | Printer Menus - Page 83
Simultaneous Connections Connection Time-Out Password Connection Time-Out Select the Service Call Select the check box to receive an E-Mail AlertE-Mail Alert for Service community Name in previous settings are not displayed on the screen. The default Read Community is public. Specifies the community - Dell 3010cn Color Laser Printer | Printer Menus - Page 84
-digits only. IP socket mmmmm is a value between 0 and 65535. Select the check box to notify Authenticate Error Trap. *1 The default value of each items can be changed by using Dell Printer Configuration Web Tool. IP Filter Purpose: To configure the detailed settings for the IP Filter used for - Dell 3010cn Color Laser Printer | Printer Menus - Page 85
9. Select Permit. 10. Click Apply New Settings. Other Features The Other Features tab includes Set Password page and Reset Print Server page. Set Password Purpose: To set or change the password that is required to access the printer setup parameters from the Dell Printer Configuration Web Tool. Set - Dell 3010cn Color Laser Printer | Printer Menus - Page 86
revert to the factory default settings and reboot the network capability. Click the Start button to reboot printer. Tray Settings Use the Tray Settings menu to set the printer media types and sizes for trays respectively. Values: Tray 1 Paper Type Sets the type of paper loaded in the optional - Dell 3010cn Color Laser Printer | Printer Menus - Page 87
The following illustrations show the standard Dell Color Laser Printer 3010cn, and an optional 250-sheet tray module or 500-sheet tray module. Standard printer Printer with options 1 Center output tray 2 Operator panel 3 Multipurpose feeder 4 Optional 250-sheet tray module (A4/Letter cassette - Dell 3010cn Color Laser Printer | Printer Menus - Page 88
-NNN relates to printer problems. Turn off the printer, and then on. If this does not solve the problem, contact Dell. See "Contacting Dell" in the Owner's Manual. The outer levers on both sides of the fuser unit are not securely locked. Error NNN-NNN relates to printer problems. Confirm that the - Dell 3010cn Color Laser Printer | Printer Menus - Page 89
fully inserted into the printer. Reinsert the drum cartridge. See "Replacing the Drum Cartridges" The toner cartridge is low on toner. XXX is one of the following: · Yellow Toner · Cyan Toner · Magenta Toner · Black Toner Error NNN-NNN relates to printer problems. The drum cartridge needs to be - Dell 3010cn Color Laser Printer | Printer Menus - Page 90
Press Set Invalid Job 016-799 Data Violation Press Set Insert TonerCart NNN-NNN Insert XXX Replace Toner NNN-NNN Replace XXX Ready to Print NNN-NNN XXX Is Low · BTR Cover · Paper Cover · Feeder 1 Cover · Feeder 2 Cover Error NNN-NNN relates to printer problems. The toner cartridge does not rotate - Dell 3010cn Color Laser Printer | Printer Menus - Page 91
091-402 Drum Cartridge Replace Soon Ready to Print 193-700 non-DELL Toner Installed Drum life warning. The drum cartridge needs to be replaced. The printer is in the non-Doll toner mode. Replace the drum cartridge. See "Replacing the Drum Cartridges" When some of the toner cartridges reach the - Dell 3010cn Color Laser Printer | Printer Menus - Page 92
) l "Loading the Multipurpose Feeder" l "Avoiding Jams" If you experience a jam, see "Clearing Jams" for instructions. Sending a Job to Print To support all of the printer features, use the printer driver. When you choose Print from a software program, a window representing the printer driver opens - Dell 3010cn Color Laser Printer | Printer Menus - Page 93
when you sent the job. A list of print jobs appears in the printer window. 4. Select the job you want to cancel. 5. Press on the keyboard. Printing a Printer Settings Page To verify detailed printer settings, print a Printer Settings page. A printed Printer Settings page also allows you to - Dell 3010cn Color Laser Printer | Printer Menus - Page 94
4. Press until your user name appears, and then press or . 5. If you print confidential jobs (Secure Print jobs), enter the password you have specified on the printer driver, and then press . 6. Press until the job you want to print appears, and then press or . 7. Press until the way you want to - Dell 3010cn Color Laser Printer | Printer Menus - Page 95
9. If you do not enter the password from the printer driver, it is not required at the operation panel. This function is called "Store Print". The job is then held in printer memory until you enter the same 12-digit password from the printer operator panel and choose to print or delete the job. This - Dell 3010cn Color Laser Printer | Printer Menus - Page 96
Toner and Drum Cartridges Installing the Toner Cartridge Installing the Drum Cartridge CAUTION: Before performing any of the following procedures, read and follow the safety instructions in your Owner's Manual. Installing the Toner Cartridge Install or replace the toner cartridge while the printer - Dell 3010cn Color Laser Printer | Printer Menus - Page 97
the next empty slot. When the color of the newly inserted cartridge appears on the display, followed by the Insert message, insert the next toner cartridge. 8. Repeat steps 1 through 7 when inserting the remaining cartridges. Installing the Drum Cartridge 1. When the Insert Drum or Insert Drum Cart - Dell 3010cn Color Laser Printer | Printer Menus - Page 98
, push up the lever on the right side of the printer. With the lever in the upright position, hold the drum cartridge by the handle, align the arrows on the drum cartridge with the corresponding arrows on the printer and guide the cartridge in until it snaps into place. 4. Pull down the lever - Dell 3010cn Color Laser Printer | Printer Menus - Page 99
NOTE: After installing the drum cartridge, the printer makes an adjustment for about one to two minutes. Do not turn off the printer during this time. - Dell 3010cn Color Laser Printer | Printer Menus - Page 100
when the printer is ready to print, and when a error occurs. 1. LCD display 2. Ready indicator l Displays green when the printer is ready. Press until Panel Settings appears, and then press . The Panel Settings page is printed. 5. Verify that any optional 250-sheet tray module or 500-sheet tray - Dell 3010cn Color Laser Printer | Printer Menus - Page 101
Network l Setup Security Troubleshooting Instructions l Diagnostic Menu Map (Customer Mode) l Testing "Print Quality" l Testing "Toner Pallets Check" or "Contamination Check" l Clear NVRAM Other Problems l How to replace the Drum Cartridge l How to install the Toner Cartridge l Basic toner cleaning - Dell 3010cn Color Laser Printer | Printer Menus - Page 102
operator panel. · Disable the settings in the printer driver, the printer utilities, or the software program so you can change settings on the operator panel. Printing Problems Problem Action Job did not print correct or incorrect Make sure Ready to Print appears on the operator panel before you - Dell 3010cn Color Laser Printer | Printer Menus - Page 103
Color is out of alignment. Action · The inside of printer is dirty. · If you install a new black cartridge and a ROS cleaning has not been done, this problem may happen. See "Cleaning Inside the Printer". Print is too light. · The toner may be low. Confirm the amount of the toner and change - Dell 3010cn Color Laser Printer | Printer Menus - Page 104
Advanced dialog box) to Standard in the printer driver. · If you are using downloaded fonts, verify that the fonts are supported by the printer, the host computer, and the software program. Part or all of the page prints in black. · Check the toner cartridge to make sure it is installed correctly - Dell 3010cn Color Laser Printer | Printer Menus - Page 105
"Printing a Printer Settings Page." l Make sure the option is selected in the printer driver you are using. The following table lists printer options and corrective actions for related problems. If the suggested corrective action does not correct the problem, call customer service. Problem Action - Dell 3010cn Color Laser Printer | Printer Menus - Page 106
the problem you are experiencing or the error message on the display. You need to know your printer model type and serial number. See the label on the back of the printer near the power cable for this information. Troubleshooting Guide Configuration of your printer instructions User Settings - Dell 3010cn Color Laser Printer | Printer Menus - Page 107
this same driver properties window. 26. Open up Word and create a new document. 27. Go to File ® Print. 28. Select the Dell Color Laser Printer from the printers list 29. Click the Properties button to the right. 30. This brings up Driver Properties. 31. Click on the Paper Tray Tab. 32. Change the - Dell 3010cn Color Laser Printer | Printer Menus - Page 108
3x00cn) 10. Now driver properties window. 26. Open up Word and create a new document. 27. Go to File ® Print. 28. Select the Dell Color Laser Printer from the printers list. 29. Click the Properties button to the right. 30. This brings up Driver Properties. 31. Click on the Paper Tray Tab. 32. Change - Dell 3010cn Color Laser Printer | Printer Menus - Page 109
3x00cn) 10. Now driver properties window. 26. Open up Word and create a new document. 27. Go to File ® Print. 28. Select the Dell Color Laser Printer from the printers list 29. Click the Properties button to the right. 30. This brings up Driver Properties. 31. Click on the Paper Tray Tab. 32. Change - Dell 3010cn Color Laser Printer | Printer Menus - Page 110
this same driver properties window. 26. Open up Word and create a new document. 27. Go to File ® Print. 28. Select the Dell Color Laser Printer from the printers list 29. Click the Properties button to the right. 30. This brings up Driver Properties. 31. Click on the Paper Tray Tab. 32. Change the - Dell 3010cn Color Laser Printer | Printer Menus - Page 111
this same driver properties window. 26. Open up Word and create a new document. 27. Go to File ® Print. 28. Select the Dell Color Laser Printer from the printers list 29. Click the Properties button to the right. 30. This brings up Driver Properties. 31. Click on the Paper Tray Tab. 32. Change the - Dell 3010cn Color Laser Printer | Printer Menus - Page 112
this same driver properties window. 27. Open up Word and create a new document. 28. Go to File ® Print. 29. Select the Dell Color Laser Printer from the printers list 30. Click the Properties button to the right. 31. This brings up Driver Properties. 32. Click on the Paper Tray Tab. 33. Change the - Dell 3010cn Color Laser Printer | Printer Menus - Page 113
software you want to install. 9. When the Congratulations! screen appears, click Finish. 10. Click Cancel. Setup Network Print and Check the Printer Settings Page 1. Print the Printer Settings page. a. When Ready to Print appears in the LCD, press Menu. b. Press until Configure appears, and then - Dell 3010cn Color Laser Printer | Printer Menus - Page 114
network, and then enter a share name that users easily identify. 8. If you want to set a printer as the default, select the printer and then click the Set this printer as default check box. 9. If you want to restrict color printing, select the appropriate ColorTrack option. Enter the password. 10 - Dell 3010cn Color Laser Printer | Printer Menus - Page 115
to lock the operator panel. When changing the password for the Dell Printer Configuration Web Tool, click Set Password on the left frame and set the password. Troubleshooting Instructions Use the Customer Mode to locate the unit in the printer that causes a problem. Diagnostic Menu Map (Customer - Dell 3010cn Color Laser Printer | Printer Menus - Page 116
by phone, see your Owner's Manual. Dell recommends Dell drum cartridges for your printer. Dell does not provide warranty coverage for problems caused by using accessories, parts, or components not supplied by Dell. Removing the Used Drum Cartridge NOTE: Remove any print jobs from the center output - Dell 3010cn Color Laser Printer | Printer Menus - Page 117
hot. Allow time for the printer to cool before attempting to remove parts in this area. Installing the New Drum Cartridge 1. Remove the protective sheet from the drum cartridge. CAUTION: Do not touch the drum at the bottom of the drum cartridge. 2. To insert the drum cartridge, push up the lever on - Dell 3010cn Color Laser Printer | Printer Menus - Page 118
by phone, see "Ordering Toner Cartridges" in your Owner's Manual. Dell recommends Dell toner cartridges for your printer. Dell does not provide warranty coverage for problems caused by using accessories, parts, or components not supplied by Dell. Selecting a Replacement Toner Cartridge 1. Press Menu - Dell 3010cn Color Laser Printer | Printer Menus - Page 119
to replace appears, and press . NOTE: Each time you replace a black cartridge, you should use the cleaning rod. See "Cleaning Inside the Printer." Replacing the Used Toner Cartridge NOTE: Remove any print jobs from the center output tray and close the multipurpose feeder cover before opening the - Dell 3010cn Color Laser Printer | Printer Menus - Page 120
, keeping it parallel with the toner cartridge. 6. To insert the toner cartridge, face the label on the cartridge to the front and align it with the arrows on the printer. NOTE: Make sure that the printer is turned on. Inserting the cartridge a. Guide the cartridge until it snaps into place. CAUTION - Dell 3010cn Color Laser Printer | Printer Menus - Page 121
when inserting the remaining cartridges. Basic toner cleaning instructions A cleaning rod for cleaning inside the printer is installed on your printer. 1. Open the front door. 2. Pull out the slide bar that is inside the printer on the right side until it stops. The access window cover slides open. - Dell 3010cn Color Laser Printer | Printer Menus - Page 122
3. Hold the cleaning rod and push the rod in and pull out once to clean inside the printer. 4. Push the slide bar back to its original position. 5. Close the front door.
-
 1
1 -
 2
2 -
 3
3 -
 4
4 -
 5
5 -
 6
6 -
 7
7 -
8
-
9
-
10
-
11
-
12
-
13
-
14
-
15
-
16
-
17
-
18
-
19
-
20
-
21
-
22
-
23
-
24
-
25
-
26
-
27
-
28
-
29
-
30
-
31
-
32
-
33
-
34
-
35
-
36
-
37
-
38
-
39
-
40
-
41
-
42
-
43
-
44
-
45
-
46
-
47
-
48
-
49
-
50
-
51
-
52
-
53
-
54
-
55
-
56
-
57
-
58
-
59
-
60
-
61
-
62
-
63
-
64
-
65
-
66
-
67
-
68
-
69
-
70
-
71
-
72
-
73
-
74
-
75
-
76
-
77
-
78
-
79
-
80
-
81
-
82
-
83
-
84
-
85
-
86
-
87
-
88
-
89
-
90
-
91
-
92
-
93
-
94
-
95
-
96
-
97
-
98
-
99
-
100
-
101
-
102
-
103
-
104
-
105
-
106
-
107
-
108
-
109
-
110
-
111
-
112
-
113
-
114
-
115
-
116
-
117
-
118
-
119
-
120
-
121
-
122
 |
 |

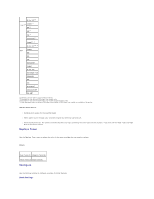
Understanding Printer Menus
When your printer is configured as a network printer available to a number of users, the access to the
Configure
menus can be limited. This prevents other
users from using the operator panel to inadvertently change a printer user default that has been set by the administrator. In this case, you can access the
Stored Print
,
Tray Settings
, and
Replace Toner
menus only.
However, you can use your printer driver to override printer user defaults and select settings for individual print jobs.
Using the Printer Menus
Setting of Panel Lock
Using the Printer Menus
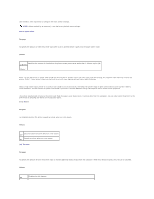
Stored Print
This menu provides applicable printing services such as
Secure Print
and
Proof Print
.
Secure Print
Purpose:
To print confidential jobs. The printer can hold the job in memory until you arrive at the printer and type the password on the operator panel. This requires 320
MB or more of RAM to be enabled. In addition, set the
RAM Disk
setting to
On
.
Values:
Proof Print
Purpose:
To print only one copy and check the print result before printing all of the copies. This prevents a large number of misprinted copies from being printed at one
time. This requires 320 MB or more of RAM to be enabled. In addition, set the
RAM Disk
setting to
On
.
Values:
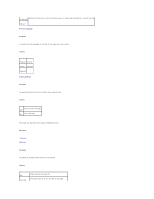
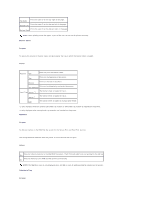
Tray Settings
Del after Print
Prints the job, and then deletes it from printer memory.
Save after Print
Prints the job, and then saves it in printer memory.
Delete
Deletes the job from printer memory.
Del after Print
Prints the job, and then deletes it from printer memory.
Save afterPrint
Prints the job, and then saves it in printer memory.
Delete
Deletes the job from printer memory.