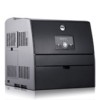
Dell 3010cn Color Laser Printer Printer Menus - Page 100
Operator Panel
 |
View all Dell 3010cn Color Laser Printer manuals
Add to My Manuals
Save this manual to your list of manuals |
Page 100 highlights
Operator Panel Using the Operator Panel Buttons Printing a Panel Settings Page Using the Operator Panel Buttons The printer operator panel has a 2-line by 16-character liquid crystal display (LCD), seven buttons, and two indicators that flash when the printer is ready to print, and when a error occurs. 1. LCD display 2. Ready indicator l Displays green when the printer is ready. Blinks when data is being received. 3. buttons l In the Menu mode, displays menus or items in order. 4. Menu button l Toggles between the Menu mode and the Print mode. 5. buttons l In the Menu mode, selects different submenus. Also selects setting values. 6. Error indicator l Displays red when an error has occurred. Blinks when an irrecoverable error has occurred. 7. Cancel button l In the Menu mode, exits to the Print mode. l Cancels current print job. 8. button l In the Menu mode, selects the currently displayed menu or item. l In the Print mode, outputs data in the printer. Printing a Panel Settings Page The Panel Settings page shows current settings for the operator panel menus. 1. Press Menu. 2. Press until Configure appears, and then press or . 3. Press until Reports appears, and then press or . 4. Press until Panel Settings appears, and then press . The Panel Settings page is printed. 5. Verify that any optional 250-sheet tray module or 500-sheet tray module you installed are configured for the sizes and types of print media you loaded.
-
 1
1 -
2
-
3
-
4
-
5
-
6
-
7
-
8
-
9
-
10
-
11
-
12
-
13
-
14
-
15
-
16
-
17
-
18
-
19
-
20
-
21
-
22
-
23
-
24
-
25
-
26
-
27
-
28
-
29
-
30
-
31
-
32
-
33
-
34
-
35
-
36
-
37
-
38
-
39
-
40
-
41
-
42
-
43
-
44
-
45
-
46
-
47
-
48
-
49
-
50
-
51
-
52
-
53
-
54
-
55
-
56
-
57
-
58
-
59
-
60
-
61
-
62
-
63
-
64
-
65
-
66
-
67
-
68
-
69
-
70
-
71
-
72
-
73
-
74
-
75
-
76
-
77
-
78
-
79
-
80
-
81
-
82
-
83
-
84
-
85
-
86
-
87
-
88
-
89
-
90
-
91
-
92
-
93
-
94
-
 95
95 -
 96
96 -
 97
97 -
 98
98 -
 99
99 -
 100
100 -
 101
101 -
 102
102 -
 103
103 -
 104
104 -
 105
105 -
106
-
107
-
108
-
109
-
110
-
111
-
112
-
113
-
114
-
115
-
116
-
117
-
118
-
119
-
120
-
121
-
122
 |
 |
