Dell 3010cn Color Laser Printer Printer Menus - Page 41
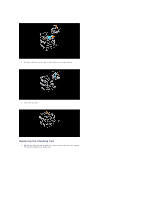
Replacing the Toner Cartridge
 |
View all Dell 3010cn Color Laser Printer manuals
Add to My Manuals
Save this manual to your list of manuals |
Page 41 highlights
7. Close the front door. Replacing the Toner Cartridge CAUTION: Before performing any of the following procedures, read and follow the safety instructions in your Owner's Manual. In addition to the toner level indicator that appears each time you send a job to print, a message appears on the operator panel to alert you when it's time to order a new toner cartridge. Dell toner cartridges are available only through Dell. You can order more toner online at http://www.dell.com/supplies or by phone. To order by phone, see "Ordering Toner Cartridges" in your Owner's Manual. Dell recommends Dell toner cartridges for your printer. Dell does not provide warranty coverage for problems caused by using accessories, parts, or components not supplied by Dell. Selecting a Replacement Toner Cartridge 1. Press Menu. 2. Press until Replace Toner appears, and then press or . 3. Press until the desired toner to replace appears, and press . NOTE: Each time you replace a black cartridge, you should use the cleaning rod. See "Cleaning Inside the Printer." Removing the Used Toner Cartridge NOTE: Remove any print jobs from the center output tray and close the multipurpose feeder cover before opening the front door. 1. Grab the notch in the front door and pull forward. The toner cartridge that must be replaced has moved to the front of the printer. 2. Push up the handhold on the right to unlock the cartridge.
-
 1
1 -
2
-
3
-
4
-
5
-
6
-
7
-
8
-
9
-
10
-
11
-
12
-
13
-
14
-
15
-
16
-
17
-
18
-
19
-
20
-
21
-
22
-
23
-
24
-
25
-
26
-
27
-
28
-
29
-
30
-
31
-
32
-
33
-
34
-
35
-
 36
36 -
 37
37 -
 38
38 -
 39
39 -
 40
40 -
 41
41 -
 42
42 -
 43
43 -
 44
44 -
 45
45 -
 46
46 -
47
-
48
-
49
-
50
-
51
-
52
-
53
-
54
-
55
-
56
-
57
-
58
-
59
-
60
-
61
-
62
-
63
-
64
-
65
-
66
-
67
-
68
-
69
-
70
-
71
-
72
-
73
-
74
-
75
-
76
-
77
-
78
-
79
-
80
-
81
-
82
-
83
-
84
-
85
-
86
-
87
-
88
-
89
-
90
-
91
-
92
-
93
-
94
-
95
-
96
-
97
-
98
-
99
-
100
-
101
-
102
-
103
-
104
-
105
-
106
-
107
-
108
-
109
-
110
-
111
-
112
-
113
-
114
-
115
-
116
-
117
-
118
-
119
-
120
-
121
-
122
 |
 |
