Dell Dimension 2400 Owner's Manual - Page 62
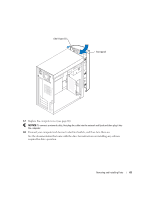
Check all cable connections, and then fold the cables out of the way to provide airflow for
 |
View all Dell Dimension 2400 manuals
Add to My Manuals
Save this manual to your list of manuals |
Page 62 highlights
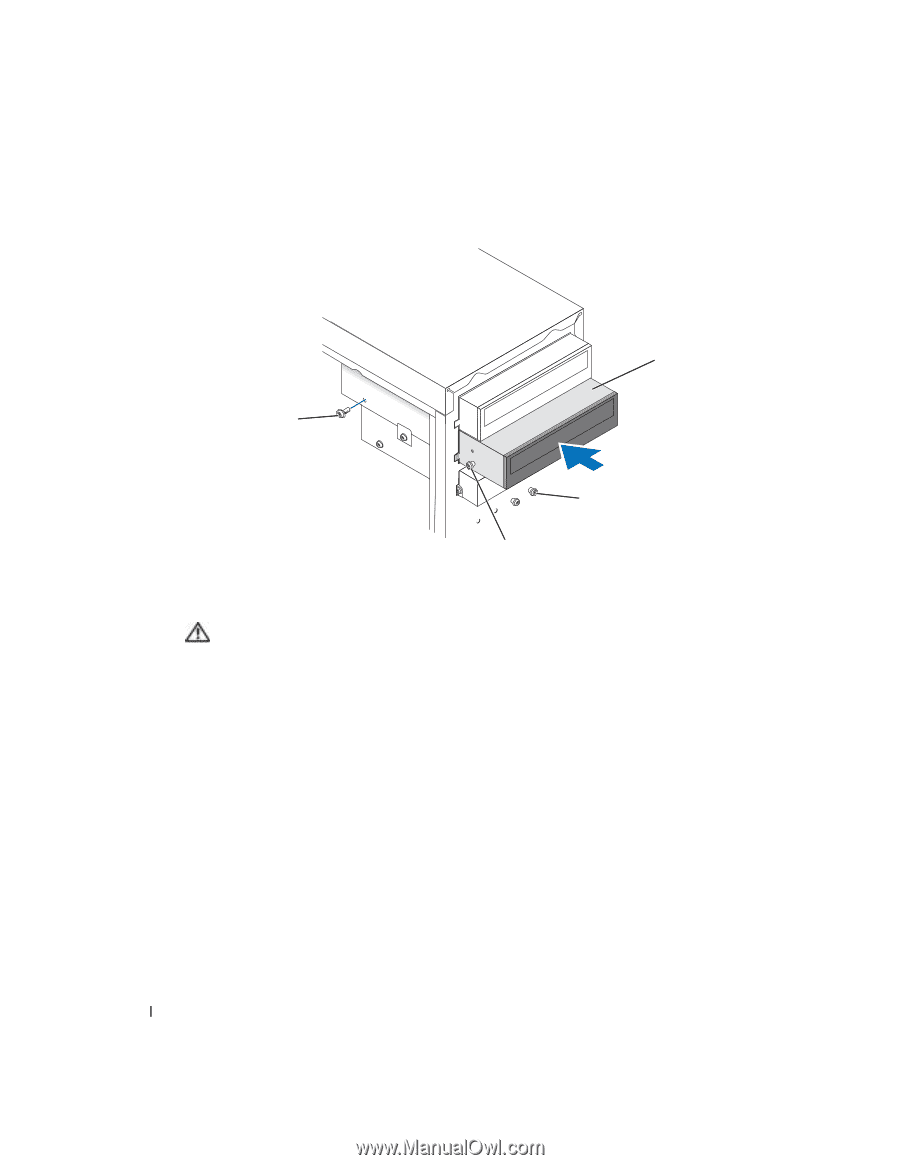
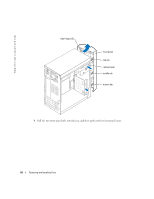
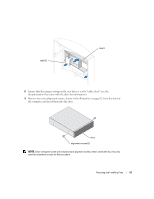
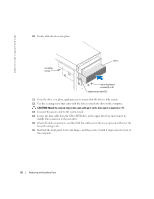
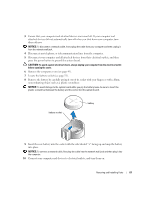
www.dell.com | support.dell.com 10 Gently slide the drive into place. securing screw drive extra alignment screws (2 or 4) alignment screws (2) 11 Once the drive is in place, apply pressure to ensure that the drive is fully seated. 12 Use the securing screw that came with the drive to attach the drive to the computer. CAUTION: Match the colored strip on the cable with pin 1 on the drive (pin 1 is marked as "1"). 13 Connect the power cable to the system board. 14 Locate the data cable from the CD or DVD drive in the upper drive bay and connect its middle data connector to the new drive. 15 Check all cable connections, and then fold the cables out of the way to provide airflow for the fan and cooling vents. 16 Reattach the front panel to the side hinges, and then rotate it until it snaps onto the front of the computer. 62 Removing and Installing Parts
-
 1
1 -
2
-
3
-
4
-
5
-
6
-
7
-
8
-
9
-
10
-
11
-
12
-
13
-
14
-
15
-
16
-
17
-
18
-
19
-
20
-
21
-
22
-
23
-
24
-
25
-
26
-
27
-
28
-
29
-
30
-
31
-
32
-
33
-
34
-
35
-
36
-
37
-
38
-
39
-
40
-
41
-
42
-
43
-
44
-
45
-
46
-
47
-
48
-
49
-
50
-
51
-
52
-
53
-
54
-
55
-
56
-
 57
57 -
 58
58 -
 59
59 -
 60
60 -
 61
61 -
 62
62 -
 63
63 -
 64
64 -
 65
65 -
 66
66 -
 67
67 -
68
-
69
-
70
-
71
-
72
-
73
-
74
-
75
-
76
-
77
-
78
-
79
-
80
-
81
-
82
-
83
-
84
-
85
-
86
-
87
-
88
-
89
-
90
-
91
-
92
-
93
-
94
-
95
-
96
-
97
-
98
-
99
-
100
 |
 |