Denon CDR-1000 Owners Manual - Page 10
Recording - remote
 |
View all Denon CDR-1000 manuals
Add to My Manuals
Save this manual to your list of manuals |
Page 10 highlights
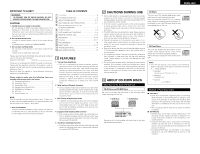
ENGLISH (3) Names and Functions of Remote Control Unit Buttons 5 Buttons without descriptions have the same function as those on the main unit. See "PART NAMES AND FUNCTIONS" on Page 8. Scan button (SCAN) • Plays/program plays the first 10 seconds of each track. Repeat button (REPEAT) Number/alphabet buttons (0 ~ 9) • Selects a track by number. • For 2-digit track numbers, press the buttons in rapid succession. • Selects character for text input. Track mark button (TRACK MARK) • Increases track numbers during recording. (Only Manual Rec mode). Automatic search reverse button (8) • Current track (Play and Program mode). Manual search reverse button (6) SCAN ON /STANDBY REPEAT PROGRAM SHUFFLE ABC 1 JKL 4 RST 7 TRACK MARK DEF 2 GHI 3 MN 5 OPQ 6 UVW 8 XYZ 9 SPACE SCROLL 0 PLAY STOP PAUSE STORE / MENU ENTER CANCEL/ DELETE REMOTE CONTROL UNIT RC-276 10 Program button (PROGRAM) On/Standby button (ON/STANDBY) • Switches to Standby/On. Shuffle button (SHUFFLE) Scroll button (SCROLL) Automatic search forward button (9) • Next track (Play and Program mode). Play button (1 PLAY) • Starts play. Manual search forward button (7) Stop button (2 STOP) Pause button (3 PAUSE) • Interrupts play/recording. Cancel/Delete button (CANCEL/DELETE) Enter button (ENTER) Store/Menu button (STORE/MENU) (4) Inserting Discs q Press the OPEN/CLOSE button (5) to open the disc tray. • "OPEN" lights up. w Insert a CD, CD-R or CD-RW in the appropriate recess in the tray, label side up. e Press the OPEN/CLOSE button (5) to close the tray. • "CLOSE" lights up, followed by "READING" and the display will show the type of disc you inserted. • If you insert a blank or partly-recorded CD-R or unfinalized CD-RW, the CD recorder will calibrate the disc for optimum recording. During this process the display will first show "INITIALIZING" and then the number of audio tracks. Calibration can take up to 40 seconds. • If a CD-R/RW is finalized it will show "CD" on the display. • If CD-text is available the TITLE/ARTIST will scroll by. B Recess Disc tray OPEN/CLOSE button (5) REM REC TIME 123 OPTICAL I 4 5 6 7 8 9 10 CD 11 RW L R TRACK TIME MANUAL SYNC NOTES: • If your finger should get caught in the disc tray when it closes, press the OPEN/CLOSE button (5). • Only Audio CDs will be accepted. If a non-audio disc is inserted, the display shows "WRONG DISC". • For recording it is important that the blank disc is completely free from dust particles or scratches. See "Disc cleaning" on page 6. 9 RECORDING Remarks About Recording • To assure accurate recording, record with an ambient temperature of 30°C or less. • Recording may stop if the unit is subject to shocks during recording. If recording stops, it may no longer be possible to use the disc normally. ("DISC ERROR") Recording Modes 5 Your recorder offers several recording modes. 5 Pressing the REC MODE button will switch the recording mode as described below. RECORD DISC ª RECORD TRACK • To make a synchronized recording of the complete disc or a program simply by starting the source. • To make a synchronized recording of a single track simply by starting the source. ª REC MANUAL • To manually start a recording simply by pressing the REC button. ª MAKE CD • To make a synchronized recording of the complete disc or a program simply by starting the source. Finalizing will be done automatically. NOTE: • Analog recording is not possible in the Make CD mode. Some remarks on recording: • When Auto track is ON (default setting), track numbers will automatically be increased during recording. • By programming the source first, a compilation can be recorded. • If a finalized CD-R disc is inserted in the CD recorder, "FINALIZED CD" will be displayed when the REC MODE button is pressed. Recording is not possible. • If a finalized CD-RW disc is inserted in the CD recorder, "UNFINALIZE" and "PRESS ENTER" will be dis-played when the REC MODE button is pressed. If ENTER button is pressed, the disc will be unfinalized.
-
 1
1 -
2
-
3
-
4
-
 5
5 -
 6
6 -
 7
7 -
 8
8 -
 9
9 -
 10
10 -
 11
11 -
 12
12 -
 13
13 -
 14
14 -
 15
15 -
16
-
17
-
18
-
19
-
20
-
21
-
22
-
23
-
24
-
25
-
26
-
27
-
28
-
29
-
30
-
31
-
32
-
33
-
34
-
35
-
36
-
37
-
38
-
39
-
40
-
41
-
42
-
43
-
44
-
45
-
46
-
47
-
48
-
49
-
50
 |
 |
