Garmin Geko 301 Owner's Manual - Page 23
Turning the, Electronic Compass On and Off, To use, Sight 'N Go to navigate
 |
UPC - 753759042073
View all Garmin Geko 301 manuals
Add to My Manuals
Save this manual to your list of manuals |
Page 23 highlights
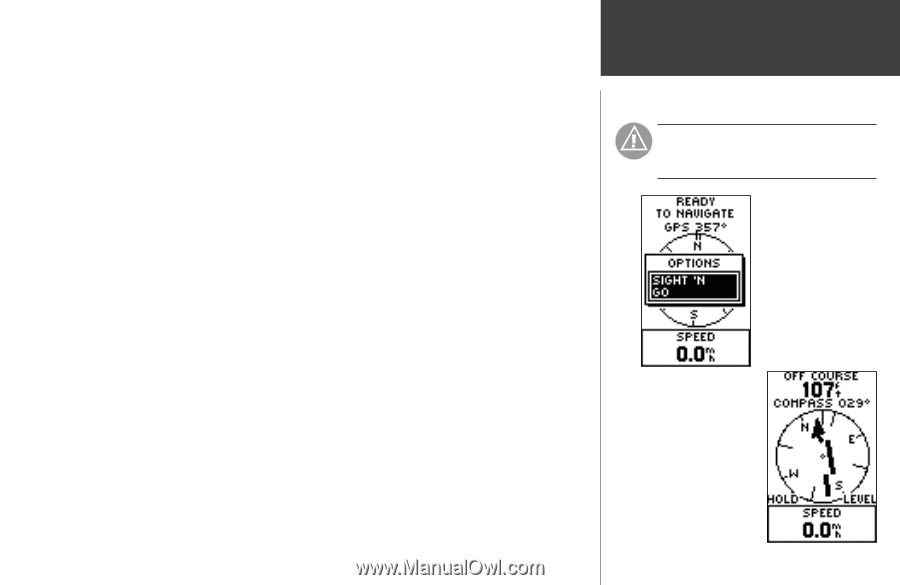
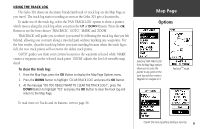
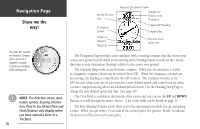
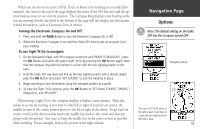
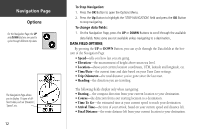
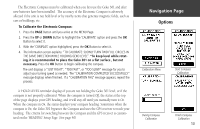
When you are not on an active GOTO, Track, or Route (not traveling to a recorded destination), the status at the top of the page displays the status of the GPS Receiver and the approximate accuracy of our current position. The Compass Ring displays your heading while you are moving, but the data field at the bottom of the page will not display any destination related information, such as Estimated Time of Arrival. Turning the Electronic Compass On and Off: 1. Press and hold the PAGE Button to turn the Electronic Compass On or Off. 2. When the Electronic Compass is on, hold the Geko 301 level to get an accurate Compass reading. To use Sight 'N Go to navigate: 1. On the Navigation Page, with the compass turned on and 'READY TO NAVIGATE', press the OK Button and select the option Sight 'N Go by pressing the OK Button again. Note that the compass ring with the pointer is in-line with the two sighting marks on the case. 2. Hold the Geko 301 eye-level and line up the two sighting marks with a distant object, press the OK Button and select 'SET COURSE' to lock the heading in place. 3. Begin traveling to your destination using the compass pointer as a guide. 4. To view the Sight 'N Go options, press the OK Button to 'SET (New) COURSE', 'PROJECT (Waypoint)', and 'RE-SIGHT'. When using a Sight 'N Go, the compass displays a broken course pointer. What this means is as you are moving, if you were to stray left or right of your pre-set course, the middle section of the course pointer moves to the left or right of the center. To get back on course, travel in the direction that moves the middle line back to the center and lines up proper with the pointer. You want to keep the middle line in the center as best as possible when traveling. For an example, look at the picture in the right column. Navigation Page Options Note: The default setting on the Geko 301 has the Compass turned OFF. Navigation Options This user is 107 ft off course to the right or east. To get back on course, the user needs to bear to their left or west. 11
-
 1
1 -
2
-
3
-
4
-
5
-
6
-
7
-
8
-
9
-
10
-
11
-
12
-
13
-
14
-
15
-
16
-
17
-
 18
18 -
 19
19 -
 20
20 -
 21
21 -
 22
22 -
 23
23 -
 24
24 -
 25
25 -
 26
26 -
 27
27 -
 28
28 -
29
-
30
-
31
-
32
-
33
-
34
-
35
-
36
-
37
-
38
-
39
-
40
-
41
-
42
-
43
-
44
-
45
-
46
-
47
-
48
-
49
-
50
-
51
-
52
-
53
-
54
-
55
-
56
-
57
-
58
-
59
-
60
-
61
-
62
-
63
-
64
-
65
-
66
-
67
-
68
 |
 |