Garmin Geko 301 Owner's Manual - Page 39
save a track for navigation later, rename a saved track log
 |
UPC - 753759042073
View all Garmin Geko 301 manuals
Add to My Manuals
Save this manual to your list of manuals |
Page 39 highlights
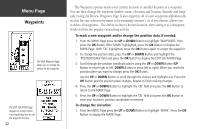
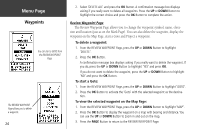
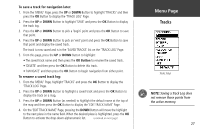
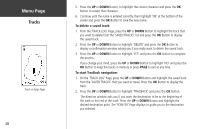
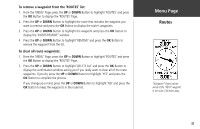
To save a track for navigation later: 1. From the 'MENU' Page, press the UP or DOWN Button to highlight 'TRACKS' and then press the OK Button to display the 'TRACK LOG' Page. 2. Press the UP or DOWN Button to highlight 'SAVE' and press the OK Button to display the track log. 3. Press the UP or DOWN Button to pick a 'begin' point and press the OK Button to save that point. 4. Press the UP or DOWN Button to pick an 'end' point and press the OK Button to save that point and display the saved track. The track is now saved and is in the 'SAVED TRACKS' list on the 'TRACK LOG' Page. 5. From this page, press the UP or DOWN Button to highlight: • The saved track name and then press the OK Button to rename the saved track. • 'DELETE' and then press the OK Button to delete this track. • 'NAVIGATE' and then press the OK Button to begin navigation from either point. To rename a saved track log: 1. From the 'MENU' Page, highlight 'TRACKS' and press the OK Button to display the 'TRACK LOG' Page. 2. Press the UP or DOWN Button to highlight a saved track and press the OK Button to display the track on a map. 3. Press the UP or DOWN Button (as needed) to highlight the default name at the top of the map and then press the OK Button to display the 'EDIT TRACK NAME' Page. 4. On the 'EDIT TRACK NAME' Page, pressing the DOWN Button will move the highlight to the next place in the name field. When the desired place is highlighted, press the OK Button to activate the drop-down alphanumeric list. (contined on next page) Menu Page Tracks Tracks Setup ) NOTE: Saving a Track Log does not remove those points from the active memory. 27
-
 1
1 -
2
-
3
-
4
-
5
-
6
-
7
-
8
-
9
-
10
-
11
-
12
-
13
-
14
-
15
-
16
-
17
-
18
-
19
-
20
-
21
-
22
-
23
-
24
-
25
-
26
-
27
-
28
-
29
-
30
-
31
-
32
-
33
-
 34
34 -
 35
35 -
 36
36 -
 37
37 -
 38
38 -
 39
39 -
 40
40 -
 41
41 -
 42
42 -
 43
43 -
 44
44 -
45
-
46
-
47
-
48
-
49
-
50
-
51
-
52
-
53
-
54
-
55
-
56
-
57
-
58
-
59
-
60
-
61
-
62
-
63
-
64
-
65
-
66
-
67
-
68
 |
 |
