HP 1050c HP DesignJet 1000 Series Take-Up Reel UserÂ’s Guide - C60 - Page 15
screw as shown below., Tighten the two screws supporting
 |
View all HP 1050c manuals
Add to My Manuals
Save this manual to your list of manuals |
Page 15 highlights
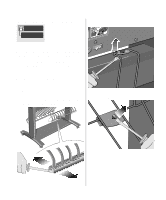
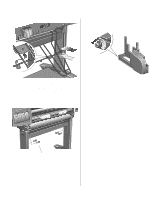
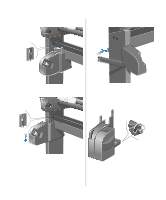
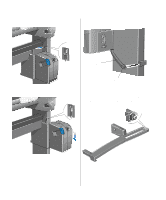
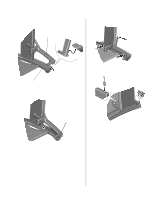
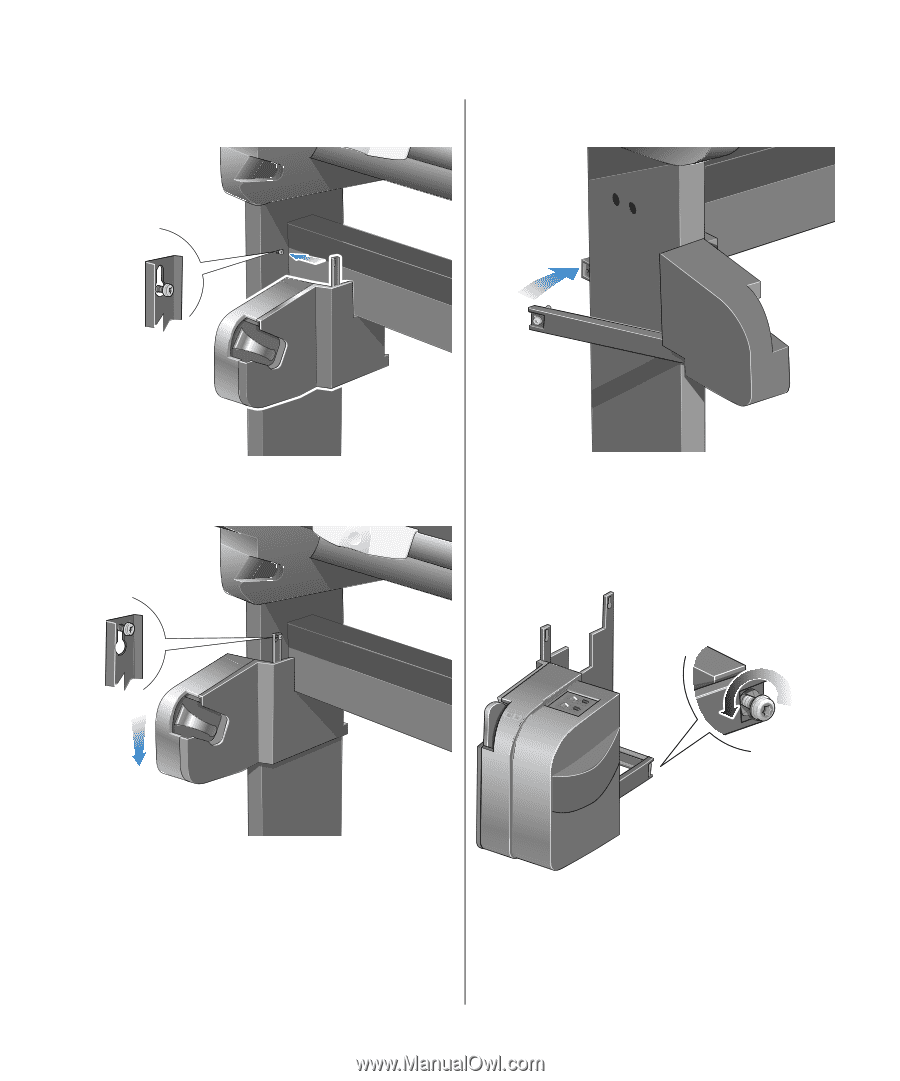
12. Open the clamp and fit the left-hand assembly 14. Close the clamp and secure with the clamp on to the screws installed in step 10. screw as shown below. 13. Pull the left-hand assembly down so that it rests securely on the screws. 15. Tighten the two screws supporting the assembly. 16. Release the clamp on the right-hand assembly. by loosening the screw shown below. Do not remove the screw. 15 HP DesignJet 1000 Series Take-Up Reel
-
 1
1 -
2
-
3
-
4
-
5
-
6
-
7
-
8
-
9
-
 10
10 -
 11
11 -
 12
12 -
 13
13 -
 14
14 -
 15
15 -
 16
16 -
 17
17 -
 18
18 -
 19
19 -
 20
20 -
21
-
22
-
23
-
24
-
25
-
26
-
27
-
28
-
29
-
30
-
31
-
32
-
33
-
34
-
35
-
36
-
37
-
38
-
39
-
40
-
41
-
42
-
43
-
44
 |
 |
15
HP DesignJet 1000 Series Take-Up Reel
12.
Open the clamp and fit the left-hand assembly
on to the screws installed in step 10.
13.
Pull the left-hand assembly down so that it
rests securely on the screws.
14.
Close the clamp and secure with the clamp
screw as shown below.
15.
Tighten the two screws supporting the
assembly.
16.
Release the clamp on the right-hand assembly.
by loosening the screw shown below. Do not remove
the screw.