HP 1050c HP DesignJet 1000 Series Take-Up Reel UserÂ’s Guide - C60 - Page 18
Ensure the spindle lock is open., guide back on to the spindle and lock it with the blue - designjet 36
 |
View all HP 1050c manuals
Add to My Manuals
Save this manual to your list of manuals |
Page 18 highlights
26. Connect the power cord into the rear of the take-up reel. 29. Ensure the spindle lock is open. Power switch 27. Use the blue lever to unlock the left-hand paper guide on the take-up reel spindle. Remove the paper guide. 30. Install the take-up reel spindle into the printer 28. Assemble the take-up reel core and put it on to the spindle as shown below. Then put the paper by pushing firmly on each end of the spindle A then B as shown below. guide back on to the spindle and lock it with the blue lever.. A B 42'' + + + /=1==3056560'4'7/'9''/'m/11125m37m702mmmmm 12'' / 305mm 42'' + + / =1=03=6655'07'/4'9m'/'1'1/m1523m770m2mmmm + 12'' / 305mm HP DesignJet 1000 Series Take-Up Reel 18
-
 1
1 -
2
-
3
-
4
-
5
-
6
-
7
-
8
-
9
-
10
-
11
-
12
-
 13
13 -
 14
14 -
 15
15 -
 16
16 -
 17
17 -
 18
18 -
 19
19 -
 20
20 -
 21
21 -
 22
22 -
 23
23 -
24
-
25
-
26
-
27
-
28
-
29
-
30
-
31
-
32
-
33
-
34
-
35
-
36
-
37
-
38
-
39
-
40
-
41
-
42
-
43
-
44
 |
 |
HP DesignJet 1000 Series Take-Up Reel
18
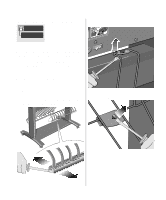
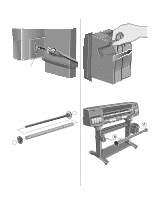
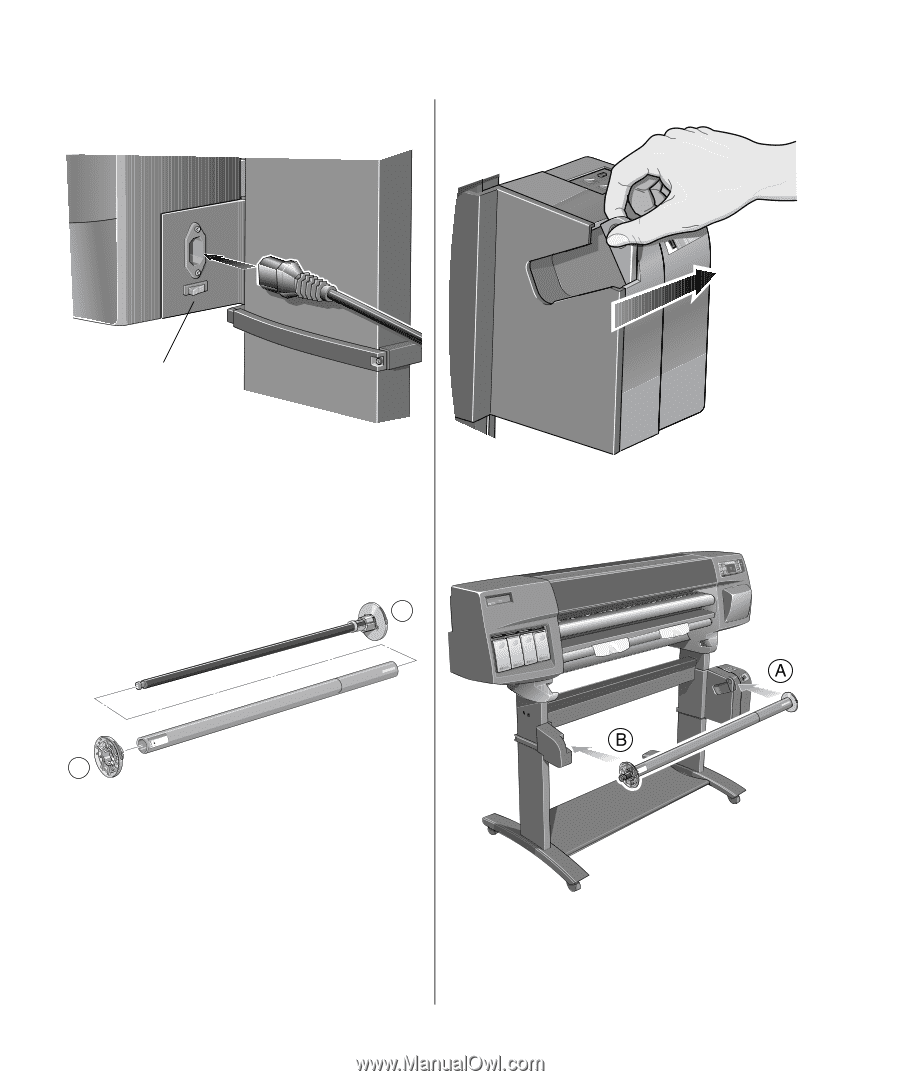
26.
Connect the power cord into the rear of the
take-up reel.
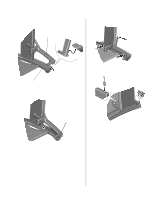
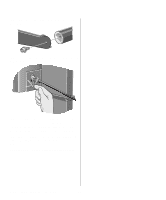
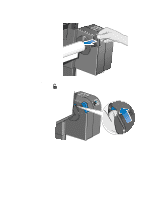
27.
Use the blue lever to unlock the left-hand
paper guide on the take-up reel spindle. Remove the
paper guide.
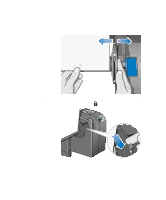
28.
Assemble the take-up reel core and put it on to
the spindle as shown below. Then put the paper
guide back on to the spindle and lock it with the blue
lever..
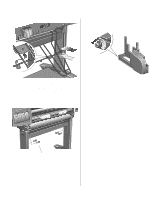
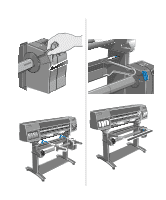
29.
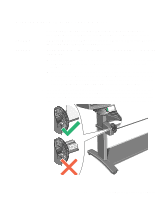
Ensure the spindle lock is open.
30.
Install the take-up reel spindle into the printer
by pushing firmly on each end of the spindle A then
B as shown below.
Power switch
12'' / 305mm
42'' / 1067mm
+
54''/1372mm
=
+
36''/915mm
=
+
50''/1270mm
=
A
B