HP 1050c HP DesignJet 1000 Series Take-Up Reel UserÂ’s Guide - C60 - Page 33
It is important that the take-up core is the same width as the paper you are using. - designjet supplies
 |
View all HP 1050c manuals
Add to My Manuals
Save this manual to your list of manuals |
Page 33 highlights
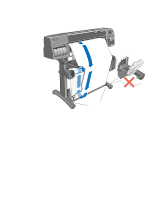
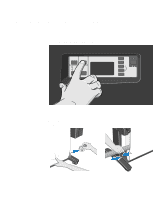
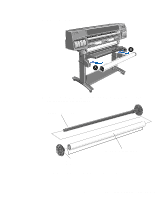
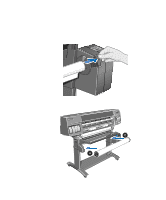
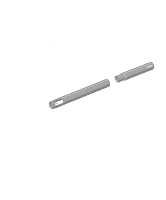
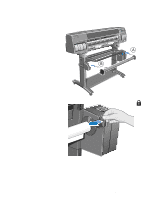
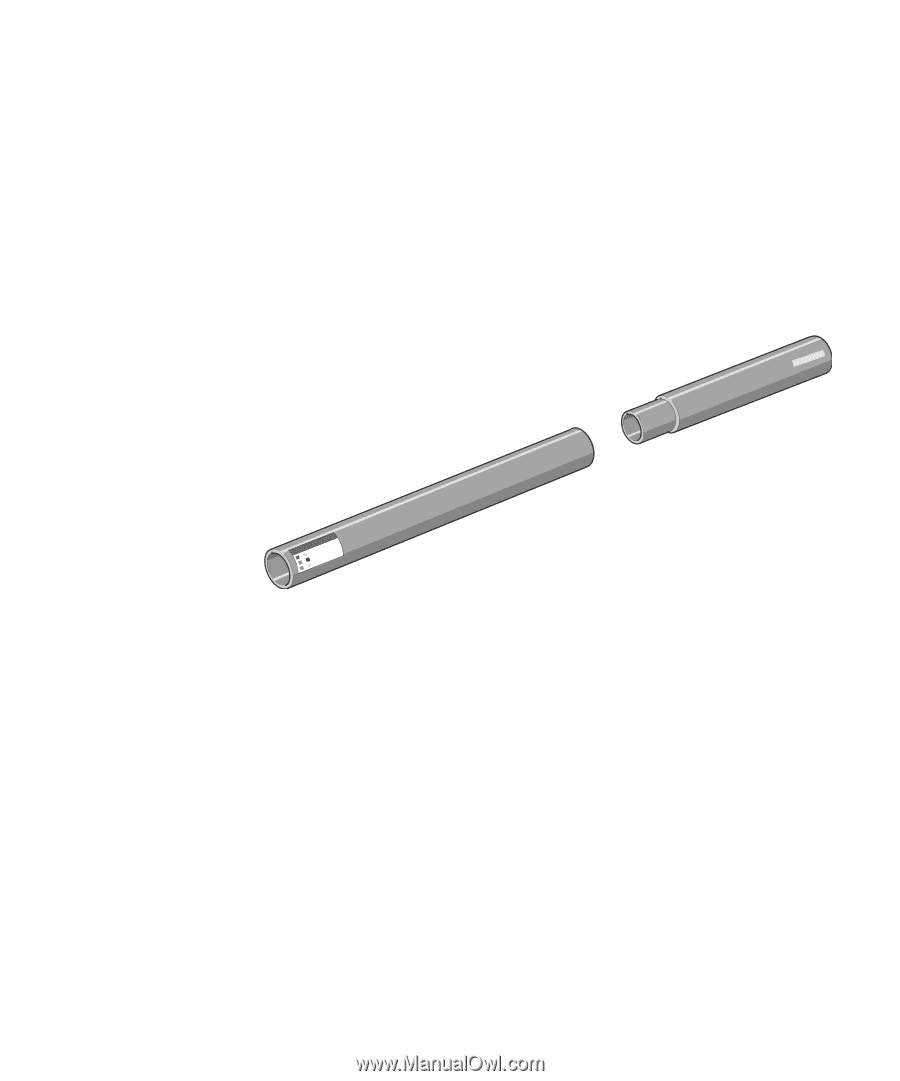
3 Remove the left-hand paper guide. 4 Remove the old take-up core. 5 Install the new core you have chosen onto the spindle and re-install the left hand guide assembly. NOTE: You can also use an empty cardboard tube to replace the plastic take-up core that was supplied with your printer. It is important that the take-up core is the same width as the paper you are using. By matching color coded lengths of plastic tube, you can make a take-up core for different widths of standard paper sizes: 24", 36". 12'' / 305mm +2+4+''=/=3=66515'0'0/4'9''/m'11/152m3m770m2mmmm Alternatively, you can use an empty paper cardboard core. NOTE: Ensure the take-up core is pushed firmly into both paper guides. 33 HP DesignJet 1000 Series Take-Up Reel
-
 1
1 -
2
-
3
-
4
-
5
-
6
-
7
-
8
-
9
-
10
-
11
-
12
-
13
-
14
-
15
-
16
-
17
-
18
-
19
-
20
-
21
-
22
-
23
-
24
-
25
-
26
-
27
-
 28
28 -
 29
29 -
 30
30 -
 31
31 -
 32
32 -
 33
33 -
 34
34 -
 35
35 -
 36
36 -
 37
37 -
 38
38 -
39
-
40
-
41
-
42
-
43
-
44
 |
 |
33
HP DesignJet 1000 Series Take-Up Reel
3
Remove the left-hand paper guide.
4
Remove the old take-up core.
5
Install the new core you have chosen onto the spindle and re-install the left hand
guide assembly.
NOTE:
You can also use an empty cardboard tube to replace the plastic take-up core
that was supplied with your printer.
It is important that the take-up core is the same width as the paper you are using. By
matching color coded lengths of plastic tube, you can make a take-up core for
different widths of standard paper sizes: 24”, 36”.
Alternatively, you can use an empty paper cardboard core.
NOTE:
Ensure the take-up core is pushed firmly into both paper guides.
12'' / 305mm
+
54''/1372mm
=
+
36''/915mm
=
+
50''/1270mm
=
24'' / 610mm