HP 30b HP 20b Business Consultant and HP 30b Business Professional User's Guid - Page 17
Menu Maps, INPUT, FIXED
 |
View all HP 30b manuals
Add to My Manuals
Save this manual to your list of manuals |
Page 17 highlights
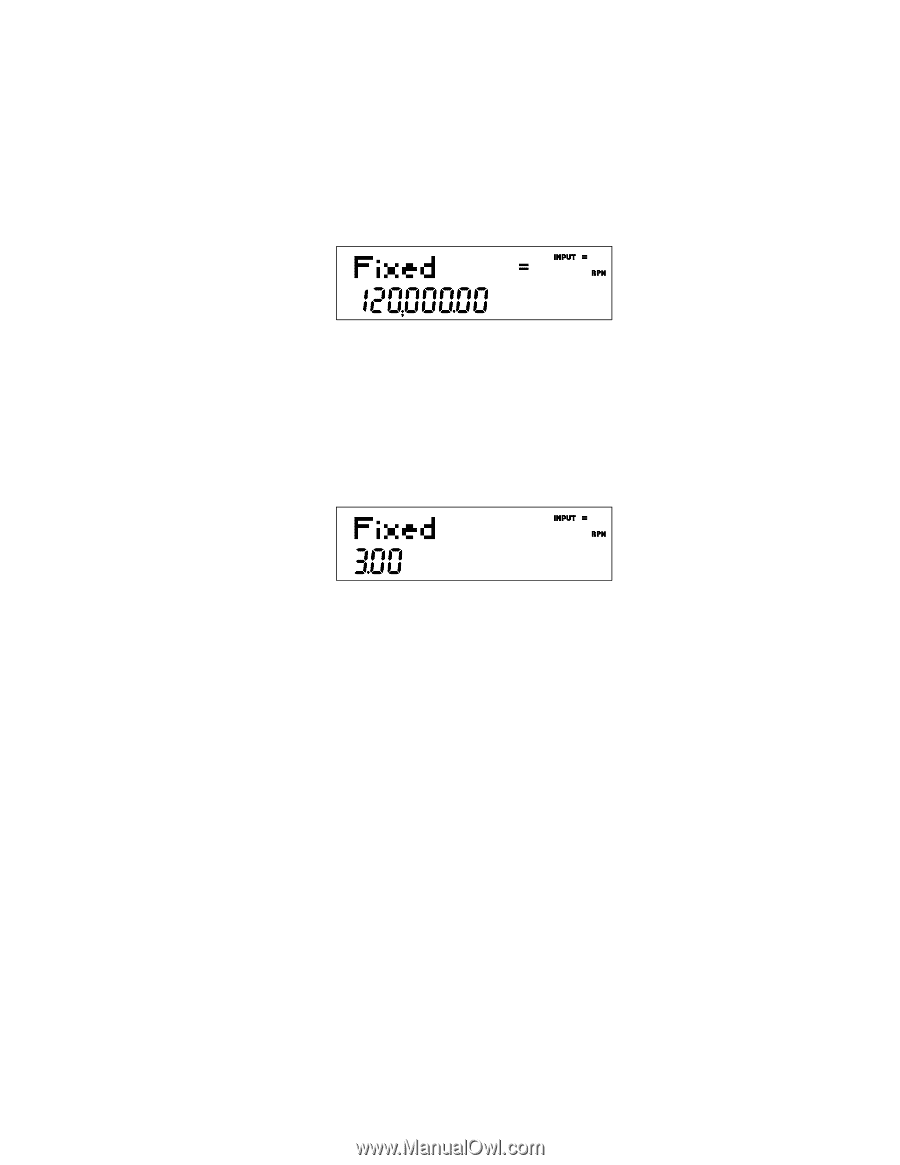
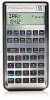
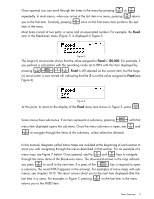
< > Once opened, you can scroll through the items in the menu by pressing or < repeatedly. In most menus, when you arrive at the last item in a menu, pressing returns > you to the first item. Similarly, pressing once on the first menu item scrolls to the last item in the menu. Most items consist of two parts: a name and an associated number. For example, the Fixed item in the Break-even menu (Figure 7) is displayed in Figure 5. Figure 5 The large (=) annunciator shows that the value assigned to Fixed is 120,000. For example, if you perform a calculation with the operating mode set to RPN with this item displayed by 1I2+ pressing , Fixed is still selected as the current item, but the large (=) annunciator is now turned off, indicating that the 3 is not the value assigned to Fixed (see Figure 6). Figure 6 O At this point, to return to the display of the Fixed menu item shown in Figure 5, press . I Some menus have sub-menus. If an item represents a sub-menu, pressing with that > menu item displayed opens the sub-menu. Once the menu sub-menu is open, use and < to navigate through the items of the sub-menu, unless otherwise directed. In this manual, diagrams called Menu Maps are included at the beginning of each section to assist you with navigating through the menus described in that section. For an example of a > < menu map, see Figure 7 below. Once opened, use the and keys to navigate through the menu items of the Break-even menu. The downward arrows in the map indicate < I you press to scroll to the next item. If a press of the key is required to open a sub-menu, the word INPUT appears in the arrow(s). For examples of menu maps with sub- menus, see chapters 10-12. The return arrows direct you to the next item displayed after the < last item in a menu. For example, in Figure 7, pressing on the last item in the menu returns you to the FIXED item. Basic Features 9
-
 1
1 -
2
-
3
-
4
-
5
-
6
-
7
-
8
-
9
-
10
-
11
-
 12
12 -
 13
13 -
 14
14 -
 15
15 -
 16
16 -
 17
17 -
 18
18 -
 19
19 -
 20
20 -
 21
21 -
 22
22 -
23
-
24
-
25
-
26
-
27
-
28
-
29
-
30
-
31
-
32
-
33
-
34
-
35
-
36
-
37
-
38
-
39
-
40
-
41
-
42
-
43
-
44
-
45
-
46
-
47
-
48
-
49
-
50
-
51
-
52
-
53
-
54
-
55
-
56
-
57
-
58
-
59
-
60
-
61
-
62
-
63
-
64
-
65
-
66
-
67
-
68
-
69
-
70
-
71
-
72
-
73
-
74
-
75
-
76
-
77
-
78
-
79
-
80
-
81
-
82
-
83
-
84
-
85
-
86
-
87
-
88
-
89
-
90
-
91
-
92
-
93
-
94
-
95
-
96
-
97
-
98
-
99
-
100
-
101
-
102
-
103
-
104
-
105
-
106
-
107
-
108
-
109
-
110
-
111
-
112
-
113
-
114
 |
 |