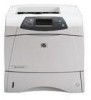
HP 4300n HP LaserJet 4200 and 4300 series printer - User Guide - Page 154
Retrieve Job menu, Values, Explanation
 |
UPC - 808736314381
View all HP 4300n manuals
Add to My Manuals
Save this manual to your list of manuals |
Page 154 highlights
Retrieve Job menu Note This menu provides a list of the stored jobs in the printer and access to all the Job Storage features. You can print or delete these jobs at the printer control panel. See "Printing a private job" on page 72 and "Storing a print job" on page 74 for more information about using this menu. If you turn the printer power off, all stored jobs are deleted unless an optional hard disk is installed. The section that follows lists the settings and possible values. In the Values column, the default value for each setting is the one with an asterisk (*) next to it. Item Values Explanation [USERNAME] There is no value to The name of the person who sent the job. select. [JOBNAME] There is no value to select. The name of the job stored in the printer. Select one of your jobs or all of your private jobs (those that were assigned a PIN in the printer driver). To select all of your private jobs, select ALL PRIVATE JOBS. NO STORED JOBS There is no value to Indicates that there are no stored jobs to print or delete. select. ALL PRIVATE JOBS There is no value to Appears if two or more private jobs are stored in the printer. select. Selecting this item prints all private jobs stored in the printer for that user, after the correct PIN is entered. Print There is no value to Prints the selected job. select. ENTER PIN TO PRINT *0000 to 9999 A prompt that appears for jobs that were assigned a personal identification number (PIN) in the printer driver. You must enter the PIN to print the job. COPIES *1 to 32000 Allows you to select the number of copies that you want to print. 1-32000: Prints the requested number of copies of the job. Delete There is no value to Deletes the selected job from the printer. select. ENTER PIN TO DELETE *0000 to 9999 A prompt that appears for jobs that were assigned a PIN in the printer driver. You must enter the PIN to delete the job. 152 Appendix A Control panel menus ENWW
-
 1
1 -
2
-
3
-
4
-
5
-
6
-
7
-
8
-
9
-
10
-
11
-
12
-
13
-
14
-
15
-
16
-
17
-
18
-
19
-
20
-
21
-
22
-
23
-
24
-
25
-
26
-
27
-
28
-
29
-
30
-
31
-
32
-
33
-
34
-
35
-
36
-
37
-
38
-
39
-
40
-
41
-
42
-
43
-
44
-
45
-
46
-
47
-
48
-
49
-
50
-
51
-
52
-
53
-
54
-
55
-
56
-
57
-
58
-
59
-
60
-
61
-
62
-
63
-
64
-
65
-
66
-
67
-
68
-
69
-
70
-
71
-
72
-
73
-
74
-
75
-
76
-
77
-
78
-
79
-
80
-
81
-
82
-
83
-
84
-
85
-
86
-
87
-
88
-
89
-
90
-
91
-
92
-
93
-
94
-
95
-
96
-
97
-
98
-
99
-
100
-
101
-
102
-
103
-
104
-
105
-
106
-
107
-
108
-
109
-
110
-
111
-
112
-
113
-
114
-
115
-
116
-
117
-
118
-
119
-
120
-
121
-
122
-
123
-
124
-
125
-
126
-
127
-
128
-
129
-
130
-
131
-
132
-
133
-
134
-
135
-
136
-
137
-
138
-
139
-
140
-
141
-
142
-
143
-
144
-
145
-
146
-
147
-
148
-
 149
149 -
 150
150 -
 151
151 -
 152
152 -
 153
153 -
 154
154 -
 155
155 -
 156
156 -
 157
157 -
 158
158 -
 159
159 -
160
-
161
-
162
-
163
-
164
-
165
-
166
-
167
-
168
-
169
-
170
-
171
-
172
-
173
-
174
-
175
-
176
-
177
-
178
-
179
-
180
-
181
-
182
-
183
-
184
-
185
-
186
-
187
-
188
-
189
-
190
-
191
-
192
-
193
-
194
-
195
-
196
-
197
-
198
-
199
-
200
-
201
-
202
-
203
-
204
-
205
-
206
-
207
-
208
-
209
-
210
-
211
-
212
-
213
-
214
-
215
-
216
-
217
-
218
 |
 |
