HP 4300n HP LaserJet 4200 and 4300 series printer - User Guide - Page 18
Moving the printer, Locking and unlocking optional accessories
 |
UPC - 808736314381
View all HP 4300n manuals
Add to My Manuals
Save this manual to your list of manuals |
Page 18 highlights
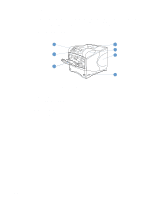
Moving the printer WARNING! The printer is heavy and should be lifted by two people. To lift the printer, grip the handles on the sides of the printer. If the bottom of the printer is attached to an optional accessory (such as a 500-sheet tray and feeder, 1,500-sheet tray and feeder, or storage cabinet), the accessory latches must be unlocked before moving the printer. To prevent possible injury or damage to the printer, separate the printer from any currently installed optional accessories (for example, an optional tray and feeder or a stapler/stacker) before lifting the printer. Locking and unlocking optional accessories For more stability against tipping over, the optional tray and feeder units and the cabinet can be locked to the bottom of the printer. To lock the accessories, locate the lever on the upper left side of the optional tray and feeder and rotate the lever to the rear (locked) position. To unlock the accessories, rotate the lever to the forward (unlocked) position. 16 Chapter 1 Printer basics ENWW
-
 1
1 -
2
-
3
-
4
-
5
-
6
-
7
-
8
-
9
-
10
-
11
-
12
-
 13
13 -
 14
14 -
 15
15 -
 16
16 -
 17
17 -
 18
18 -
 19
19 -
 20
20 -
 21
21 -
 22
22 -
 23
23 -
24
-
25
-
26
-
27
-
28
-
29
-
30
-
31
-
32
-
33
-
34
-
35
-
36
-
37
-
38
-
39
-
40
-
41
-
42
-
43
-
44
-
45
-
46
-
47
-
48
-
49
-
50
-
51
-
52
-
53
-
54
-
55
-
56
-
57
-
58
-
59
-
60
-
61
-
62
-
63
-
64
-
65
-
66
-
67
-
68
-
69
-
70
-
71
-
72
-
73
-
74
-
75
-
76
-
77
-
78
-
79
-
80
-
81
-
82
-
83
-
84
-
85
-
86
-
87
-
88
-
89
-
90
-
91
-
92
-
93
-
94
-
95
-
96
-
97
-
98
-
99
-
100
-
101
-
102
-
103
-
104
-
105
-
106
-
107
-
108
-
109
-
110
-
111
-
112
-
113
-
114
-
115
-
116
-
117
-
118
-
119
-
120
-
121
-
122
-
123
-
124
-
125
-
126
-
127
-
128
-
129
-
130
-
131
-
132
-
133
-
134
-
135
-
136
-
137
-
138
-
139
-
140
-
141
-
142
-
143
-
144
-
145
-
146
-
147
-
148
-
149
-
150
-
151
-
152
-
153
-
154
-
155
-
156
-
157
-
158
-
159
-
160
-
161
-
162
-
163
-
164
-
165
-
166
-
167
-
168
-
169
-
170
-
171
-
172
-
173
-
174
-
175
-
176
-
177
-
178
-
179
-
180
-
181
-
182
-
183
-
184
-
185
-
186
-
187
-
188
-
189
-
190
-
191
-
192
-
193
-
194
-
195
-
196
-
197
-
198
-
199
-
200
-
201
-
202
-
203
-
204
-
205
-
206
-
207
-
208
-
209
-
210
-
211
-
212
-
213
-
214
-
215
-
216
-
217
-
218
 |
 |
