HP BL10e HP ProLiant BL e-Class System Setup and Installation Guide - Page 52
Cabling the ProLiant BL e-Class System, the type of interconnect tray installed in the system.
 |
UPC - 808736933599
View all HP BL10e manuals
Add to My Manuals
Save this manual to your list of manuals |
Page 52 highlights
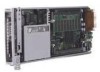
Installing and Cabling the System 4. Place the hexagonal washer at the back of the hole in the enclosure (1). 5. Insert the screw through the hole in the enclosure (2). 6. Press the head of the screw inward while compressing the spring completely (3). Figure 3-12: Replacing a thumbscrew, spring, and hexagonal washer 7. Screw the hexagonal washer onto the shaft of the screw until it passes all the threads and is secure within the thumbscrew housing. 8. Repeat steps 1 through 7 for the other thumbscrew. Cabling the ProLiant BL e-Class System ProLiant BL e-Class systems require no internal cabling. External cabling depends on the type of interconnect tray installed in the system. The procedure for cabling an enclosure consists of the following steps: • Identifying the interconnect tray connectors • Cabling the server blade enclosure 3-14 HP ProLiant BL e-Class System Setup and Installation Guide
-
 1
1 -
2
-
3
-
4
-
5
-
6
-
7
-
8
-
9
-
10
-
11
-
12
-
13
-
14
-
15
-
16
-
17
-
18
-
19
-
20
-
21
-
22
-
23
-
24
-
25
-
26
-
27
-
28
-
29
-
30
-
31
-
32
-
33
-
34
-
35
-
36
-
37
-
38
-
39
-
40
-
41
-
42
-
43
-
44
-
45
-
46
-
 47
47 -
 48
48 -
 49
49 -
 50
50 -
 51
51 -
 52
52 -
 53
53 -
 54
54 -
 55
55 -
 56
56 -
 57
57 -
58
-
59
-
60
-
61
-
62
-
63
-
64
-
65
-
66
-
67
-
68
-
69
-
70
-
71
-
72
-
73
-
74
-
75
-
76
-
77
-
78
-
79
-
80
-
81
-
82
-
83
-
84
-
85
-
86
-
87
-
88
-
89
-
90
-
91
-
92
-
93
-
94
-
95
-
96
-
97
-
98
-
99
-
100
-
101
-
102
-
103
-
104
-
105
-
106
-
107
-
108
-
109
-
110
-
111
-
112
-
113
-
114
-
115
-
116
-
117
-
118
-
119
-
120
-
121
-
122
-
123
-
124
-
125
-
126
-
127
-
128
-
129
-
130
-
131
-
132
-
133
-
134
-
135
-
136
-
137
-
138
-
139
-
140
-
141
-
142
-
143
-
144
-
145
-
146
-
147
-
148
-
149
-
150
-
151
-
152
-
153
-
154
-
155
-
156
 |
 |
