HP Designjet 4500 HP Designjet 4500 Printer Series - Setup Poster - Page 10
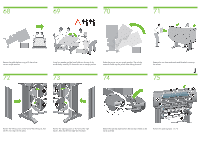
Fix the roll module to the left leg of the stand using two
 |
View all HP Designjet 4500 manuals
Add to My Manuals
Save this manual to your list of manuals |
Page 10 highlights
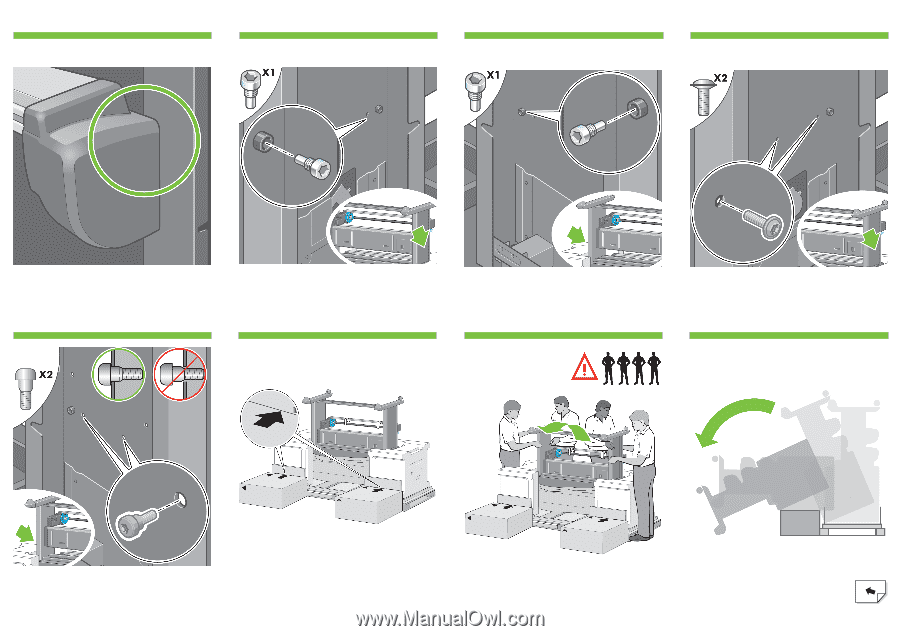
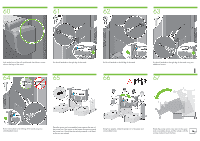
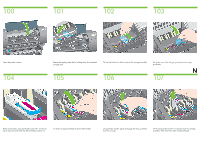
60 61 62 63 Look at the front of the roll module and check that it comes close to the legs of the stand Fix the roll module to the right leg of the stand. 64 65 Fix the roll module to the left leg of the stand. 66 Fix the roll module to the right leg of the stand using two additional screws. I 67 Fix the roll module to the left leg of the stand using two collar-headed screws. Place the spare and consumables boxes against the rear of the printer box. The arrows on the boxes must point towards the printer box. Check that the anti-slip material is still fixed to the two rear wheels. Using four people, rotate the printer on to the spare and consumables boxes. Rotate the printer until its rear rests on the spare and consumables boxes and the wheels with the anti-slip material touch the floor.
-
 1
1 -
2
-
3
-
4
-
 5
5 -
 6
6 -
 7
7 -
 8
8 -
 9
9 -
 10
10 -
 11
11 -
 12
12 -
 13
13 -
 14
14 -
 15
15 -
16
-
17
-
18
-
19
-
20
-
21
-
22
-
23
-
24
-
25
-
26
-
27
 |
 |