HP Designjet 4500 HP Designjet 4500 Printer Series - Setup Poster - Page 16
Driver and Documentation - problem
 |
View all HP Designjet 4500 manuals
Add to My Manuals
Save this manual to your list of manuals |
Page 16 highlights
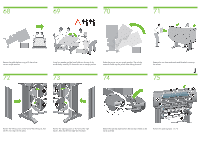
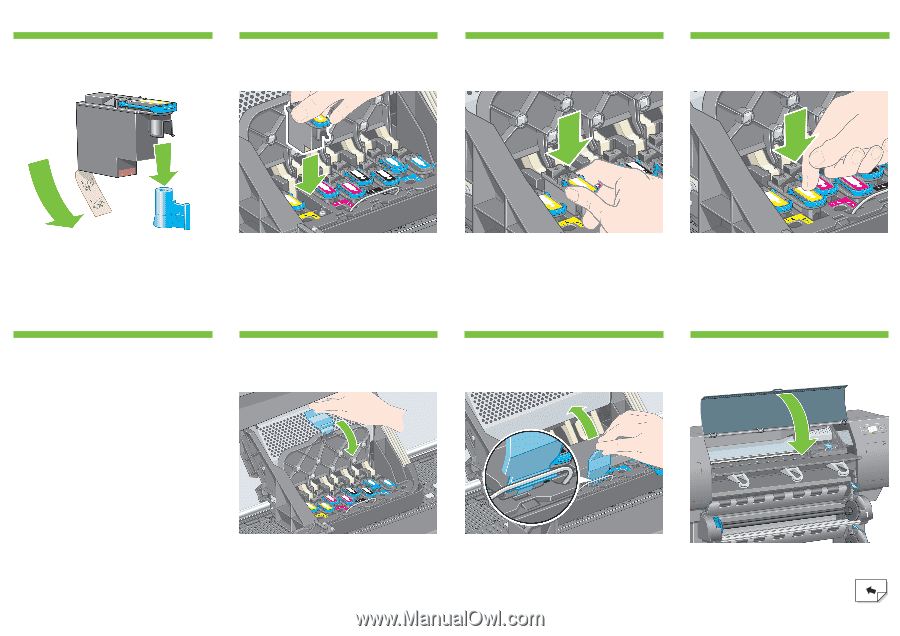
108 109 110 111 Remove the blue protective cap and the clear protective tape from the printhead. Lower all the printheads vertically into their correct positions. Seat the printheads slowly and carefully. 112 113 114 Make sure the printheads are correctly seated. When all the printheads are installed, the front panel prompts, "Close printhead cover and window". O 115 If "Reseat" is displayed on the front panel, check that the protective tape has been removed. Then try reseating the printhead more firmly. If the problem persists, refer to the Driver and Documentation CD. Close the carriage assembly cover. Make sure the latch engages correctly. Close the printer window.
-
 1
1 -
2
-
3
-
4
-
5
-
6
-
7
-
8
-
9
-
10
-
 11
11 -
 12
12 -
 13
13 -
 14
14 -
 15
15 -
 16
16 -
 17
17 -
 18
18 -
 19
19 -
 20
20 -
 21
21 -
22
-
23
-
24
-
25
-
26
-
27
 |
 |
O
Close the carriage assembly cover.
Make sure the latch engages correctly.
Close the printer window.
If “Reseat” is displayed on the front panel, check
that the protective tape has been removed. Then try
reseating the printhead more firmly. If the problem
persists, refer to the
Driver and Documentation
CD.
Make sure the printheads are correctly seated. When all the
printheads are installed, the front panel prompts, “Close
printhead cover and window”.
Lower all the printheads vertically into their correct positions.
Seat the printheads slowly and carefully.
Remove the blue protective cap and the clear protective tape
from the printhead.
109
108
110
111
113
112
114
115